Tuesday, March 31, 2009

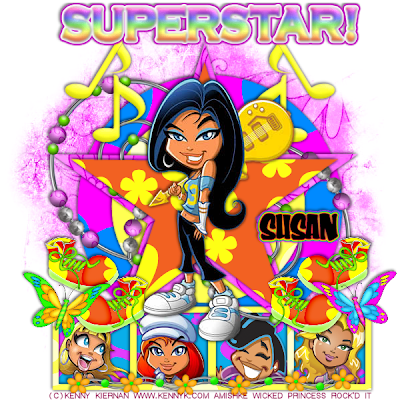
Groovy Superstar Tutorial


All my friends who know me well, know I love bright colors.. so I decided to steer from the rock themes this go around and make this fun one! I hope you like it! Please do send me your finished tags!

Groovy Superstar

This tutorial was written on March 31, 2009 By Shani aka Wicked Princess. The concept of the tag is my creation. Any similarities to any other tag is purely coincidental.

Supplies needed:

My template #2 which can be found on this blog

Scrap kit (FTU) A bit Groovy, which can be found here: http://scrapsdimensions-dorisnilsa.blogspot.com/2009/01/ftu-bit-groovy.html

Mask of choice

Gradient of choice

Eye Candy 4000 Gradient glow

5 tubes of choice, I used the artwork of Kenny Kiernan which you can find at www.artisticmindsinc.com You must have a valid license to use his work. Remember ALL of his work is now with AMI and is strictly PTU

Let’s get this tut a rockin!

Open the template and delete the copyright layer.

Open several papers of your choosing from the kit and minimize to be used later.

Add a blank raster layer at the very bottom of the template layers, flood fill with your choice of paper.

Add mask of choice, and merge group.

Select the first circle layer, and using your magic wand tool, click inside the circle. This will activate the dancing ants around it.

Go to selections, then float, the selections, defloat.

Add a new raster layer and flood fill with the paper of your choice.

Continue this for each part of the template.

For the music notes you can just choose a matching color if you like.

For the word art, I chose a rainbow gradient. I added a gradient glow on the fat setting choosing white and purple.

Next, open the four tubes of your choosing that will go between the frame layer and the rectangle layer. What I did before I copy and pasted the tubes, was use the selection tool (in the drop down menu from the magic wand tool) and used the square and just chose what part of the tube I wanted to use. When it was activated around that part I went to edit, cut and then pasted it into my working canvas. Move and adjust to where you want each one under the frame layer.

Open one of the beaded swirls of your choosing, copy and paste into your canvas. Adjust as needed, and move below the first star, so it is sandwiched between the two. Duplicate this layer and go to image, mirror.

Next add your shoes/boots of choice, adjust as needed and resize. Place to the left of the frame. Duplicate this layer and go to image, mirror.

Open the two butterflies of your choice and place them on either side of the frame.

Pick a metal flower piece and resize, copy and paste at the bottom of the frame.

Open your final tube, place it toward the center of the stars.

Add your copyright info, tagger stuff, and license info.

Add chosen text and save!

Ty for trying this fun and colorful tutorial!
Yay for presents!

I'm so thrilled to see new tags coming in with my templates and tutorials! Susan shot me a new one she made today with template 2, which you can download from this blog :) Thank you Susan!!! I LOVE it!

Monday, March 30, 2009

Organizing.. and messing things up..

I'm still trying to get things organized better on this blog and figuring out how to make everything more noticable and easier to read. Please bare with me! I'm also going to be posting some tags that were made with template 1 and the VERY first tag made with my tutorial :) Thank you to Susan for allowing me to post it! She totally rocked it!

Tuesday, March 24, 2009

Templates, Tuts, and Tsunami's....

Few weeks back before my household got the flu I was working on making templates for the first time. I had made a few but somehow lost them all except the first one! I was so mad! I found it and have it out there for ya'll now :) TOU is added to the file, it is a zip file. If you download I would love to see a comment, but its not necessary :) Also if you make a tag with my templates I would absolutely ADORE seeing them! You can email me at superrainpolly@gmail.com. Also please include in your email if I have your permission to post the tag in my blog. If you have a tag site or group on myspace, send me your link! I'll post it along with your creation :)

I would like to share a very special thank you to Valerie! She has an amazing yahoo group, where she puts together links for tutorials, kits, templates everything! And can you believe she even categorizes them? She's such a sweetheart and I ADORE her and her group :) If you have a chance join her group, you so will not be sorry! If you are apart of that group you will see links to my tutorials as I get them done :D

You can follow her link to here: http://groups.yahoo.com/group/Meadows-ScrapbookingTutorials/

Also I just realized she has a blog: http://meadowsstudio.blogspot.com/ which I am now a follower of :)

On to one other funny note.... I live on the west coast, more importantly on the coast of Washington State. Hmmmm odd for someone like me who has a fear of the water to live only 20 miles from the ocean and with in a block of one river let alone 5 just in our town! My point.. I think I was making one... lol... last week, a county just about 30 minutes from here had an earthquake just off their coast. And there were Tsunami sized waves! OH EM GEE!!!! I just about had to run in the corner with my bag of cookies! We get Tsunami warning bells practiced once a month. My question is.. how much is a warning REALLY going to help us? Shoot I best get my canoe ready now!! :P

Happy tagging my friends and have a wickedly fun week!

Much love,

Shani the Wicked Princess

Monday, March 23, 2009

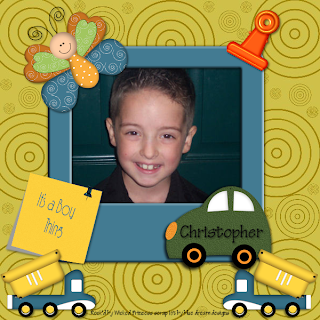
It's a boy thing scrap tutorial


This tutorial was written on March 23,2009 and all concepts of the tutorial and tag are mine. Any similarities are coincidental.

This is a beginners tutorial for basic scrap tagging.

Supplies needed:

Paint Shop Pro (any version will work I used PSP 10)

Picture of choice ( I used one of my son Christopher)

Kit of choice or the one I used, a freebie called It’s A Boy Thing from Blue Dream Designs and can be found here:

http://bluedreamdesigns.blogspot.com/search/label/Freebie?updated-max=2008-10-02T15%3A25%3A00%2B01%3A00&max-results=20

Font of choice

Let’s get started!

Once you have downloaded the kit and have it saved to your computer, open the papers folder and pick a paper of your choice. This is the main background for your scrap tag.

Next open the folder marked marked frames and choose your frame you would like to use. Click open.

With the frame open in PSP go to Edit then Copy. Then Click on your paper, and go to edit, Paste as new layer. Adjust as needed.

Open the picture of your choice, resize as needed. Either using your pointer tool or going to, Image then resize and resize to the percentage needed.

Edit then copy, paste as new layer onto your working canvas. Make sure you look at your layer palette on the right side and click on the picture layer. Click on the layer, and move it to below the frame layer.

Next open the various elements you would like to use from the kit and place them where you would like to on the working canvas. Remember to resize them as needed.

You may also add drop shadow as you want. You can get to the drop shadow by going to Effects then drop shadow. The settings I used are: Offset: Vertical 2 Horizontal 2 Attributes: Opacity 50 Blur 5.00 and the color black.

Add text as you want.
Thank you for using my tutorial!

Sunday, March 22, 2009

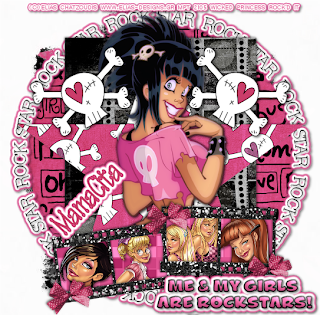
RockStar Girls Tutorial


This tutorial was written on March 21, 2009 by Shani aka Wicked Princess. All concepts for tags are mine. Any similarites to any other tutorial or tag are coincidental.

On to the tutorial!~

Supplies needed:

Template 65 By Yvette, can be found at her site:
http://essenceofcreativity.wordpress.com/category/new-templates/

Girlz Rock by Yvette can be found at her blog her: http://misfitsscrapz.blogspot.com/

Mask of choice

5 tubes of choice. I used the work of Elias Chatzoudis, you must have a license to use his work. You can find him at www.mypsptubes.com

Eyecandy 4000>Gradient Glow plug in

Font of choice

Let’s get started:

Open a blank canvas 600x600

Choose a paper of choice, flood fill. Using mask of choice

Copy and paste template as new layers.

Click on the circle layer, using your magic wand tool click inside the circle to activate it.

Go to selections, float, then selections de float.

Add new raster layer

Using paper of choice from kit, flood fill on the new raster layer. Repeat this for the other template layers. Remember to delete the template layers as you go.

Activate the word art layer. Add drop shadow of choice and then add a gradient glow of your choice. Move this layer above your circle layer.

Add tube of choice to the center of the star, adjusting as needed.

Pick a frame from the kit and add it to the bottom of the tube, adjusting placement where you like it.

Using your magic wand tool, click in the first square in the frame. Hold down the shift key and click the magic wand in each square.

Add new layer, moving it down below the frame layer. Flood fill with a paper of choosing or pick up a matching color.

Selections> none

Using the plug in Xero>Fritallary, click the random button until you find out which setting you like.

Open the four remaining tubes you chose, adjusting in size if needed.

Paste first tube as new layer under the frame layer. Adjust size to fit the face pretty much in the square.

Activate the frame layer, use your magic wand tool clicking inside of the square. Then go to Selections>modify> expand by 4 then Selections>invert

Make your tube layer active and hit delete on your keyboard. Go to selections none.

Repeat this each time for your tubes in each frame.

Add your copyright info for the artist, license number if needed, your watermark/tag info.

Add chosen text and your done!

Remember to save as a .png if you want it to have a transparent background. Otherwise save it as a .jpg in order to get it with the white background.

Thank you for trying out my tutorial!


Saturday, March 14, 2009

Where to start?

Welcome! I'm super excited to start a brand new project on my own. I've started writing tutorials recently and had to stop due to some other things going in my life. I'm super excited to get started on them again and will be posting some in the coming weeks :) I will make sure to use a variety of both PTU and FTU kits, templates, and artists. I think its important as a tagger to make sure there is a variety for those who look to use tuts.

I'm also beginning on learning how to make templates. I have a few already up on my myspace tag page I share with my brother David. I'll be moving these here and starting to update info as I can. I thank you for taking the time to come by and take a peek! Please be patient with me as I get started and get moving things around. I'm new to Blogspot and will be taking a test run on it!

It seems this can be pretty overwhelming at first.. but I'm very ready to venture out and share my skills with others and welcome any newbies joining the PSP world :)

Have a peaceful and rockin' week my friends!

Shani aka Wicked Princess