Sunday, February 28, 2010

Superstar! FTU


This tutorial was written on February 28, 2010 Shani aka Wicked Princess. The concept of the tag is mine and mine alone. Any resemblance to any other tag/tut is pure coincidence. This was written for those with working knowledge of PSP.

Supplies Needed:

++Paint Shop Pro ( I used 10 but any version should work)

++Scrap kit By Tishia called Paradyce Lost can be found HERE

++Template 50 by Kristin can be found HERE

++Tube of choice or the one I used. I used the artwork of CEI Stickers. You can purchase it from MPT You must have a valid license in order to use their work.

++Font and mask of your choice

++Plug ins:
-Muera Meister copies

**NOTES:
-Add Drop shadow of choice as you go
-You can merger layers as you want to make things easier for yourself.

Open the template in PSP, using your shortcut keys on your keyboard (SHIFT+D) duplicate the template as a new image. Close the original.

Open several papers of choice, resizing as needed. For example, when I look at the blue bar where it tells me what I’ve opened (say like paper 2) it tells me what percentage I’m viewing it at. For me it’s usually 16%, so I resize to 16% bringing it to 100%. ( I hope that made sense!) Once you’ve done this, minimize for later use.

Next go to the bottom template layer and go to selections, select all, then float, selections defloat. Don’t forget to go to selections, none then delete the template layer. Repeat this process for the rest of the template. **Note I deleted the brush layer

Add a new raster layer, flood fill with your choice of paper and add your mask. Merge the group.

Then open the flower of your choosing. Resize it then copy and paste as a new layer into the center of the canvas. Use your plug in, muera meister copies on the encircle option. Set it at the shift x and y at 80 and any number of flowers you like. Move this layer below the circle template layer and adjust as you need to.

Open your tube of choice then copy and paste as a new layer. Move it to the right of the rectangle layer. Adjust where you like it alright. Duplicate it and go to adjust, blur, guassin blur set to 3.00. On the top layer, change blend mode to soft light and merge down. Now change the blend mode to luminance (legacy). Duplicate it and go to image, mirror.

On the big rectangle layer, go to selections, select all, selections float then defloat. Then go to selections, invert. On your tube layers, hit the delete key. Go to selections none.

Open one of the ribbon’s with the bow on the end. Resize it then rotate it to the right. Copy and paste as a new layer to the top of the rectangle on the right, so the bow is facing out. Duplicate it and go to image, mirror.

Now open the stitching and resize. Copy and paste as a new layer, move to the bottom of the rectangle layer. Adjust as needed.

Then open the star clip, resize it then copy and paste as a new layer. Move it at an angle towards the middle of the rectangle on the left side. Duplicate it and go to image, mirror.

Next go back to your tube then copy and paste as a new layer to the center. Resize and adjust where you want it. We need it in there now so we can make sure we’re centering everything right.

Open the safety pin bow, resize it then copy and paste as a new layer. Move it below the tube layer to the left of it slightly. Duplicate it and go to image, mirror. Adjust as needed.

Then open the label, resize it then copy and paste as a new layer. Move to the bottom right of the tag, angling as needed. Duplicate it and go to image, mirror.

Next open the star wand, resize it then copy and paste as a new layer. Move to the upper left of the tag, placing it where you like it. You will need to adjust it in a few minutes when we add another element. Duplicate it and go to image, mirror.

Now open the other ribbon with bow, resize then copy and paste as a new layer. Move it to the right of the tag. Duplicate it and go to image, mirror. Adjust as needed. Move the wands under the ribbons adjusting as needed.

Add your text, copyrights, license info and tagger markings. Save and your done.

Thanks for trying my tutorial.
Simple Sticker Tut (No Scraps)


*-*-NOTE! Mine has a gradient background only for the purpose of showing the dropshadow. Yours does not have to have it *-**-*

I was working on a tag earlier and decided to do something funky that I haven't done in a long time and made a sticker out of a name. A lot of people don't know how to do this, so I thought, what the heck? LOL In this tut you will learn how to make a sticker.

**This tutorial was created by me on 2/28/10 and the concept is my own. Any resmemblance to any other tutorial is by pure coincidence.

Let's get going!

No plug ins needed!

Open a new transparent canvas layer of 500x500, we can always crop when we're done.

Choose what ever font you like, personally I like script-fancy fonts lol. For this I used MeaCulpa with font size set at 24. Choose your color you want. I used a bright color to really show it off, but your welcome to use a gradient glow or even a pattern. Type out the name you want to use and click ok. Convert this layer to a raster layer then go to edit, cut then edit, paste as new layer. This centers it back in to the canvas evenly. It drives me nuts if it's not done this way lol.

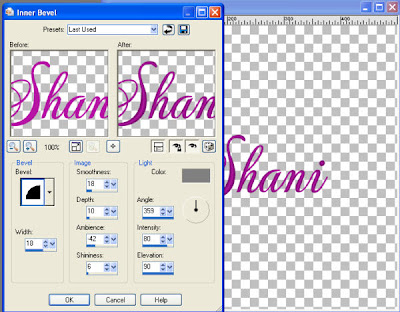
Next we're going to add an inner bevel. Go to effects, 3d effects, inner bevel. I used these settings:


I chose to keep the color setting on a gray, only because if I change it to white, it distorts the color. You can change it to whatever color you like.

Now go to selections, select all, then float, selections defloat. You should see dancing ants around the font. Go to selections, modify, expand by 4. This should give you a bit of a room around it to make it look like a decent sticker.

Add a new raster layer and move this below the font layer. Using your flood fill tool, flood fill with your choice of color. I chose white just as a default example. When satisfied, go to selections, none.

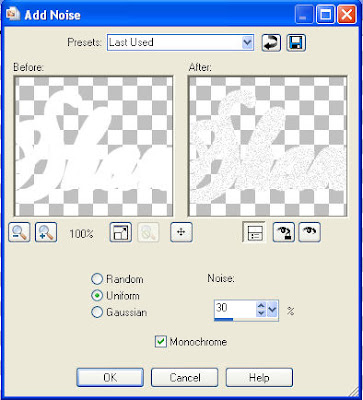
On the sticker layer, go to adjust, add/remove noise, add noise. These are the settings I used:


Now go back to the font layer, add a drop shadow you like. Make any adjustments you need to. If your satisfied with what you have done, crop and save it as a .png!

Thanks for trying my tutorial!

♥ Shani

Saturday, February 27, 2010

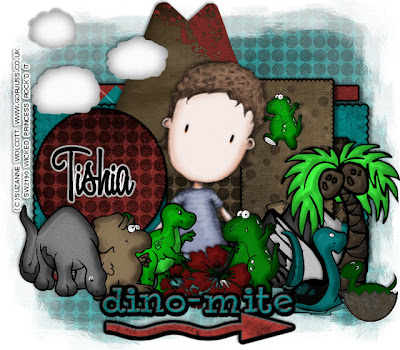
Dino-Mite PTU


This tutorial was written on February 22, 2010 Shani aka Wicked Princess. The concept of the tag is mine and mine alone. Any resemblance to any other tag/tut is pure coincidence. This was written for those with working knowledge of PSP.

Supplies Needed:

++Paint Shop Pro ( I used 10 but any version should work)

++Scrap kit Sweet by Designs by Tishia can be purchased from http://www.scrappinbratz.com/shoppe/index.php?main_page=index&manufacturers_id=60

++Template 08 by Scraps of Enchantment can be found http://scrapsofenchantment.blogspot.com/

++Tube of choice or the one I used. I used the artwork Suzanne Wolcott. You must have a valid license in order to use her work. You can purchase her work from www.gorjussart.co.uk

++Font

++Plug ins:
-Eye Candy Gradient Glow

**NOTES:
-Add Drop shadow of choice as you go
-You can merger layers as you want to make things easier for yourself.

Open the template in PSP, using your shortcut keys on your keyboard (SHIFT+D) duplicate the template as a new image. Close the original.

Open several papers of choice, resizing as needed. For example, when I look at the blue bar where it tells me what I’ve opened (say like paper 2) it tells me what percentage I’m viewing it at. For me it’s usually 16%, so I resize to 16% bringing it to 100%. ( I hope that made sense!) Once you’ve done this, minimize for later use.

Next go to the bottom template layer and go to selections, select all, then float, selections defloat. Don’t forget to go to selections, none then delete the template layer. Add a gradient glow of your choosing. Repeat this process for the rest of the template.

Add a new raster layer, flood fill with your choice of paper and add your mask. Merge the group.

Then open the volcano, resize it then copy and paste as a new layer. Move it more towards the center of the canvas. Move it below the circle and rectangle layers.

Now open the boulder/cliff. Resize it then copy and paste as a new layer. Move to the right of the canvas. Add the tree of choice to the right of it.

Next open the clouds, resize then copy and paste as a new layer. Move it to the upper left of the canvas.

Add your tube of choice to the center of the canvas, adjusting as needed.

Then open several of the dinosaurs, including the one in the egg. Resize them then copy and paste as a new layer around the tube as you like. Overlap them and move so they look as though they are surrounding him.

Open the hibiscus flower then copy and paste as a new layer into the center at the bottom of the tube.

Add the word art you like with a gradient glow, resize it then add it to the bottom center of it.

Finally add any copyrights, tagger markings, licensing and text you like.

Save and your done!

Thanks for trying my tutorial.
Friday, February 26, 2010

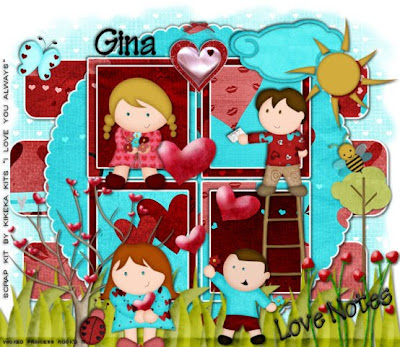
Love Notes (PTU)


This tutorial was written on February 26, 2010 Shani aka Wicked Princess. The concept of the tag is mine and mine alone. Any resemblance to any other tag/tut is pure coincidence. This was written for those with working knowledge of PSP.

Supplies Needed:

++Paint Shop Pro ( I used 10 but any version should work)

++Scrap kit Gina of Kikeka kits called I love you always can be found HERE

++Template 12 by Scraps of Enchantment can be found HERE

++Tube of choice or the one I used. I used the clip out kiddo’s that come with the kit. If you don’t use any outside tubes, please credit back to the designers blog.


++Font and Mask of choice

**NOTES:
-Add Drop shadow of choice as you go
-You can merger layers as you want to make things easier for yourself.

Open the template in PSP, using your shortcut keys on your keyboard (SHIFT+D) duplicate the template as a new image. Close the original.

Open several papers of choice, resizing as needed. For example, when I look at the blue bar where it tells me what I’ve opened (say like paper 2) it tells me what percentage I’m viewing it at. For me it’s usually 16%, so I resize to 16% bringing it to 100%. ( I hope that made sense!) Once you’ve done this, minimize for later use.

Next go to the bottom template layer and go to selections, select all, then float, selections defloat. Don’t forget to go to selections, none then delete the template layer. Repeat this process for the rest of the template.

Add a new raster layer and flood fill with your choice of paper. Add your choice of mask and merge group. Move this layer below your template layers.

Open the ladder, resize it then copy and paste as a new layer. Move it to the left squares. Adjust it so it looks like the top of the ladder looks like its “resting” on the top square.

Then open the cloud you like and sun. Resize it then copy and paste as a new layer to the upper right of the tag, overlapping them.

Now open the tree, the stick tree. Resize then copy and paste as a new layer to the left of the template. Adjust as needed.

Next open the grass. Resize it then copy and paste as a new layer. Make sure this is the top layer and move it to the bottom of the canvas. Adjust as needed.

Open the strawberry flower bunch. Resize then copy and paste as a new layer moving it to the right of the tag.

Now open the heart tree, resize it then copy and paste as a new layer to the left of the tag towards the bottom.

Then open the little girl you like, resize then copy and paste as a new layer. Move her to the right of the heart tree. Add a little boy to the right of her after resizing.

Next open the heart cluster, resize then copy and paste as a new layer into the center of the template.

Open the other little girl, resize then copy and paste so that it sits in the upper left hand square. Add the other boy one to the opposite side of it.

Then open the butterfly, bee and lady bug. Copy and paste them after resizing where you like it

Now open the heart dangle charm, resize it then copy and paste as a new layer to the upper center of the template.

Finally add your text, copyrights and tagger markings.

Save and your done! Thanks for trying my tutorial.
Wednesday, February 24, 2010

How about some Games and contests?

I'm thinking of doing some games and contests to win coupons and kits! Who's interested? Go to my fanpage on facebook, become a fan and look for more details coming soon!

You can become a fan, by going to the box on the right :)

Hugs
Shani

Tuesday, February 23, 2010

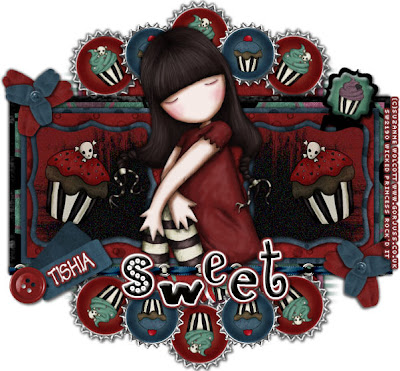
Sweet PTU


This tutorial was written on February 22, 2010 Shani aka Wicked Princess. The concept of the tag is mine and mine alone. Any resemblance to any other tag/tut is pure coincidence. This was written for those with working knowledge of PSP.

Supplies Needed:

++Paint Shop Pro ( I used 10 but any version should work)

++Scrap kit Sweet by Designs by Tishia can be purchased from HERE

++Template 33 by Scraps of Enchantment can be found HERE

++Tube of choice or the one I used. I used the artwork Suzanne Wolcott. You must have a valid license in order to use her work. You can purchase her work from HERE

++Font

++Plug ins:
-Muera Meister Copies

**NOTES:
-Add Drop shadow of choice as you go
-You can merger layers as you want to make things easier for yourself.

Open the template in PSP, using your shortcut keys on your keyboard (SHIFT+D) duplicate the template as a new image. Close the original.

Open several papers of choice, resizing as needed. For example, when I look at the blue bar where it tells me what I’ve opened (say like paper 2) it tells me what percentage I’m viewing it at. For me it’s usually 16%, so I resize to 16% bringing it to 100%. ( I hope that made sense!) Once you’ve done this, minimize for later use.

Next go to the bottom template layer and go to selections, select all, then float, selections defloat. Don’t forget to go to selections, none then delete the template layer. Repeat this process for the rest of the template.

Open the bottle cap of your choice. Resize it then copy and paste as a new layer. Use your plug in muera meister copies on the encircle option. Set it at the setting you like. I believe I used 10 with the setting at 70. Move this layer below all the rectangle layers.

Then open another bottle cap. Resize then copy and paste as a new layer. Move it to the upper left of the ones you did on the encircle option. Place it so it overlaps them a bit. Duplicate it and go to image, mirror. Then duplicate it again and go to image, flip. Duplicate once more and go to image, mirror.

Next open the clip of choice, resize it then copy and paste as a new layer. Move it below the top scalloped layer on the right.

Now open your tube of choice, resize it then copy and paste as a new layer. Move into the center of the canvas. Add the eyelet ribbon to the bottom of the rectangles.

Open two of the flowers of your choosing, resize them then copy and paste as new layers. Arrange so one is overlapping the other. Merge down then duplicate it. Move one to the upper left of the tag then the lower right.

Then open your tag of choice, resize then copy and paste as a new layer. Open the button of choice, and add to the end of the tag.

Add your word art or text of your choosing.

Don’t forget your copyrights, license info and tagger markings.

Thanks for trying my tutorial!

Welcome to Paradise PTU


This tutorial was written on February 22, 2010 Shani aka Wicked Princess. The concept of the tag is mine and mine alone. Any resemblance to any other tag/tut is pure coincidence. This was written for those with working knowledge of PSP.

Supplies Needed:

++Paint Shop Pro ( I used 10 but any version should work)

++Scrap kit called Acid Rock by me which can be purchased from HERE

++Template 101 by Yvette can be found HERE

++ Tube of choice, or the one I used. I used the work of Joel Adams. You can purchase his art from HERE You must have a valid license to use his work.

++Plug ins:
-Eye Candy 4000 Gradient Glow
-Penta dot and cross

++Font and mask of choice

**NOTES:
-Add Drop shadow of choice as you go
-You can merger layers as you want to make things easier for yourself.

Open the template in PSP, using your shortcut keys on your keyboard (SHIFT+D) duplicate the template as a new image. Close the original.

Open several papers of choice, resizing as needed. For example, when I look at the blue bar where it tells me what I’ve opened (say like paper 2) it tells me what percentage I’m viewing it at. For me it’s usually 16%, so I resize to 16% bringing it to 100%. ( I hope that made sense!) Once you’ve done this, minimize for later use.

Next go to the bottom template layer and go to selections, select all, then float, selections defloat. Don’t forget to go to selections, none then delete the template layer. Add the gradient glow of your choosing. Repeat this process for the rest of the template.

Add a new raster layer, flood fill with your choice of paper and move to the bottom of the layer palette. Add your choice of mask and merge group.

Then open the rose vine, resize it then copy and paste as a new layer. Rotate it so that it’s up right. Move it below all the layers but above the circle template layer.

Next open the star trail, add a gradient glow to it. Resize then copy and paste as a new layer. Move it to the right of the canvas and make sure it’s just above the circle layer also.

Now open the guitar of your choosing. Resize then copy and paste as a new layer. Angle it the way you like it and move it to the upper right of the tag, just above the star layer.

Open the button frame, resize it then copy and paste as a new layer. Move it at an angle below the rectangle layers. Using your magic wand tool, click inside the frame. Go to selections, modify, expand and add a new layer. Flood fill with your choice of paper. Go to selections, none. Move this layer below the frame layer.

Next open the flame, resize it then copy and paste as a new layer. Move it to the left a bit of the rectangle layers. Make sure this is at the top of the layers Angle it to the left a bit, then duplicate it and go to image, mirror. Adjust as needed.

Then open the microphone and cassette. Resize them then copy and paste as a new layer. Move it to the left of the tag, place them overlapping where you like them.

Now open the speaker. Resize then copy and paste as a new layer to the left of the tag. Angle it just a bit. Add the drum set to the left of that just a bit.

Add the skull and crossbones after resizing to the upper right hand corner of the rectangles.

Open the ball and change. Resize it then copy and paste as a new layer. Move it to the bottom left of the rectangles.

Next open your tube of choice. Resize it as needed then copy and paste as a new layer. Move it into the center of the tag where you like. Duplicate it then on the top layer go to blur, guassin blur and change the blur to 3.00. Change the blend mode on the layer’s palette to overlay. Merge down. Now dulicate it again and on the bottom layer use your plug in, penta dot and cross on whatever setting you like. On the top tube layer, change your opacity to 50.

Now open your winged tag. Resize and add your glow of choice. Copy and paste as a new layer. Move it to the bottom of the tag, centering as you like it.

Add your text, copyrights, license info and tagger markings. Save and your done!

Thanks for trying my tutorial!

Monday, February 22, 2010

Pardon the dust!

Well I figured it was time to go back and clean up the blog. After a year of tut's and designing, it got a bit messy in here! lol I'm double checking links, updating as needed and removing old defunct tuts where I can't find the designer because the store closed or they moved, YOu will see some things moved around, please bare with me!

I am also taking the time to list the tuts that are staying to the Tut Stop forum for easier find! Check it out if you haven't already :)

THanks everyone as always for the support and love!

♥ Shani

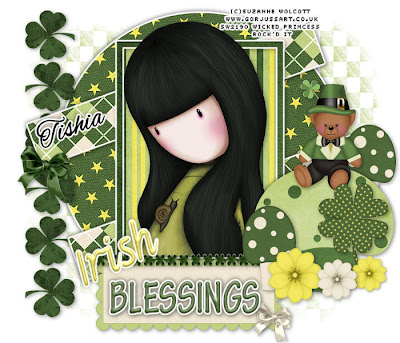
Irish Blessings PTU


This tutorial was written on February 21, 2010 Shani aka Wicked Princess. The concept of the tag is mine and mine alone. Any resemblance to any other tag/tut is pure coincidence. This was written for those with working knowledge of PSP.

Supplies Needed:

++Paint Shop Pro ( I used 10 but any version should work)

++Scrap kit Just My Luck by Designs by Tishia can be purchased from HERE

++Template 101 by Ali can be found HERE

++Tube of choice or the one I used. I used the artwork Suzanne Wolcott. You must have a valid license in order to use her work. You can purchase her work from HERE

++Font and mask of choice

++Plug ins:
-Eye Candy 4000 Gradient Glow

**NOTES:
-Add Drop shadow of choice as you go
-You can merger layers as you want to make things easier for yourself.

Open the template in PSP, using your shortcut keys on your keyboard (SHIFT+D) duplicate the template as a new image. Close the original.

Open several papers of choice, resizing as needed. For example, when I look at the blue bar where it tells me what I’ve opened (say like paper 2) it tells me what percentage I’m viewing it at. For me it’s usually 16%, so I resize to 16% bringing it to 100%. ( I hope that made sense!) Once you’ve done this, minimize for later use.

Next go to the bottom template layer and go to selections, select all, then float, selections defloat. Don’t forget to go to selections, none then delete the template layer. Add a gradient glow of your choosing. Repeat this process for the rest of the template.

Then open the clover border. Resize and free rotate to the left. Copy and paste as a new layer, moving it below the rectangles layers.

Now open the tag, resize then copy and paste as a new layer at the bottom of the frame layer, off to the left a bit. Add the criss cross stitching so it overlaps the tag and the frame slightly. Giving it that look like its been stitched on there.

Open the large toadstool, reseize it then copy and paste as a new layer. Move it to the left of the tag. Add two of the smaller ones, one in front and one behind it.

Then open the bear, resize then copy and paste as a new layer to the top of the large toadstool. Make it look like he is sitting on top of it.

Pick one of the shamrocks you like, resize it then copy and paste as a new layer to the left of the large toadstool.

Now open two flowers you like, resize then copy and paste as new layers towards the bottom of the toad stools.

Add a bow to one of the ends of rectangles. Then another to the bottom tag.

Add your texts, copyrights, tagger markings and license numbers. Save and your done!

Thanks for trying my tutorial.
Sunday, February 21, 2010

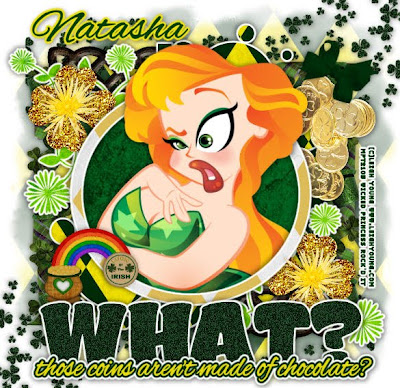
Gold Chocolate PTU


This tutorial was written on February 21, 2010 Shani aka Wicked Princess. The concept of the tag is mine and mine alone. Any resemblance to any other tag/tut is pure coincidence. This was written for those with working knowledge of PSP.

Supplies Needed:

++Paint Shop Pro ( I used 10 but any version should work)

++Scrap kit by Natasha of Sticky Kisses Designs called Lucky can be purchased from HERE

++Template 101 by Ali can be found HERE

++Tube of choice or the one I used. I used the work of Leigh Young. When I purchased her work, she was still with MPT, you can go to her website to find out where to get her art now. Leigh Young's Website HERE

++Plug ins:
-Eye Candy 4000 Gradient Glow

++Font and Mask of choice

**NOTES:
-Add Drop shadow of choice as you go
-You can merger layers as you want to make things easier for yourself.

Open the template in PSP, using your shortcut keys on your keyboard (SHIFT+D) duplicate the template as a new image. Close the original.

Open several papers of choice, resizing as needed. For example, when I look at the blue bar where it tells me what I’ve opened (say like paper 2) it tells me what percentage I’m viewing it at. For me it’s usually 16%, so I resize to 16% bringing it to 100%. ( I hope that made sense!) Once you’ve done this, minimize for later use.

Next go to the bottom template layer and go to selections, select all, then float, selections defloat. Don’t forget to go to selections, none then delete the template layer. Add a gradient glow of your choice. Repeat this process for the rest of the template.

Add a new raster layer and flood fill with your choice of paper. Add your choice of mask and merge group. Move this layer below your template layers.

Then open the shamrock splatter, resize it then copy and paste as a new layer at the top of the canvas. Move it down below the template layers. Duplicate it and go to image, mirror and then image, flip.

Now open the ribbon with hats on it, resize then copy and paste as a new layer. Arrange it to the bottom left of the templates, we’re going to make a square out of it. Also make sure its below the template layers. Duplicate it and go to image, mirror then image, flip.

Open the iron braid, resize it then copy and paste as a new layer. Move it to below the template layers, to the right, at the end of the ribbon. Duplicate it and go to image, mirror then image, flip.

Now open the gold coins, resize it then copy and paste as a new layer. Move it below the large circle layer, arrange it to the upper right of the tag. Add a bow to the top right.

Next open the glitter shamrock paper clip, resize it then copy and paste as a new layer to the upper left of the tag. Move it below the circle layer. Duplicate it and go to image, mirror then image, flip. Add the yellow flower of your choice to the middle of the shamrocks.

Then open the pot of gold with the rainbow. Resize it then copy and paste as a new layer to the left of the tag.

Add your text, copyrights, tagger markings and licensing info.

Save and your done!

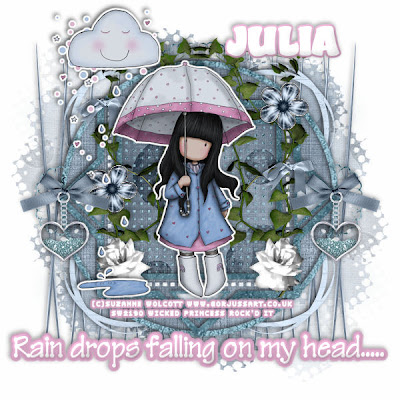
Rain Drops PTU


This tutorial was written on February 21, 2010 Shani aka Wicked Princess. The concept of the tag is mine and mine alone. Any resemblance to any other tag/tut is pure coincidence. This was written for those with working knowledge of PSP.

Supplies Needed:

++Paint Shop Pro ( I used 10 but any version should work)

++Scrap kit called Blue Lagoon by Julia Designs can be purchased from http://www.scrappinbratz.com/shoppe/index.php?main_page=product_info&cPath=19_150&products_id=2729

++Template 12 by HippieDaze can be found http://hippiedazetuts.blogspot.com/search/label/Templates

++ Tube of choice or the one I used. I used the artwork of Suzanne Wolcott and it can be purchased www.gorjussart.co.uk

++Plug ins:
-Eye Candy 4000 Gradient Glow

++Font and mask of choice

**NOTES:
-Add Drop shadow of choice as you go
-You can merger layers as you want to make things easier for yourself.

Open the template in PSP, using your shortcut keys on your keyboard (SHIFT+D) duplicate the template as a new image. Close the original.

Open several papers of choice, resizing as needed. For example, when I look at the blue bar where it tells me what I’ve opened (say like paper 2) it tells me what percentage I’m viewing it at. For me it’s usually 16%, so I resize to 16% bringing it to 100%. ( I hope that made sense!) Once you’ve done this, minimize for later use.

Next go to the bottom template layer and go to selections, select all, then float, selections defloat. Don’t forget to go to selections, none then delete the template layer.. Repeat this process for the rest of the template.

Add a new raster layer and move it to the bottom of the layers palette. Flood fill with your choice of paper. Add your mask of choice and merge group.

Then open the criss cross sticks, resize then copy and paste as a new layer. Move all the way down just above the mask layers.

Open the ivy, resize then copy and paste as a new layer. Move to the right of the square. Duplicate it and go to image mirror.

Next open the rose blossom, resize then copy and paste as a new layer. Move to the bottom of the ivy stem on the right. Duplicate it and go to image, mirror.

Then open the small blue blossom. Resize then copy and paste as a new layer. Move it to where you like on the right side. Duplicate and move it to where you want it on the left side. Do the same with a bow of your choosing.

Now open the heart dangle with bow you like. Copy and paste as a new layer. Move it to the right triangle layer. Duplicate it and go to image, mirror.

Open your tube of choice, resize it then copy and paste as a new layer. Add the gradient glow of your choosing. Center into your canvas.

Finally add your text, copyrights and tagger markings. Save and your done!

Thanks for trying my tutorial.
Saturday, February 20, 2010

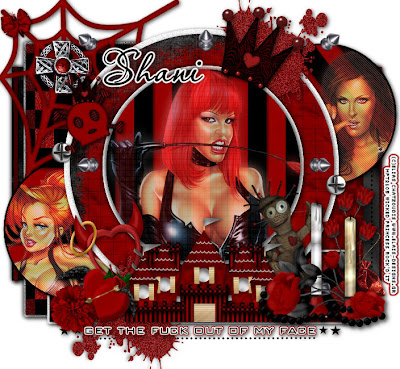
Out of my face SAC PTU


**PLEASE NOTE, WHEN YOU CLICKED ON THE WARNING BEFORE LOGGING TO MY BLOG, YOU ACCEPT THAT THERE IS SOME ADULT CONTENT ON THIS BLOG. THE FOLLOWING TAG DOES HAVE STRONG LANGUAGE AND SOME CLEAVAGE. IF YOU ARE EASILY OFFENDED PLEASE CLOSE OUT NOW.**

SCROLL DOWN FOR TAG AND TUT


This tutorial was written on February 20, 2010 Shani aka Wicked Princess. The concept of the tag is mine and mine alone. Any resemblance to any other tag/tut is pure coincidence. This was written for those with working knowledge of PSP.

Supplies Needed:

++Paint Shop Pro ( I used 10 but any version should work)

++Scrap kit called Wicked Princess-The kit by me which can be purchased from HERE


++Template 329 by Missy by can be found HERE


++ 3 tubes of choice or the ones I used. I used the work of Elias Chatzoudis. You must have a valid license in order to use his work and you can purchase it from HERE


++Plug ins:

-Eye Candy 4000 Gradient Glow

-Penta jeans

-Penta dot and cross


++Font of choice

**NOTES:

-Add Drop shadow of choice as you go

-You can merger layers as you want to make things easier for yourself.


Open the template in PSP, using your shortcut keys on your keyboard (SHIFT+D) duplicate the template as a new image. Close the original.

Open several papers of choice, resizing as needed. For example, when I look at the blue bar where it tells me what I’ve opened (say like paper 2) it tells me what percentage I’m viewing it at. For me it’s usually 16%, so I resize to 16% bringing it to 100%. ( I hope that made sense!) Once you’ve done this, minimize for later use.

Next go to the bottom template layer and go to selections, select all, then float, selections defloat. Don’t forget to go to selections, none then delete the template layer. Add the gradient glow of your choosing. Repeat this process for the rest of the template. NOTE add your gradient glow to the two outside circles.

Then open the spider web, resize it then copy and paste as a new layer. Move it below all the circle layers in the upper left hand corner of the tag.

Open two of your tubes, crop and resize. Copy and paste the first one as a new layer, moving it over to the left hand circle layer at the bottom. Duplicate the tube, go to adjust, blur, guassin blur at the setting of 3.00. While still active on this layer change your blend mode (above your layers palette) to overlay. Now merge down. Merging down just merges it down one layer. Nowyou’re your plug in, Penta>Jeans on the setting you like. Change the opacity to 75.Adjust the tube with in the circle layer the way you like it. Then go to the circle layer and go to selections, select all, selections, float then selections, defloat. Go to selections, invert. Go back to the tube layer, and hit the delete key. Then go to selections, none.

Repeat this for the other tube and other circle layer.

Now open the glitter splats. Resize then copy and paste as a new layer towards the top right of the tag. Move it below the top circle glitter layer. Duplicate it and go to image, mirror then image, flip.

Then open your last tube, resize and crop as needed. Copy and paste the first one as a new layer, moving it over to the center circle layer. Duplicate the tube, go to adjust, blur, guassin blur at the setting of 3.00. While still active on this layer change your blend mode (above your layers palette) to overlay. Now merge down. Merging down just merges it down one layer. Now you’re your plug in, Penta>dots and cross on the setting you like. Change the opacity to 75. Adjust the tube with in the circle layer the way you like it. Then go to the circle layer and go to selections, select all, selections, float then selections, defloat. Go to selections, invert.

Now open the steel spikes, resize then copy and paste as a new layer. Adjust it as needed.

Next open the castle , resize it then copy and paste as a new layer. Move it to the bottom center of the tag. Adjust as needed. Add the voodoo doll after resizing to the upper right of it.

Open the candeles with roses, resize then copy and paste as a new layer, moving it to the right of the castle. Add the bauganvilla flower below this layer to the right of it. Along with the sachet bag.

Then open the devil horns frame, resize then copy and paste to the left of the castle. Move it below the castle layer.

Add the winged hearts just low that but above the castle. Angle it the way you like. Add the blood flower to the left of that.

Open the silver cross, resize then copy and paste as a new layer over the web layer. Adjust as needed. Add the butterfly to the upper left corner.

Open the skull with the crown, resize it then copy and paste as a new layer. Angle it and move to over by the web.

Then open the crown, resize then copy and paste as a new layer. Move it and angle it so it sits sideways on the circle.

Add two screws on the edges of the circle layers.

Finally add your text, copyrights and tagger markings. Save and your done!

Thanks for trying my tutorial.



Thursday, February 18, 2010

Heartbreaker PTU


This tutorial was written on February 18, 2010 Shani aka Wicked Princess. The concept of the tag is mine and mine alone. Any resemblance to any other tag/tut is pure coincidence. This was written for those with working knowledge of PSP.

Supplies Needed:

++Paint Shop Pro ( I used 10 but any version should work)

++Scrap kit Forever Friends by me which can be purchased from HERE

++Template 176 by Ali can be found HERE

++Tube of choice or the one I used. I used the work of Keith Garvey. You must have a valid license in order to use his work and you can purchase it from MPT

++Plug ins:
-Eye Candy 4000 Gradient Glow

++Font and mask of choice

**NOTES:
-Add Drop shadow of choice as you go
-You can merger layers as you want to make things easier for yourself.

Open the template in PSP, using your shortcut keys on your keyboard (SHIFT+D) duplicate the template as a new image. Close the original.

Open several papers of choice, resizing as needed. For example, when I look at the blue bar where it tells me what I’ve opened (say like paper 2) it tells me what percentage I’m viewing it at. For me it’s usually 16%, so I resize to 16% bringing it to 100%. ( I hope that made sense!) Once you’ve done this, minimize for later use.

Next go to the bottom template layer and go to selections, select all, then float, selections defloat. Don’t forget to go to selections, none then delete the template layer. Add the gradient glow of your choosing. Repeat this process for the rest of the template. NOTE on the right side heart, I angled it a bit and moved it over to better fit my tube.

Add a new raster layer and flood fill with your choice of paper. Add your mask of choice, merge group and move this layer to below the template layers.

Open the rose cluster, resize then copy and paste as a new layer to the upper left of the tag. Move it below the heart layers, but above the large rectangle layer on the bottom. Duplicate it and go to image, mirror. Then duplicate it once more, go to image, flip. One more duplication then go to image, mirror.

Then open the flower clip, resize then copy and paste as a new layer. Move to the left between the two rose clusters. Duplicate it then go to image, mirror.

Next open your tube of choice. Copy and paste it as a new layer and duplicate it four times. Close off all but one. BTW you want these above the heart layers. Adjust and resize to a smaller size. Move one over the top of the heart on top. Go to the heart layer, go to selections, select all then selections, defloat. Now go to selections, modify and contract. Contract to what you wan it to be then go to selections, invert. On the tube layer, hit the delete key. Go to selections, none. Now with the remaining two tubes, do the same thing, putting which ever parts of the tube you want in the hearts.

On the last tube, resize it then move it so its below the small rectangle layer. Place it in the center of the canvas as much as you can.

Open the boom box, resize it then copy and paste as a new layer. Move it to below the tube layer, angling it to the right and also make sure its on the right.

Then open the rainbow, resizing then copy and paste it as a new layer angling to the left. Move it below the tube layer and adjust it as you like.

Now open the butterfly brad and the small blossom. Resize them then copy and paste as new layers where you like around the tag. Duplicate them and move where ever else you like.

Finally add your text, copyrights, license info and tagger markings.

Save and your done! Thanks for trying my tutorial.

Wednesday, February 17, 2010

Come Over Sometime PTU


This tutorial was written on February 17, 2010 Shani aka Wicked Princess. The concept of the tag is mine and mine alone. Any resemblance to any other tag/tut is pure coincidence. This was written for those with working knowledge of PSP.

Supplies Needed:

++Paint Shop Pro ( I used 10 but any version should work)

++Scrap kit Enchanted Grace which can be purchased from any of these stores:


++Template 94 by Ali can be found HERE

++Tube of choice or the one I used. I used the tube that is included in the kit. If you choose to use it please credit Lisa and her blog is HERE

++Font and mask of choice

**NOTES:
-Add Drop shadow of choice as you go
-You can merger layers as you want to make things easier for yourself.

Open the template in PSP, using your shortcut keys on your keyboard (SHIFT+D) duplicate the template as a new image. Close the original.

Open several papers of choice, resizing as needed. For example, when I look at the blue bar where it tells me what I’ve opened (say like paper 2) it tells me what percentage I’m viewing it at. For me it’s usually 16%, so I resize to 16% bringing it to 100%. ( I hope that made sense!) Once you’ve done this, minimize for later use.

Next go to the bottom template layer and go to selections, select all, then float, selections defloat. Don’t forget to go to selections, none then delete the template layer. Repeat this process for the rest of the template

Add a new raster layer and flood fill with your choice of paper. Add your mask of choice, merge group and move this layer to below the template layers.

Then open the fan, resize and copy and paste as a new layer. Move it below the frame layer in the left frame. Adjust it so its more towards the center of the frame. Duplicate it and go to image, mirror. Adjust as needed.

Next open the candelabra. Resize then copy and paste as a new layer. Move it to the right side of the frame towards the outer part. Add the piano next, towards the bottom of the frame.

Now open the gem ribbon, resize it then copy and paste as a new layer at the top of the frame. Adjust it so it looks like its hanging over.

Open the couch, resize it then copy and paste into the center of the “room”. Add a callalily bouquet behind it.

Then open your tube of choice, resize it then copy and paste as a new layer off to the left of the couch a bit. Behind it add the sachet bag. In front of it add the sachet bag.

Now open the pillow, resize it then copy and paste as a new layer. Move it so it looks like its sitting on the couch.

Next open the drapery, resize it then copy and paste as a new layer. Move it to the left of the frame and adjust as needed.

Open the rose cluster. Resize it then copy and paste as a new layer. Move it to the upper left corner of the frame. Duplicate it and go to image, mirror.

Add the clock to the center of the “room” towards the top.

Finally add your text, copyrights any necessary licensing info and tagger markings.

Save and your done!

Thanks for trying my tutorial.

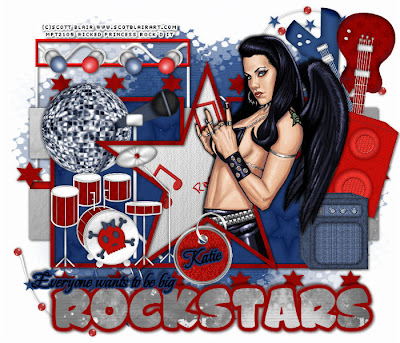
Big Rockstars PTU


This tutorial was written on February 17, 2010 Shani aka Wicked Princess. The concept of the tag is mine and mine alone. Any resemblance to any other tag/tut is pure coincidence. This was written for those with working knowledge of PSP.

Supplies Needed:

++Paint Shop Pro ( I used 10 but any version should work)

++Scrap kit Rockstar by Crazed’s creations which can be purchased from HERE

++Template 132 by Ali can be found HERE

++Tube of choice or the one I used. I used the artwork of Scott Blair. His work can be purchased from HERE

++Font and mask of choice

**NOTES:
-Add Drop shadow of choice as you go
-You can merger layers as you want to make things easier for yourself.

Open the template in PSP, using your shortcut keys on your keyboard (SHIFT+D) duplicate the template as a new image. Close the original.

Open several papers of choice, resizing as needed. For example, when I look at the blue bar where it tells me what I’ve opened (say like paper 2) it tells me what percentage I’m viewing it at. For me it’s usually 16%, so I resize to 16% bringing it to 100%. ( I hope that made sense!) Once you’ve done this, minimize for later use.

Next go to the bottom template layer and go to selections, select all, then float, selections defloat. Don’t forget to go to selections, none then delete the template layer. Repeat this process for the rest of the template

Add a new raster layer and flood fill with your choice of paper. Add your mask of choice, merge group and move this layer to below the template layers.


Then open the stage, resize and copy and paste as a new layer towards the top of the canvas. Move below the bottom template layer.

Now open two of the guitars you like. Resize, copy and paste as new layers. Arrange them to the upper right of the canvas, angling as you like.

Next open the beaded twirl you like, resize then copy and paste as a new layer. Move to the bottom, just above the mask layer. You want it to be at the bottom left. Duplicate it and go to image, mirror then image, flip. Adjust as needed.

Now open the speaker and amp. Resize then copy and paste as a new layer to the right side of the canvas. Angle as you like and adjust.

Open the disco ball. Resize then copy and paste as a new layer to the upper left of the tag. Add the microphone to the center of the left hand rectangle.

Then open your tube of choice, resize then copy and paste as a new layer. Move it above the star frame layer. Duplicate it and move one layer below the frame. On the top tube layer, erase the parts of the tube you don’t want seen outside the frame. On the bottom layer erase the excess also.

Next open the drum set. Resize then copy and paste as a new layer. Move it to the left hand rectangle layer. Adjust as needed. Add the skull and crossbones to the center of the big drum. Angle it as you like.

Now open the tag you like, resize then copy and paste as a new layer. Make it look like its hooked around the star frame layer.

Add your text, copyrights, license info and tagger markings.

Save and your done!

Thanks for trying my tutorial.

You Are Beautiful PTU


This tutorial was written on February 17, 2010 Shani aka Wicked Princess. The concept of the tag is mine and mine alone. Any resemblance to any other tag/tut is pure coincidence. This was written for those with working knowledge of PSP.

Supplies Needed:

++Paint Shop Pro ( I used 10 but any version should work)

++Scrap kit My valentine by Designs by Tishia can be purchased from HERE

++Template 63 by Toxic Desirez can be found HERE

++Tube of choice or the one I used. I used the artwork of Leigh Young. She is no longer with MPT so please visit her website to find out where to purchase her work. Her site HERE

++Font and mask of choice

**NOTES:
-Add Drop shadow of choice as you go
-You can merger layers as you want to make things easier for yourself.

Open the template in PSP, using your shortcut keys on your keyboard (SHIFT+D) duplicate the template as a new image. Close the original.

Open several papers of choice, resizing as needed. For example, when I look at the blue bar where it tells me what I’ve opened (say like paper 2) it tells me what percentage I’m viewing it at. For me it’s usually 16%, so I resize to 16% bringing it to 100%. ( I hope that made sense!) Once you’ve done this, minimize for later use.

Next go to the bottom template layer and go to selections, select all, then float, selections defloat. Don’t forget to go to selections, none then delete the template layer. Repeat this process for the rest of the template. NOTE: I deleted the word art layer.


Add a new raster layer and flood fill with your choice of paper. Add your mask of choice, merge group and move this layer to below the template layers.

Then open the glitter heart, resize it then copy and paste as a new layer. Move it below the template layers, but above the large scalloped layer. Adjust as needed.

Now open the tied ribbon element. Resize then copy and paste as a new layer. Move at an angle to the right under the frame layer. Erase the parts outside of the frame you don’t want showing.

Open your tube of your choice, resize it then copy and paste as a new layer to the left of the tag.

Open the rose of your choice. Resize then copy and paste as a new layer to the right side of the frame towards the top. Duplicate it several times and space it out on the side. Add the quilted heart you like in between the roses.

Add several roses to the bottom of the frame, spaced out as you like.

Finally add your text, copyrights and license info. Save and your done!

Thanks for trying my tutorial.

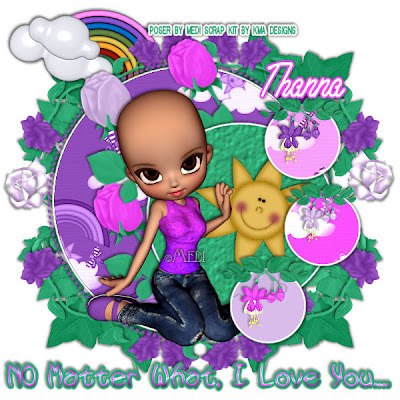
No Matter What - PTU


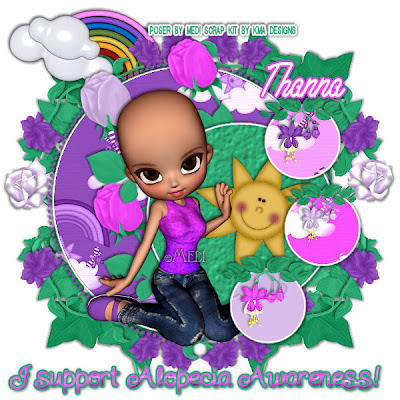
**This kit was made for Thanna's daughter who lives with Alopecia. To find out more, vist the website NAAF.** Look at the end for another version of the tag.


This tutorial was written on February 17, 2010 Shani aka Wicked Princess. The concept of the tag is mine and mine alone. Any resemblance to any other tag/tut is pure coincidence. This was written for those with working knowledge of PSP.

Supplies Needed:

++Paint Shop Pro ( I used 10 but any version should work)

++Scrap kit KMA Designs called No Matter What I Love you and it can be purchased HERE

++Template 124 by Ali can be found HERE

++Tube of choice or the one I used. I used the poser that come with the kit. If you don’t use any outside tubes, please credit back to maker of the tube, MEDI

++Plug ins:
-Eye Candy 4000 Gradient Glow

++Font

**NOTES:
-Add Drop shadow of choice as you go
-You can merger layers as you want to make things easier for yourself.

Open the template in PSP, using your shortcut keys on your keyboard (SHIFT+D) duplicate the template as a new image. Close the original.

Open several papers of choice, resizing as needed. For example, when I look at the blue bar where it tells me what I’ve opened (say like paper 2) it tells me what percentage I’m viewing it at. For me it’s usually 16%, so I resize to 16% bringing it to 100%. ( I hope that made sense!) Once you’ve done this, minimize for later use.

Next go to the bottom template layer and go to selections, select all, then float, selections defloat. Don’t forget to go to selections, none then delete the template layer. Add a gradient glow of your choice. Repeat this process for the rest of the template.

Now open the ivy, resize as needed then copy and paste as a new layer below the first template layer. Adjust it where you like it. Duplicate it and go to image, mirror. Duplicate it again and go to image flip. Once more duplicate it and go to image, mirror.

Then open the rose of choice, resize it then copy and paste as a new layer. Move it to the right side of the tag, below the circle template layer. Arrange it so its between the ivy. Duplicate it and go to image, mirror.

Open the rainbow, resize it then copy and paste as a new layer. Move it to the upper left corner of the tag. Arrange as you like it.

Next open the rose vine, resize it then copy and paste as a new layer. Move it below the circle template layer. Duplicate it and go to image, mirror. Duplicate it then go to image, flip. Duplicate one more time and go to image, mirror.

Now open the tube of choice. Resize it then copy and paste as a new layer. Move it below the small circle layers. Add the closed rose buds of your choosing at an angle below the tube layer. Make sure that you keep the watermark for the tube in tact if you choose to use the one from the kit.

Then open the sun layer. Resize it then copy and paste as a new layer. Move it below the circle’s layer also below the tube layer.

Open the fuchsia of your choosing. Resize it then copy and paste as a new layer. Move it to the top of the small circle layer. Add the other two to the other circles.

Finally add your text, copyrights and necessary license numbers. Add your tagger markings, save and your done!

Thanks for trying my tutorial.

Tuesday, February 16, 2010

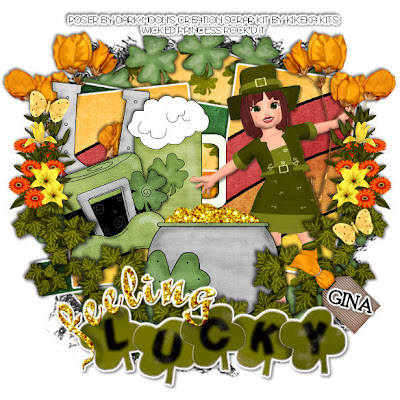
Feeling Lucky (FTU)


This tutorial was written on February 16, 2010 Shani aka Wicked Princess. The concept of the tag is mine and mine alone. Any resemblance to any other tag/tut is pure coincidence. This was written for those with working knowledge of PSP.

Supplies Needed:

++Paint Shop Pro ( I used 10 but any version should work)

++Scrap kit Gina of Kikeka kits called Feeling Lucky can be found HERE

++Template 154 by Ali can be found HERE

++Tube of choice or the one I used. I used the posers included in the kit. Please credit the poser maker, Dark Moon’s creation.

++Plug ins:
-Eye Candy 4000 Gradient Glow

++Font and Mask of choice

**NOTES:
-Add Drop shadow of choice as you go
-You can merger layers as you want to make things easier for yourself.

Open the template in PSP, using your shortcut keys on your keyboard (SHIFT+D) duplicate the template as a new image. Close the original.

Open several papers of choice, resizing as needed. For example, when I look at the blue bar where it tells me what I’ve opened (say like paper 2) it tells me what percentage I’m viewing it at. For me it’s usually 16%, so I resize to 16% bringing it to 100%. ( I hope that made sense!) Once you’ve done this, minimize for later use.

Next go to the bottom template layer and go to selections, select all, then float, selections defloat. Don’t forget to go to selections, none then delete the template layer. Add a gradient glow of your choice. Repeat this process for the rest of the template.

Add a new raster layer and flood fill with your choice of paper. Add your choice of mask and merge group. Move this layer below your template layers.

Now open the clover leaf frame, resize it then copy and paste as a new layer, moving it blow all layers but above the circle layer.

Open the bougainvillea flower, resize it then copy and paste as a new layer. Move it to the upper left portion of the tag. Duplicate it and go to image, mirror.

Then open the horseshoe, hat and mug. Resize then copy and paste as new layers. Arrange them in the left side template rectangle as you like.

Now open the tube of choice, resize it then copy and paste as a new layer. Move to the right side rectangle. Add the pot of gold to the center of the rectangles, above both the clip art layers and poser layer.

Next open the ivy branches, resize then copy and paste as new layer. Move to the left of the canvas. Duplicate it and go to image, mirror.

Open the feeling lucky word art, resize it then copy and paste as a new layer. Move to the bottom of the template layer.

Next open the flower bouquet of your choice. Resize then copy and paste as a new layer. Move to the left side of the tag then duplicate it. Go to image, mirror and adjust as needed.

Then open the butterfly of choice, resize then copy and paste as a new layer. Move to where ever you like in the tag. Duplicate it and do the same.

Now open the tag of choice, resize it then copy and paste as a new layer. Move it to the bottom lower corner of the tag as you like.

Finally add your text, copyrights, license number if needed and tagger markings.

Save and your done!

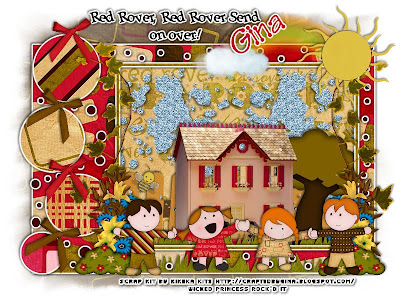
Red Rover, Red Rover (FTU)


This tutorial was written on February 20, 2010 Shani aka Wicked Princess. The concept of the tag is mine and mine alone. Any resemblance to any other tag/tut is pure coincidence. This was written for those with working knowledge of PSP.

Supplies Needed:

++Paint Shop Pro ( I used 10 but any version should work)

++Scrap kit Gina of Kikeka kits called Red Rover can be found on her blog as a freebie HERE

++Template 155 by Ali can be found HERE

++Tube of choice or the one I used. I used the clip out kiddo’s that come with the kit. If you don’t use any outside tubes, please credit back to the designers blog.

++Plug ins:
-Eye Candy 4000 Gradient Glow

++Font and Mask of choice

**NOTES:
-Add Drop shadow of choice as you go
-You can merger layers as you want to make things easier for yourself.

Open the template in PSP, using your shortcut keys on your keyboard (SHIFT+D) duplicate the template as a new image. Close the original.

Open several papers of choice, resizing as needed. For example, when I look at the blue bar where it tells me what I’ve opened (say like paper 2) it tells me what percentage I’m viewing it at. For me it’s usually 16%, so I resize to 16% bringing it to 100%. ( I hope that made sense!) Once you’ve done this, minimize for later use.

Next go to the bottom template layer and go to selections, select all, then float, selections defloat. Don’t forget to go to selections, none then delete the template layer. Add a gradient glow of your choice. Repeat this process for the rest of the template.

Add a new raster layer and flood fill with your choice of paper. Add your choice of mask and merge group. Move this layer below your template layers.

Open the blue glitter splat. Resize then copy and paste as a new layer. Move below the frame layer. Duplicate it and go to image, mirror. Adjust as needed. Using your magic wand tool click inside the frame layer. Go to selections modify, expand by 10. Then go to selections, invert. On the splat layers, hit the delete button.

We’re going to create a scene with in the frame.

Then open the tree, resize and copy and paste as a new layer to the right side, under the frame. Erase the parts seen outside of the frame.

Now open up the house, resize it then copy and paste as a new layer. Move to the center bottom of the frame layer. Add the grass to the bottom of the house. Duplicate the grass and move down at the bottom of the rectangle layer.

Copy and paste the fence after resizing below the house layer. Add a bee above the fence.

Next open the ivy, resize it then copy and paste as a new layer. Duplicate it and move one on the left side of the frame layer and the other on the other side.

Open the flower bouquet. Resize as needed then copy and paste as a new layer to the left and bottom of the frame layer. Duplicate it and go to image, mirror.

Then open the bows of choice, resize them then copy and paste as a new layer. Duplicate them and move them accordingly between the circle layers.

Now open the bush, resize it then copy and paste as a new layer to the left and right of the bottom grass layer. Adjust as needed.

Next add the children playing red rover to the bottom above the bush layer. Resize and adjust as needed.

Open the sun, resize it then copy and paste as a new layer. Move it to the upper right of the tag. Add the rainbow and cloud of your choice next to the sun layer. Move them below the layer.

Finally add your text, copyrights, license info and tagger markings. Save and your done!

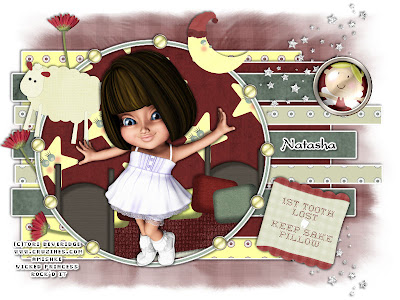
Tooth Fairy Visit (FTU)


This tutorial was written on February 20, 2010 Shani aka Wicked Princess. The concept of the tag is mine and mine alone. Any resemblance to any other tag/tut is pure coincidence. This was written for those with working knowledge of PSP.

Supplies Needed:

++Paint Shop Pro ( I used 10 but any version should work)

++Scrap kit by Natasha of Sticky Kisses Designs can be found on her blog HERE

++Template 153 by Ali can be found HERE

++Tube of choice or the one I used. I used the work of Tori Beveridge and you can purchase it from HERE

++Plug ins:
-Eye Candy 4000 Gradient Glow

++Font and Mask of choice

**NOTES:
-Add Drop shadow of choice as you go
-You can merger layers as you want to make things easier for yourself.

Open the template in PSP, using your shortcut keys on your keyboard (SHIFT+D) duplicate the template as a new image. Close the original.

Open several papers of choice, resizing as needed. For example, when I look at the blue bar where it tells me what I’ve opened (say like paper 2) it tells me what percentage I’m viewing it at. For me it’s usually 16%, so I resize to 16% bringing it to 100%. ( I hope that made sense!) Once you’ve done this, minimize for later use.

Next go to the bottom template layer and go to selections, select all, then float, selections defloat. Don’t forget to go to selections, none then delete the template layer. Add a gradient glow of your choice. Repeat this process for the rest of the template.

Add a new raster layer and flood fill with your choice of paper. Add your choice of mask and merge group. Move this layer below your template layers.

Open up the star cluster, resize it then copy and paste as a new layer. Move it below the circle background layer and at the upper right of the canvas. Duplicate it and go to image, flip.

Then open up the flower, resize then copy and paste as a new layer. Move to the upper left of the canvas, below the circle background layer. Duplicate it and move a little bit further down of the other one. Duplicate it one more time and do the same thing.

Now open up the bed, resize it then copy and paste as a new layer. Move below the circle frame layer. Erase the parts of the bed you don’t want seen outside the frame.

Now open up the sheep, resize it then copy and paste as a new layer. Move it to the upper left of the frame layer. Add a moon to the opposite side.

Open the button of your choosing, resize then copy and paste as a new layer. Duplicate it several times and move around the circle layer as you like.

Then open the button with the tooth fairy on it. Resize it then move it to the upper right of the template, where the rectangles are.

Next open your tube of choice, resize it then copy and paste as a new layer. Move it to the center of the circle layer. Adjust as needed.

Add the tooth fairy pillow and move it to the bottom right of the canvas, angle as you like.

Finally add your text, copyright, tagger markings and license info. Save and your done!

Monday, February 15, 2010

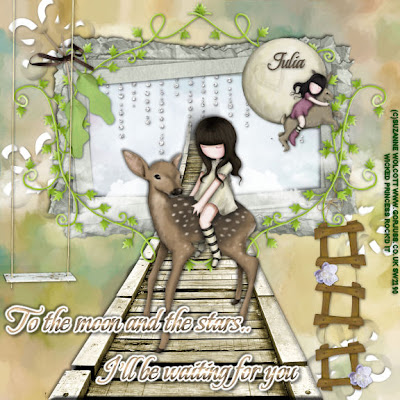
Till the moon and the stars (PTU)


This tutorial was written on February 15, 2010 Shani aka Wicked Princess. The concept of the tag is mine and mine alone. Any resemblance to any other tag/tut is pure coincidence. This was written for those with working knowledge of PSP.

Supplies Needed:

++Paint Shop Pro ( I used 10 but any version should work)

++Scrap kit by Julia Designs called Fairytale can be found HERE

++Two tubes of choice, or the ones I used. I used the work of Suzanne Wolcott. You can find her work at HERE

++Font of choice


**NOTES:
-Add Drop shadow of choice as you go
-You can merger layers as you want to make things easier for yourself.

Open a canvas of 600x600 and flood fill with your choice of paper.

Then open the see through flower trail, resize as needed then copy and paste as a new layer to the upper left corner of the canvas. Duplicate it and go to image, mirror then go to image flip. Adjust as needed.

Now open the ruffle frame, resize it then copy and paste as a new layer. Adjust it and move where you like in the center of the canvas. Using your magic wand tool and click in inside the frame. Go to selections, modify and then expand by 10. Add a raster layer, and move below the frame layer. Flood fill with your choice of paper. Go to selections, none.

Open the bling rain, resize it then copy and paste as a new layer. Move it below the frame layer, adjust as needed. Erase the parts you don’t want seen outside the frame layer.

Next open the wooden bridge, resize it then copy and paste as a new layer into the center of the canvas. Your going to adjust it so it looks like the part at the top that is fading out is going into the frame.

Then open up the clouds, the see through ones and resize. Copy and paste as a new layer, move it below the frame layer to the left. Duplicate it and go to image, mirror. Adjust as needed.

Now open the vine, resize then copy and paste as a new layer. Move it into the upper left hand corner of the frame. Adjust as needed. Then duplicate it then go to image, mirror then duplicate it again. Go to image, flip then one more time duplicate and go to image, mirror. Add the toothpick with bow’s and leaves to the upper left hand corner.

Open the swing, resize then copy and paste as a new layer. Move it to the upper left hand corner of the tag.

Then open the ladder frame, resize it then copy and paste as a new layer. Move to the bottom right hand corner. Add a few flowers to it as you like.

I used a tube by Suzanne Wolcott where the girl is riding a rabbit (maybe lol) with a moon behind her. I put that one in the upper right hand corner of the frame.

Now open your other tube, resize it then copy and paste it as a new layer and move where you like it on the bridge.

Finally add your copyrights, license info and tagger markings. Save and your done!

Thanks for trying my tutorial.

Thursday, February 11, 2010

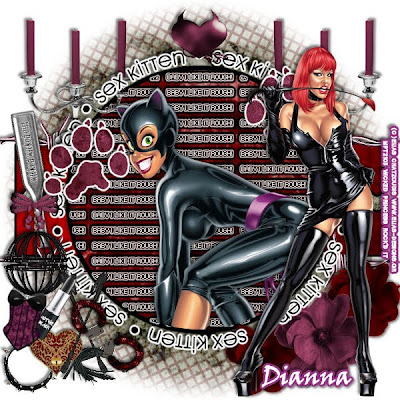
Sex Kitten SAC! (FTU)


This tutorial was written on February 11, 2010 Shani aka Wicked Princess. The concept of the tag is mine and mine alone. Any resemblance to any other tag/tut is pure coincidence. This was written for those with working knowledge of PSP.

Supplies Needed:

++Paint Shop Pro ( I used 10 but any version should work)

++Scrap kit by Dianna of Digicats and Dogs called Dark Cravings can be found HERE

++Template 54 By Kristin can be found HERE

++Two tubes of choice or the ones I used. I used the artwork of Elias Chatzoudis and you can purchase his work from MPT and you must have a license to use his work.

++Plug ins:
-Eye Candy 4000 Gradient Glow

++Font and Mask of choice

**NOTES:
-Add Drop shadow of choice as you go
-You can merger layers as you want to make things easier for yourself.

Open the template in PSP, using your shortcut keys on your keyboard (SHIFT+D) duplicate the template as a new image. Close the original.

Open several papers of choice, resizing as needed. For example, when I look at the blue bar where it tells me what I’ve opened (say like paper 2) it tells me what percentage I’m viewing it at. For me it’s usually 16%, so I resize to 16% bringing it to 100%. ( I hope that made sense!) Once you’ve done this, minimize for later use.

Next go to the bottom template layer and go to selections, select all, then float, selections defloat. Don’t forget to go to selections, none then delete the template layer. Add a gradient glow of your choice. Repeat this process for the rest of the template.

Add a new raster layer and flood fill with your choice of paper. Add your choice of mask and merge group. Move this layer below your template layers.

Open the mesh of your choosing, resize then copy and paste as a new layer. Move it below your mask layer. Duplicate it and go to image, flip. Add your same mask to the mesh layers.

Now add the barb wire of your choosing to the top and bottom of the rectangle layer.

Then open the candelabra of your choosing, resize then copy and paste as a new layer. Move it to the upper left hand corner of the canvas and below the circle layer. Duplicate it and go to image, mirror.

Open your first tube of choice, resize and crop as needed. Copy and paste as a new layer, into the circle layer above the background word art. Position it the way you like, then go to selections, select all the selections, float and then defloat. Go to selections, invert and on the tube layer hit the delete key. Go to selections, none.

Next open the flowers of your choosing, resize then copy and paste as a new layer in a trio form to the bottom right hand corner of the canvas. Make sure they are below the circle layer.

Then open the other tube you like, resize it then copy and paste as a new layer to the right of the tag. Position where you like it.

Now open the paddle, resize then copy and paste as a new layer . Move to middle of the canvas on the left hand side.

Next open the cage, resize then copy and paste as a new layer below the paddle. Add a bow of choice to the top of it.

Now open several elements you like, resize and copy and paste in clusters toward the bottom right hand corner of the tag.

Add the heart with horns you like to the top of the canvas.

Finally add your text, copyrights, license number and tagger markings.

Save and your done!

Thank you for trying my tutorial.