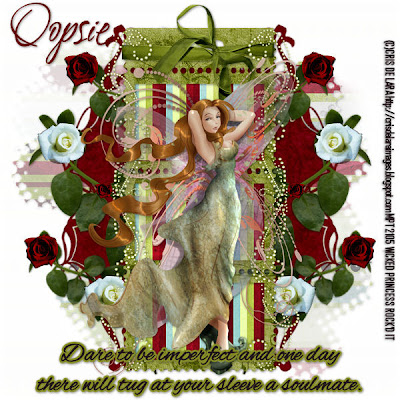
Imperfect PTU
This tutorial was written on August 27, 2009 by Shani aka Wicked Princess. The concept of the tag is mine and mine alone. Any resemblance to any other tag/tut is pure coincidence. This was written for those with working knowledge of PSP.
Supplies Needed:
++Paint Shop Pro ( I used 10 but any version should work)
++Reminise Scrap kit by Oopsie-Daisy can be purchased HERE or HERE
++Tube of choice or the one I used. I used the artwork of Cris De Lara an you can purchase it
HERE
++Font and Mask of choice
Let’s get Started!
**NOTES:
-Add Drop shadow of choice as you go
-You can merger layers as you want to make things easier for yourself.
Open several papers of choice, resizing as needed. For example, when I look at the blue bar where it tells me what I’ve opened (say like paper 2) it tells me what percentage I’m viewing it at. For me it’s usually 16%, so I resize to 16% bringing it to 100%. ( I hope that made sense!) Once you’ve done this, minimize for later use.
Next open a new canvas of 600x600. Remember you can always resize later. Flood fill with your choice of paper and add your mask. Merge the group.
Next open frame3 and resize it. Copy and paste into the center of the canvas. Angle it slightly to the left. Duplicate it and angle this one to the right.
Then open frame 4 and resize it. Copy and paste it as a new layer into the center. Use your magic wand tool and click inside each square. Hold the shift key and click inside the other squares. Go to selections, modify expand by 5. Add a new raster layer and flood fill with your choice of paper. Go to selections, none and move this layer below the frame layer.
Open the leaf element. Resize it and copy and paste as a new layer. Move it below the frame background layer, adjusting to about the center of the frame. Duplicate it and go to image, mirror. Then duplicate it again, resizing it slightly smaller and move it to the bottom of the frame. Duplicate and go to image mirror. Duplicate once more, make it smaller and move to the top of the frame. Duplicate it and go to image, mirror.
Next your going to open both roses, and resize them. Copy and paste them on to each of the leaf stems where you like. You’ll note I did mine towards the end and the end by the frame.
Now open up a wrap bow you like, resize it then copy and paste as a new layer at the top of the frame. Adjust it as needed to make sure it looks right.
Open the Pearly doodle, resize it then copy and paste as a new layer. Move it to the left top of the frame. Duplicate it then go to image, mirror. Duplicate it again and go to image, flip then duplicate it once more and go to image, mirror.
Add your tube of choice, resizing as needed and center in the middle of the frame.
Add your text, license info, copyrights and tagger markings. Save and your done!
Thank you for trying my tutorial.

No comments:
Post a Comment