Sorry guys I've been MIA for the last two days. Things are kind of hectic here this week, and I've had a rough few days. I have an appointment today that has me pretty stressed out and then I'm coming home to veg out with my family. I have given myself time this weekend to work on the blog and PSP,as I need that stress reliever.
All three of my kids are having health issues flair up at once and we're pretty concerned. My youngest has to have her tonsils out asap, and in order to get this done right away I have to drive her two hours away to do so. Which is ok.. except I hate driving lol and then the added stress of worrying about my baby. She's only 5 and has to have it done at the childrens hospital up north. I've been through the tonsillectomy route with my husband and my oldest this time last year. They had them back to back! OYE VEY! lol It's just the worry of it all that gets me. Then my oldest is having issues with losing focus and the concern is great enough she has to see a specialist. My son is having issues with his disorders add on the million of things I worry about and the end of school coming.....
I need a nap lol! I'm not going anywhere I promise! I just need to take a time out for a day or two more to gather my wits. I will be posting templates later today though. I have those already done. I won't be posting anymore tuts until this weekend.
I'm sorry I promise I'm not flaking out on anyone :) I just need a time out. Anyone else need a time out.. let's all find a corner together! LMAO!
Much love,
Shani

Thursday, April 30, 2009
Tuesday, April 28, 2009
Queen of Rock Tutorial

Queen of Rock Tutorial
This tutorial was written on April 28, 2009 By Shani aka Wicked Princess and the concept of the tag is mine and mine alone. Any resemblance to any other tag or tutorial is strictly coincidence.
This tutorial is for anyone with working knowledge of PSP.
Supplies:
Scrap Kit from Kristin @ Wicked Scrapz called Rock Revolution can be found here:
http://kristinswickedscrapz.blogspot.com/2009/03/rock-revolution.html
Template by Alyssa (it’s the one with the star) can be found here: http://alyssastutorials.blogspot.com/2009/04/2-new-templates.html
Tube of choice, I used the artwork of Keith Garvey and you can find it at www.mypsptubes.com
Plugins:
Xero Radiance
Eye Candy 4000 Gradient Glow
Let’s get started!
Open up the template, deleting the info layer. Resize it by 84 % making sure that all layers is checked.
Open several papers of choice from the kit and minimize.
Activate the long rectangle layer first on your layers palette. Go to selections, select all then selections, float then selections defloat. Add a new raster layer and flood fill with your choice of paper. Got to selections none and delete the template layer. With the now filled rectangle layer active, go to your Eye Candy 4000 plug in and select gradient glow. Use the fat gradient glow set to the color black and the glow width of 3.00. Then re do the gradient glow with the same settings but set to white. Repeat these steps for all the template layers EXCEPT the star and circle background layer.
Next open Frame 2, resizing if needed. Copy and paste as new layer and move this layer in between the small rectangle layers. Adjust and resize if needed.
Then open the wire from the kit, you will need to resize this. Copy and paste as a new layer just below the circle frame layer. Make sure the frame layer is active then go to selections, select all then expand by 6. Activate the wire layer and hit delete on your keyboard. Go to selections none.
Open the metal doodle, resizing as needed and copy and paste as a new layer below the star frame layer. With the frame layer activated, go to selections, select all, then selections expand by 6. Click on the doodle layer and hit delete on your keyboard. Go to selections none.
Open your tube of choice and copy and paste as a new layer. Adjust where you would like for it to be. I used the plug in Xero, Radiance to add a different kind of effect to the tube. This is optional, If you use it, just hit random or mess with the settings until you find the one you like.
Add a thin white gradient glow to the tube to make it stand out a bit more.
This is optional: I made her pop out of the frame a little by doing the following….
Duplicate the tube once you have added all effects. Move one layer below the frame layer. On the top tube layer use your eraser brush and erase parts that you want the frame to show through. Use my finished tag as a guide.
Next add the elements of your choosing, resizing and adjusting as needed. Add text or word art of choice.
Don’t forget your copyright info and license number for the tube you used if needed! Add tagger info and your all done!
Thank you for trying out my tutorial
Monday, April 27, 2009
Sweet Elegance Tutorial

Sweet Elegance
This tutorial was written on April 27, 2009 by Shani aka Wicked Princess. The concept for this tutorial is mine and mine alone. Any resemblance to any other tag/tutorial is strictly coincidental.
Supplies needed:
Casual Elegance scrap kit can be found HERE
Template 11 by me, which can be found on this blog.
4 tubes of choice, I used the artwork of Israel Rac. You can find his work HERE . You must use a license number with his work.
Plug ins: Muera Meister Copies
Let’s begin!
*Remember to add your drop shadow of choice as we go through!
Open your template and delete the information layer.
Open several papers of choice and minimize for later use.
Open flower 3 and copy and paste as new layer. Move this layer to the bottom. Resize a bit if needed. Go to your plug ins, Muera Meister Copies and use the encircle setting. Adjust the settings to your liking and click ok.
Next activate your bottom template layer go to selections, select all then selections, float then defloat. Add a new raster layer and flood fill with your choice of paper. Go to selections none. Delete the template layer. Continue this for each part of the template.
Open the rose and resize as needed. Copy and paste as new layer and move below the frame background layer. Angle slightly to the left of the layer. Duplicate this layer and go to image, mirror.
Open the tubes of your choice, copy and paste the first one as a new layer and move below the frame layer. Adjust to where you want it and are happy with it. Using your magic wand tool, click inside the first frame. Go to selections, modify, expand and expand by 4. Then go to selections invert, and click on your tube layer. Hit the delete key on your keyboard. Go to selections none. Repeat this for the remaining frames and the tubes you choose.
Next open the lilies, resize as needed. Copy and paste as a new layer. Place to the left of the frame on the bottom. Duplicate this layer and go to image mirror. Repeat this process and add a second set just above the first set. Make sure to move the layers below the bottom ones.
Add bows of choice, resizing to the bottom of the lilies.
Add the remaining elements of choice and the final tube.
Don’t forget your copyright and license info to the tag and any text you like.
Don’t forget to save!
Thank you for trying my tutorial.
Friday, April 24, 2009
I've been Tagged!
Woot! I've been tagged by Nae, you can find her blog here:)
Here goes!
8 things I'm looking forward to( in no order)
1. not having a migraine for one day lol...
2 My childhood BFF coming home for the first time from the South in 4 years! We haven't seen each other in 9 years :) We've been friends all our lives.
3 A peaceful weekend with my kids just hanging out and having fun
4 the end of the mountain that is my laundry. Have you noticed that just when you think its almost done.. it goes up again?
5 The beautiful weather thats supposed to hold on for more than just two days!
6 Yard sale hopping with the family this summer! Gotta love the steals you can get!
7 Snuggling with the kids tonight to watch movies
8 registering my youngest for kindergarten this week coming.. full days here we come! lol
8 things I did yesterday
1 Played some addicting farming game on iwin.com
2 Made another template and tutorial
3 Emailed in mass quantities back and forth with my good friend Susan lol
4 did some of that pile of laundry
5 Made dinner with the kids
6 Played games with my silly babies
7 Chatted with hubby about ebay shopping
8 Went and picked up 8 kids after school and only 2 were mine lol!
8 things I wish I could do
1 Have super powers to heal the world
2 do a cartwheel
3 see with out glasses lol
4 meet some special friends that I have met online
5 not have a migraine...
6 take the kids to the zoo
7 see the loved ones I've lost
8 eat a bucket of KFC friend chicken! :P
8 things or shows I watch
1 Hells kitchen
2 Survivor
3 The Exterminators
4 Smallville
5 Dexter
6 Judge shows lol
7 Reba
8 VH1
8 People I tag:
1 Alyssa @ Alyssa Tutorials
2 Nee @ Envied and Admired
3 Vicki @ Pink Princess Designs
4 Delicious Scraps
5 cupcake Sprinkles
6 Juicy Bits
7 Krissy's scraps
8 Misfitz scraps
Thursday, April 23, 2009
New Taggies!
First up is the ever talented Vicki aka Pink Princess :) She used template 10 in this rockin' tag! If you haven't checked out her blog, make sure that you do! I've linked to her in my newest tutorial, but in case you missed it, you can find her here: http://vickipinkprincess.blogspot.com/ She does amazing tags and not too long ago started making kits, and they're awesome! She does have a few freebies on her blog as well as she designs for Scrappin Divaz! All her kits are reasonably priced, so make sure you check her out :) Ty my friend for the gorgeous tag!

Yay I love seeing this stuff :D
Next up is my homie Alyssa :D She used my Deliciously girlie tut and made this beautiful tag! Make sure you check out her awesome work at her new blog Alyssa's tutorials! She has a new tut up that I'm itching to try out :D You can find it here:
http://alyssastutorials.blogspot.com/
And the beautiful tag! Ty my friend!

Wednesday, April 22, 2009
My apologies and other wicked randomness...
I'm sorry that I haven't gotten tags up from those who sent them to me. I meant to do it last night and tweak the blog but my youngest wasn't feeling well. She had her check up yesterday and shots :( Bless her heart! She was up and down all night and hurting. On top of that we were all exposed to strep recently and I fear we may becoming down with it. I woke up with a sore throat and so did my son. I'm worried that my littlest one will get it again, as she had it in October that led to Scarlet Fever. This is so not fun.. lol. This all happens the day after we find out her tonsils need to come out. Oh the joys for me of going through this AGAIN! This time last year my husband was recovering from a tonsillectomy and my oldest was getting ready for hers. Good thing is I've been through it before, I just worry about seeing my baby sick and hurting :( *sighs* I know this will help her in so many ways though.
Oh and I ran off random again! lol I tend to do that a lot yes? :)
I'm going to take the afternoon to try and get some rest while I can and do a little laundry before my preschooler gets home. Then later this evening I'll be revamping the blog and posting tags. Also I've made the decision since I'm whipping tags out left and right and templates (I have done 18 already and only posted 10 lol) I will be posting templates AND tuts daily as I get the tuts done. This will help me catch up with my creative team too! I will be posting a new blinkie that Miss Alyssa made for me, bless her :D She's always up to a challenge, and my blinkie making just doesn't cut it! Lot's of stuff will be changing on the blog, things I've been meaning to do for over a week and haven't been able to. I'll make sure I explain things more when I'm done :)
If anyone has any suggestions or comments, let me know!
Much love and blessings,
Wicked Princess

Tuesday, April 21, 2009
Beautifully Vintag Tutorial

Beautifully Vintage
This tutorial was written on April 21, 2009 for those with knowledge of PSP. The concept of this tutorial is mine and mine alone. Any resemblance to any other tutorial is completely coincidental.
Supplies needed:
Kinda Vintage by Yvette @ Misfits Scrapz, and you can find it here:
http://misfitsscrapz.blogspot.com/2008/08/new-scrapkit-kinda-vintage.html
Template # 1 by Alyssa @ Alyssa’s Tutorials and you can find it here:
http://alyssastutorials.blogspot.com/2009/04/template-1.html
Tube of choice, I used the artwork of Keith Garvey and you can find his work at www.mypsptubes.com Make sure you use your correct license info on the tag.
Plug Ins (optional)
Xero-Radiance
Let’s get this going!
*Note add drop shadow of choice as you go through
Open your template and delete the top layer.
Open your choice of Bracket 1 or 2 from the kit, copy and paste as new layer and move this layer to the bottom, below your circle layer.
Next open 5 papers of choice and minimize. You’ll be using these in the materials palette under patterns.
Click on the first circle layer activating it. Click on your magic wand tool, and click inside the circle. Go to selections, float then selections defloat. This helps to not make the edges look so jagged.
Add a new raster layer, and activate your flood fill tool. Go to the materials palette and under the pattern tab, choose your paper of choice. Flood fill on the new raster layer. Go to selections, none. Delete the circle template layer. Continue this for each layer of the template.
Open rose 2, resize as needed and copy and paste above the doodle layer. Add drop shadow of choice and then duplicate. Go to image, mirror and it should show up on the opposite side.
Next open fan 2, resize as needed and copy and paste above the last rectangle layer. Open Pearl 3 and resize as necessary, copy and paste it putting in over the center bottom of the fan.
Open Painted flower1, resizing and copy and paste to the left side of the rectangles. Duplicate this layer and go to image, mirror. Adjust if needed.
Next open Envelope 1, resize and copy and paste as a new layer above the left painted flower. So that it falls just below the right one.
Open Tag1, resize and copy and paste to the left of the rectangles , angling as you like
Open the book, resize and copy and paste as a new layer. Angle it to the right, adjusting as needed.
Add the bows to the stems of the rose.
Next open your tube of choice, and use the plug in Xero, Radiance. You may play with the settings, or use the ones I did shown below in a screen shot.

Duplicate the layer and go to image, mirror.
Add text of choice.
Don’t forget to add your copyright info and license info!
Save and your done!
Thank you for trying out my tutorial!
Monday, April 20, 2009
Wickedly Random...

Just a few notes friends.. I'm going to be working on changing things on the blog, making things more accessible and hopefully find a better layout. I'm not sure what I'm looking for yet, but I know I want it to really "fit" me lol.
Let's see what else....
Oh yes, if you haven't already, go check out my girl Alyssa! She FINALLY decided to come to the dark side muahahahahahaha and start blogging! She's doing tutorials and templates now too! She's wickedly talented and super sweet! Check her blog out at:
http://alyssastutorials.blogspot.com
I downloaded her first template and made a pretty sweet tag with it.. even if I do say so myself! ;) I'll be making it into a tut this week.
Also I've been on quite a roll the past week or so, managing to whip out more templates that my CT team can keep up with ;) So I'll be posting every day either tuts or templates alternatly. So make sure you check it out! If you haven't already, subscribe to the blog!
I think that's all for now, so I'm signing off my friends to post a new template and get away from the computer. Since sunset is coming and the last bit of day time sun is blinding me right in the eyeball lol!
Have a good night friends!

More tags from friends!
Yay I have a bunch to post today :) Hopefully I get them all and don't miss anyone! :)
First up we have Miss MamaCita @ BFF Kreationz and she made some wicked tags for me this week! Make sure you check out template 8 preview, she put up a new one for me! LOVE IT! Make sure you check out BFF Kreationz! She is coming up with some pretty sweet tags!
This one is with Template #7...I really like the colors she used, not what I expected!

And the second one is from good friend Alyssa! She actually made this for a fabulous FTU tutorial she wrote on her blog! YAY Alyssa is sucked into the blogging world with me! And bless her heart she used my template :D Make sure you check her out! She's a super sweetheart and incredibly nice :) And not to mention incredibly taleneted! I've always been a fan of her work!
You can check out her blog here:
http://alyssastutorials.blogspot.com
And the tag...

Next is Natasha.. She left me this sweet Lix tag in my shout box! She used template 7 for this pretty spring tag! Thank you!

And lastly.. Is my sweet friend Susan who sent me this wonderful tag today! I laughed because we had the same idea and snagged the same FTU scrap kit! I was so excited when I saw the kit and even more surprised when I saw the tag! She used Template #8

Thank you to everyone for sending me your work! Beautiful tags my friends!
Sunday, April 19, 2009
Delicously Girly Tutorial

Deliciously Girly Tutorial
This tutorial was written on April 19, 2009 and the concept of the tag is mine. Any resemblance to any other tag is coincidental.
Supplies needed:
Delicious scrap kit by Blue Dream Designs, can be found here:
http://bluedreamdesigns.blogspot.com/2009/03/delicious-freebie.html
Template by Rebel Chick can be found here:
http://whispersofamemory.blogspot.com/2009/03/2-new-templates-4-u.html
Tube of choice, I used the artwork of Angela Newman and you can find her work @ www.artisticminds.com
Plug in Muera Meisters Copies
Mask of choice
Let’s get this party started!
*note add drop shadow of choice through out as you go.
Open the template and delete the copyright layer. Also remove the staple layer, we won’t be using it.
Open several papers of choice, and minimize them.
Click on the bottom template layer and add a raster layer. Move this blank layer to the very bottom.
Flood fill the area with a paper of choice. Add your mask, and remember to merge group.
Next open a flower of your choice from the kit, you may need to resize just a little. Place in center of your canvas.
Go to your plug in Muera Meister Copies, and from the drop down menu select encircle. Make your settings what you would like, keeping in mind this is going to go below the first circle layer. Click ok. You may need to adjust the size a bit.
Move this layer below the first circle template so that the petals just peek out.
Make the first template layer active. Using your magic wand tool, click inside of the circle. You should see dancing ants around it. Go to selections, float then selections, defloat. This helps take away the jagged edging you get when you flood fill the area. Add a new raster layer, and flood fill with the paper of your choice. Go to selections none and delete the template layer.
Continue this for each layer until you have a completely filled template.
Next pic the scalloped frame from the kit, open and resize as needed.
Copy and paste it into the center of your canvas. Using your magic wand tool, click inside the frame. Go to selections, modify, expand and expand by 6. Add a new raster layer and flood fill with your choice of paper. Go to selections, none. Move this layer just below your frame.
Add your tube of choice. You’ll notice I have it so her foot and the animals feet are inside the frame, yet her head is out of the frame. To do this I added the drop shadow I wanted to use and then duplicated the layer. I moved the second tube layer (the duplicate) just below the frame layer. On the top tube layer above the frame, I used the eraser tool and erased the parts I didn’t want to show outside the frame.
Next go through and add the elements of your choosing. You can go by what I did or make or do it your way J
Add your text if you choose any, the copyright info for the tube, license number if needed and your tagger info.
Save and your all done!
I hope you enjoyed this tut, and I would love to see your results!
Thank you for trying this out!
New Beautiful tags from Friends!
I'm always so thrilled to see what work ya'll can come up with! And your keeping me busy! lol. I have to say I've gotten some really positive feedback this week and its really making want to do this more! I thank you all :)
First up we have the ever talented Regina! I'm always amazed at what she comes up with and she never fails to surprise me! I so appreciate her and her love and support. She's an amazing tagger, and you must check her out @ Sinister Scraps! You can find her link over there on the sidebar :) Ty Miss Regina for your hardwork and sharing! *For you Twilight fans, this tag was inspired by it :)

Next we have my girl MamaCita! I love her work and she took time out of her busy days to shoot me a few tags :) I so appreciate her and the fact she uses my stuff :) She helps me out so much, because I'm a ding dong when it comes to the simple things, like support codes and such. What would I do with out her? :) You can find more of her amazing work @ BFF Kreationz you know where to find her linky! Over there ==>>

Then finally we have Michele, who I just met through my myspace page. She shares a wonderful tag site Called Patriotic At Heart Designs. I just added her link this week to the sidebar, check her out! Michele had let me know that she was fairly new to tagging and loves to learn! She has been checking out the blog and has done a tut and checked out a few templates. I think its so cool and honored she shared her results with me! You go girl! :) I'm so happy she's able to use this stuff! Keep on crating girl :)
Here are her tags from the Layers of love tutorial, Templates 1 and 3!


Thursday, April 16, 2009
A heartfelt thank you...

Good morning friends! I wanted to take a time out from my tagging and template creating to say a heartfelt thank you to all of you. Every day I come on here to add stuff, check out the blog, read the chat box and I'm so excited! So many hits to the blog, people leaving love and beautiful tags I see.
Anyone who knows me well, knows I truly love tagging. It's a huge stress reliever for me and a chance to be creative. When I started tagging, I learned all on my own. I didn't have anyone teaching me or helping me. I started out slow and discovered tutorials. I didn't understand them at first and found some easier beginner ones. Then it just sort of took off from there :) I'm excited to be able to help out and create and do tutorials. I'll be honest I was hesitent at first in doing them, but I remembered how hard it was to do this with out a little help at first. I really want to work on some beginner tuts this weekend too. More step by step instructions... there I go off on my own random thoughts again! lol
All in all, I love doing this blog and I thank all of you who come by and check it out, take the time to use the templates or do the tuts. I really love it when you show me your work! It doesn't matter how many ya'll send me.. I'll post them!
Thank you for the love, and loyalty :)
Much love,
Wicked Princess

Wednesday, April 15, 2009
Tag Show off's....
I got some wonderful tags sent to me today! I love them and so pleased to see the results!
First up is from Regina @ Sinister Scraps, and she did the tut Rockin' at the club, and btw I love the tube she used.. I didn't even think about that one! ;) Here is her result:

And next up as always is the mighty SisterDuck @ BFF Kreationz, she did the Groovy Superstar tutorial and did an awesome job! I like her choice of tubes for this one too! Her results:

Tuesday, April 14, 2009
Spring Princess Party Tutorial

Spring Princess Party Tutorial
This tutorial was written on April 13, 2009 by Shani aka Wicked Princess and the concept of the tag is mine and mine alone. Any resemblance to any other tag is coincidental.
Supplies needed:
Wicked Template #1, which can be found on this blog
Kit of choice or the one I used, Spring is here (FTU) and can be found here:
http://lacarolitasdesignz.blogspot.com/2009/03/freebie-spring-is-here.html
Tube of choice, I used the artwork of CEI which can be purchased through www.mypsptubes.com
Let’s party! This is going to be a quick and easy one!
*note add drop shadow of choice as you go
Open the template in PSP, delete the copyright layer.
Open 5 papers of choice and minimize to be used later.
Make sure the circle layer is active and using your magic wand tool, click on the inside of the circle. Go to selections, float then selections, defloat. Add a NEW raster layer and flood fill with the paper of your choice.
Continue this for the rest of your template.
Open the tree of choice, resizing as needed and place in the center of the bottom rectangle. Make sure it’s the top layer.
Open the rainbow, sun, flowers of choice, bee’s, ribbons and kit of choice, placing where you would like them (look at my tag for reference)
Add tube of choice, copyright, license info and taggers marking.
Add the text of your choice and save!
See wasn’t that easy? J
Thank you for trying my tutorial!
New Presents from my friends :)
I'll say it again.. I LOVE when my friends make me stuff! It's always such an honor to me to see the beautiful tags ya'll come up with when you use my stuff. It shows me how much you enjoy the things I do and makes it so worth while! I've made the decision too that I'll be using a lot of the tags as "signatures" when I make random posts and such. I want to show off ya'll brilliant work always :)
Regina sent me this beautiful tag, using Template 6. I almost forgot Mothers Day was creeping up on us already, until I saw her tag lol! Having lost my own mom 6 and a half years ago, It's hard for me to enjoy Mom's day as much as I used to.. up until this last year when my kids reminded me that its ok, La La (as they called her) celebrates with us in heaven always. I'm looking forward to it this year.. so ty Regina for the reminder of Mom's day and I'm happy and honored you made me this tag! You so ROCK!
Regina's tag.. remember you can check her out at Sinister Scraps, link over there----->>
Susan my beautiful friend from Scotland, sent me her version of my newest Tutorial, Rockin in the Club! I love how she changed it up a bit and added her own flair to it! We both love Rock tags and she knows me so well already :) I adore this tag! I'll be using it soon for sure!
Susan's work:

Regina sent me this beautiful tag, using Template 6. I almost forgot Mothers Day was creeping up on us already, until I saw her tag lol! Having lost my own mom 6 and a half years ago, It's hard for me to enjoy Mom's day as much as I used to.. up until this last year when my kids reminded me that its ok, La La (as they called her) celebrates with us in heaven always. I'm looking forward to it this year.. so ty Regina for the reminder of Mom's day and I'm happy and honored you made me this tag! You so ROCK!
Regina's tag.. remember you can check her out at Sinister Scraps, link over there----->>

Susan my beautiful friend from Scotland, sent me her version of my newest Tutorial, Rockin in the Club! I love how she changed it up a bit and added her own flair to it! We both love Rock tags and she knows me so well already :) I adore this tag! I'll be using it soon for sure!
Susan's work:

Monday, April 13, 2009
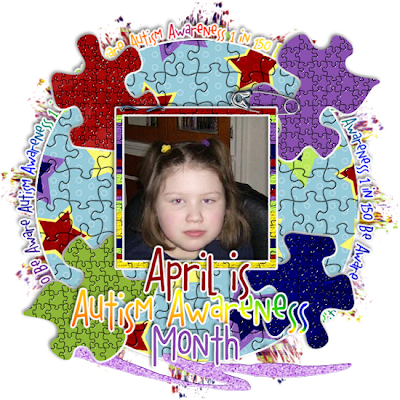
New tag for Autism Awareness!
This beautiful tag was made by Regina @ Sinister Scraps using Wicked Template # 4. I love it and it turned out so awesome! Ty to Regina for helping to spread the word about Autism and using your Rockin' Talents as a tagger to promote it! You rock my friend! You can check out Regina's tag site on myspace by clicking on the link on the sidebar for Sinister Scraps. Let her know I sent you!
Also check out www.autismspeaks.org to find out more about Autism, and how you can help!
The tag by Regina:
Also check out www.autismspeaks.org to find out more about Autism, and how you can help!
The tag by Regina:

Thursday, April 9, 2009
Candy Land Tutorial

Candy Land Tutorial
This tutorial was written on April 9, 2009 and the concept for the tag is mine. Any resemblance to any other tag or creation is of pure coincidence.
My daughter Otelia named this tutorial since I was having a hard time coming up with a name!
Supplies needed
Missy template 184 can be found here:
www.divineintentionz.blogspot.com
Scrap kit of your choice or the one I used, Candy Bunnie which can be found here:
http://lacarolitasdesignz.blogspot.com/2009/03/freebie-candy-bunnie.html
Tube of choice
I used the art work of Tori Beveridge which can be found @ AMI, www.artisticminds.com. Please make sure you have the correct license and copyright info on your tag.
Fonts of choice.
Let’s get started on this sweet tag!
*remember to add drop shadows of choice as you go!
Open up your template, delete the copyright layer and the white background layer.
Go to the bottom layer and add a raster layer, moving it to the bottom of the layers.
Open a paper of choice, and flood fill that layer with this paper.
Open Candie_Bunnie temp 1, resize as needed and add as new raster layer just above your background layer.
Duplicate this layer then go to image, mirror.
Close off the other layers EXCEPT for the pink temp layers. Merge visible.
Duplicate this layer, then go to image flip.
Merge both Pink temp layers.
Open up the other layers.
Choose a doodle of your choice as well as a glitter splat of your choice.
Add as new layers just above your pink temp layers. Resize as needed.
I chose to duplicate and then image, mirror then image, flip for both the doodles and splats. You may adjust to where you would like them.
Open 4 papers of your choosing.
First select the rectangle layer with your magic wand tool.
Go to selections, float then selections, defloat.
Add a new raster layer. Flood fill with your choice of paper.
Delete the template layer, then go to selections none.
Continue this for each piece of the template.
Pick a décor of choice. Resize as needed, place as new layer to the right of the circle. Duplicate and go to image, mirror then image, flip.
Open lollipop of choice, resize as needed and paste to the right on the upright rectangle.
Open Flower of choice and resize as needed, placing just below the lollipop.
Open bunny of choice, resize as needed and place to the left.
Add your tube, place where you like.
Next, add your copyright info, license info, tagging watermark.
Then add what ever text you like! And your done J
Thank you for trying my tutorial, I would love to see your results!
New Tag from Susan!
Susan's been a busy girl! lol.. here is the latest taggie from Susan using template 3 :)


Wednesday, April 8, 2009
Yay For Sister Duckie!
LOL! I love to pick on her ;) She made this very pretty tag with template 3, I love it! Ty hon!


Tuesday, April 7, 2009
New Tags!
Yesterday while I was out taking care of stuff, Miss Alyssa, MamaCita and my new friend Susan were working on new tags! WOOT WOOT lol... I got these in email yesterday and I love them!
First one is from Alyssa, remember she has her own myspace request site A+ Designs! You can find her amazing work there... you can find the link on the sidebar under sites I love. Make sure you told her I sent you! And her creation.. using btw one of my favorite Gorjuss girls :D Yay for spring! The colors were awesome, and I love how she made the template 3 fit in like a garden trellis! How cool is that? It all just fits so perfect together

This one is from MamaCita @ BFF Kreationz, as always she blew me away with her creativity! I love the colors and how well she put everything together. You can also find her work along with SisterDuck on myspace, their link is in the sidebar under sites I love. Make sure you send a note with your request telling them I sent ya! Here it is...
Last but never least, :) is Susan! From the moment I started this blog, she's been right out there sending me stuff and I fell in love with her work! It's awesome and she really took Template 4 in a new direction, and it really worked! I was impressed by how she didn't use any kits with this one, just strictly colors and plug ins! I'll have to get her to show me a few tricks ;) Ty Susan!

As always if you send me your tags, I'll post them AND I'll put them in the slideshow!
Thanks again ladies!
Much love,
Wicked Princess
First one is from Alyssa, remember she has her own myspace request site A+ Designs! You can find her amazing work there... you can find the link on the sidebar under sites I love. Make sure you told her I sent you! And her creation.. using btw one of my favorite Gorjuss girls :D Yay for spring! The colors were awesome, and I love how she made the template 3 fit in like a garden trellis! How cool is that? It all just fits so perfect together

This one is from MamaCita @ BFF Kreationz, as always she blew me away with her creativity! I love the colors and how well she put everything together. You can also find her work along with SisterDuck on myspace, their link is in the sidebar under sites I love. Make sure you send a note with your request telling them I sent ya! Here it is...

Last but never least, :) is Susan! From the moment I started this blog, she's been right out there sending me stuff and I fell in love with her work! It's awesome and she really took Template 4 in a new direction, and it really worked! I was impressed by how she didn't use any kits with this one, just strictly colors and plug ins! I'll have to get her to show me a few tricks ;) Ty Susan!

As always if you send me your tags, I'll post them AND I'll put them in the slideshow!
Thanks again ladies!
Much love,
Wicked Princess
Monday, April 6, 2009
Wicked Notes....
Hi all! I wanted to check in and run a few random things.. because by now some of you have figured out I can be pretty random :P I hope to start working on a new template tomorrow, while I have some quiet time. I wanted to do it yesterday and today but other things came up. As I was dozing off last night I had several idea's for kits and templates! Doesn't the creativity always hit you when your half asleep? lol I'm hoping to be able to work on my notes for the stuff tomorrow.
Also I was mesmerized today by the amount of hits this blog has gotten! I had over 100 hits today alone! How cool is that? Also I absolutley LOVE when anyone sends me stuff that you make with my tutorials and anything else I make! It's such an honor to have ya'll share that with me! I will post them too as well as put them in a slide show at the bottom of the page. So make sure you send me your stuff!
I don't require you to leave comments when you download, but I love to see comments in the CBOX over there---->>>>> so feel free to leave comments, suggestions, whatever you like!
And.... I'll be announcing this week my new Creative Team who will test out my templates, and scraps I make. So stay tuned!
Oh and I was asked if I ever plan to going PTU.. the answer is.. thats a far way off lol. I know I'm not good enough to go PTU, so instead I'd rather stay FTU and help out my fellow taggers!
Ok that's enough for me.. time to get the monsters..er.. the children ready for bed :D I shall return in the next day or so with new stuff!
Much Love,
Wicked Princess
Saturday, April 4, 2009
New Taggies and other randomness...
MamaCita @ BFF Kreationz, made me this AWESOME, gorgeous tag with Template 3! I was really impressed :) She's such a sweetheart, her and SisterDuck.. you must check out their site on myspace! I have a link to their site posted on the sidebar. Make sure you tell them who sent ya :
Here's the taggie--

On a side note.. I made the decision to close the site on myspace that I shared with my brother. So many things have been crazy for my whole family the last few weeks, that it was time to just close it. I hated doing it because there are so many beautiful and inspiring friends there who are incredibly loyal to us as taggers and friends. I felt bad letting them down in some ways by not being able to be on the site as much. I really wanted to take the next step in my tagging career (as Alyssa calls it lol) and really venture out and find something that I could call completly my own. This is why I'm doing this blog. I want to be able to help beginners, as well as the more advanced PSP'ers. I learned completly on my own and it sucked lol.. I want to be able to help anyone who asks!
To be able to do this and share is an honor, and I've met some super awesome people already and am very blessed by their friendship and support. I thank everyone for stopping by and checking out the site! Make sure you look at all posts.. I have a little bit of everything mixed in lol. I'll try to get links more organized soon. I would love to see your creations and anything you make using my templates, scraps or tutorials I will proudly display for everyone to see! Please feel free to email me at anytime with any questions you may have! Subscribe to the blog to keep up to date my friends!
Much love and Blessings,
Shani aka Wicked Princess
Thursday, April 2, 2009
Few notes from the Wicked One...
I want this blog to be user friendly, so if you have any suggestions please let me know! My good friend MamaCita @ BFF Kreationz (which you can find the link to over there somewhere --->>) suggested a chat box.. so I have :) Feel free to leave some love, questions or anything you like!
I'm working on a tutorial for Autism Awareness and should have it ready by tomorrow evening :)
It's been a long week and a crazy one here for us. I'm trying to get a bunch of stuff done and prayerfully will have some time this weekend to work on new templates and stuff :)
So keep an eye out friends!
Much love,
Wicked Princess
Fabulous tags!
Both of these were made for me from Susan! She used Wicked Template # 2 for both and you'll recognize the Groovy Superstar one from my tutorial. She really kicked butt on these! They are incredible and I love them :)
Remember if you'd like to see your tags up here on my blog, just send them on through to me and I'll post them! :)
Thanks again Susan!


Remember if you'd like to see your tags up here on my blog, just send them on through to me and I'll post them! :)
Thanks again Susan!


Subscribe to:
Posts (Atom)