Showing posts with label Tutorial-PTU. Show all posts

Sunday, September 14, 2014

PTU TUT! "Football Fan"


This tutorial was written on September 14, 2014 by Shani aka Wicked Princess. The concept of this tag is mine and mine alone. Any resemblance to any other tag/tut is pure coincidence. This was written for those with working knowledge of paint shop pro.

Supplies Needed:

++Paint Shop Pro (I use version 10 but any will work)

++Tube of choice, I used the work of Freya Langford-Sidebottom and you can purchase it HERE

++kit of choice. I used a kit by Gimptastic scraps called Football Fan and you can find her blog HERE and go to any of her stores to purchase the kit!

++Font of choice I used “Yummy Cupcakes”

Here we go! I’m a little rusty at tuts…so forgive me lol

Open up a new canvas of 600x600 and transparent background. Remember you can always resize it later.

Pick your choice of frame. I used Frame 5. Copy and paste it as a new layer. Resize it as you like. I made it a bit smaller by using the pick tool. Place your cursor to one of the corners so that it turns into a cross with arrows on it. Click it and drag inward. Once you’ve done that, go to EDIT>CUT> then to EDIT>PAST AS NEW LAYER. This centers it in the middle of the canvas.

Next, pick out which ever mask looking element you like. I used dots. Open the element, then copy and paste it to your canvas. Move it to below the frame and towards the edge on the top. Duplicate it and go to IMAGE>MIRROR then IMAGE>FLIP. Adjust it if you need to. At this point you should merge these two layers down. Right click on the top one, then click on MERGE DOWN. This will make the masks just one element.

Next open the bracket element. Resize it as you like, then copy and paste it as a new layer. Move it to the right upper hand corner of your frame. Make sure it’s moved down to below the frame layer. I angled mine a bit, so it peeks out. Right click then click on duplicate. Go to IMAGE>MIRROR> then IMAGE>FLIP.

Now, open the paper you like. I used paper 7. Use your crop tool, and crop out a smallish rectangle. Go to EDIT>COPY then EDIT>PASTE AS NEW LAYER. Move it to the right and then below the bracket layer then angle it as you like it. Duplicate it and then flip it to the to the other side. Then use your eraser tool to erase the parts of the paper you don’t want seen outside the bracket.

We’re going to jump really quick to adding a background to the frame and then the tube. I know, I know, I’m all over lol. So pick out a paper or another background that you like. I used the player background. Copy and paste it as a new layer, then move it to below the frame. Use the magic wand  tool and click inside your frame. Then go to SELECTIONS>MODIFY>EXPAND by five. Then click on the background and go to SELECTIONS>INVERT. Then hit the delete key. Go to SELECTIONS>SELECT NONE.

Next open an arrow or cheveron. I used the chevron tool. Open it up then go to EDIT>COPY then EDIT>PASTE AS NEW LAYER. Move it to the left and adjust as you like.
Open your tube, copy and paste the tube on to your canvas. Move it up above the frame. Resize and adjust as you like. I moved it to the right some.

Open the ticket stub. Copy and paste it into your canvas. Move it to just below the frame. I moved it to the right at about the center of the bracket. Angle it as you like.

Now open the flag. Resize it, then copy and paste it into your canvas. Move it to the right of the frame, below the tube.

Open the football fan sign. Resize it then copy and paste as a new layer. Move it towards the end of the frame, above the tube layer.

Then open the following elements, the t.v., the soda bottle, and keychain. Cluster them as you like to the right side of the frame and center.

Next, open the score board, copy and paste it into your canvas. Move it below the frame layer and resize with your pick tool and adjust as needed.

Open the receivers sign. Rotate it to the left, then copy and paste as a new layer to your canvas. Move it to the right of the frame, above the tube layer. Adjust as needed.

Then open the football and the hat, and copy and paste them to your canvas. Move to the bottom left and cluster as you like. Duplicate the football then move it to the upper right hand corner, below the tube layer.

Open the heart and the whistle. Resize as needed, copy and paste as a new layer. Move it to the upper left hand corner of the frame and cluster as you like.

now open the hands, copy and paste as a new layer. Move to the left of the frame, at the corner of the bracket. Duplicate it then move the other one to the other bracket

Next, open the tape element. Copy and paste it as a new layer. Move it to the upper left hand corner of the frame, and move it to below the frame and background. Duplicate it and then move it to the bottom right corner, opposite side.

Finally, add your credits, license numbers and whatever else you like. Always save a copy as a PSD or a PSP image! I suggest saving the other one as a PNG so that the background is transparent.

Thank you for checking out my tutorial! Have fun and I would love to see anything you make from this tutorial! Email me at superrainpolly@gmail.com


Tuesday, January 22, 2013

PTU "goodnight moon" featuring "tooth fairy time by gimptastic tuts


This tutorial was written on January 22, 2013 by Shani aka Wicked Princess. The concept of this tag is mine , and mine alone. Any resemblance to any other tag/tut is pure coincidence. This was written for those with working knowledge of paint shop pro.

Supplies Needed:

++Paint Shop Pro (I use version 11, but any will work)
++Tube of choice, I used the work of Suzanne Wolcott, note that the house and tree are by her as well!
++kit of choice. I used a kit by Gimptastic scraps called “tooth fairy time” You can find her blog HERE and go to any of her stores to purchase the kit!

++Font of choice I used “swagger”

Here we go! I’m a little rusty at tuts…so forgive me lol

Open a new canvas of 800x800, transparent. Remember you can resize later. Then go to image, resize and size it down to 80%. Weird I know..but that’s how I did it.
Pick your choice of frames, I used the double window frame. Copy and paste as a new layer. Adjust as needed.
Next you will want to pick paper 2 and copy and paste as a new layer. Size it down to what you like, then use your pick tool to angel it to the left. Duplicate and then go to image>mirror then Image>flip. You may need to adjust a little!
Now open two papers of your choosing. I used two different ones to give it a different feel. Using your magic wand tool, click in the left side of the frame. Go to selections, modify, expand and expand by 10. Add a new raster layer and flood fill with the paper of your choosing. Repeat this for the opposite side.
Then I opened the two swirls, one the light blue one and then the stars. So copy and paste the swirl as a new layer. Center it as you like. Add the stars swirl, duplicate it then go to image, flip then image mirror. Adjust as needed.
Open the doors with the stars. Add it to the left side, note I added the house and the tree;s. If you don’t  have those you can add another tube or more elemetns. Resize the door to what you like, then copy and paste as a new layer. Angle it to the left a bit, then duplicate it, mirror then bring it over so it overlaps the other one a bit.
Now open the bed, resize it then copy and paste as a new layer at the bottom of the doors. Angle it a bit then add the pillow to the end of it.
Next you will want to open the yellow lanters. Copy and paste as a new layer and resize. Move them up to the top of the frame and adjust as needed.
Then add the shoestring bow over the top of that. Add the half moon to the left of the frames.
Open the winged clock, then copy and paste as a new layer. Center it to the top of the frame.
Add the tube of your choice to the right frame.
Cluster the floss , tooth paste and tooth brush to the right of the tube.
On the other side, cluster the hearts, rose, butterfly and tooth to how you like it.
Add the text you choose, I just happened to make something up and add it!
Don’t forget your copyrights and watermarks! Note that I put the info ON the tube..this helps so that people don’t illegally rip the tube.
I hope you enjoyed the tut! 


Tuesday, January 24, 2012

Sorrowful-PTU


This tutorial was written on January 24, 2012 by Shani aka Wicked Princess. The concept of the tag is mine and mine alone. Any resemblance to any other tag/tut is pure coincidence. This was written for those with working knowledge of Paint Shop Pro.
Supplies Needed:


++Paint Shop Pro ( I used 10 but any version should work)


++ Tube and close up of choice. I used the work of Tony Tzokanokis and You can purchase his work currently at PSP Tubes Emporium

++Scrap kit of choice, I used the cute kit Sorrowful You by Tasha of Tasha’s Playground


++Fonts of your choice. I used one called Porcelin
++Plug ins-Xero, Radiance (optional for close up)

**NOTE ADD DROP SHADOWS OF YOUR CHOOSING AS YOU LIKE! AND SAVE AS YOU GO!

Open a canvas of 800x800 and make sure it has a transparent background. Remember we can resize this later.

Open the circle frame you like, I personally used frame4. Copy and paste as a new layer into your blank canvas.
Using your magic wand tool, and click inside the circle frame. Go to selections, modify, expand and increase it to 10. Add a new raster layer and flood fill with your choice of paper. Go to selections, none.
Open your tube of choice, and choose the close up. Copy and paste as a new layer above the paper layer. Use your plug in xero, radiance on it. I just chose a random setting and then click ok.

Go to effects, texture effects, blinds and set it to the setting you like with the color set to black. Click ok.

Now use your magic wand took again, and go to the frame layer. Click inside the frame layer and go to selections, modify, expand and expand by 10. On the close up layer go to selections, invert then hit the delete key. Go to selections, none
Next open up up the leaves element. Copy and paste as a new layer. Move it to the right of the frame, duplicate it and go to image, mirror. Merge down one layer then go to duplicate, image flip. Duplicate one more time then go to image, free rotate and set it to 90. Merge down the three layers so the leaves are all on the same layer. Then move this layer to the bottom of the canvas.
Then open the red branch, copy and paste as a new layer to the left of the frame. Make sure this is on top. Duplicate it then go to image, mirror. Add two flowers at the ends of the branches like I did.

Add the winged heart to the bottom center and then the crow to look like it’s sitting on it.
Next copy and paste the full tube to the right of the frame. Move it so it’s just above the frame layer. Adjust as you like it. Note that I erased the very bottom so it was hidden behind the flowers.
Don’t forget your copyrights and tagger markings! Save and you’re done! Thank you for trying my tut.

Sunday, December 4, 2011

Faery Magick PTU


This tutorial was written on December 4, 2011, Shani aka Wicked Princess. The concept of the tag is mine and mine alone. Any resemblance to any other tag/tut is pure coincidence. This was written for those with working knowledge of Paint Shop Pro.
Supplies Needed:


++Paint Shop Pro ( I used 10 but any version should work)


++ Tube of choice or the one I used, which is Shanomneya/Purple Mist by Denise Garbis aka SwtMeloDe which is available for purchase from The Art of Giving you can find out more about this cause and how to purchase the tube HERE *Note for the month of December you buy a tube you get a kit for free!

++Scrap kit of choice, I used Garden Magick by Kate aka 2 Irish Bitches Designs and it’s an exclusive to the Art of Giving. you can find out more about this cause and how to purchase the kit HERE *Note for the month of December you buy a tube you get a kit for free!

Visit Kate's main blog HERE


++Fonts of your choice. I can’t remember what I used! LOL

**NOTE ADD DROP SHADOWS OF YOUR CHOOSING AS YOU LIKE! AND SAVE AS YOU GO!

Open a canvas of 800x800 and make sure it has a transparent background. Remember we can resize this later.
Next open the large wooden frame you like. I used frame 3 and resized it when I pasted it to the new canvas. So copy and paste the frame into your new canvas. Resize as you like it.

Now open the paper of your choosing. I used paper 1 because it gave me a “scene”. Copy and paste as a new layer and move it below the frame. Adjust it and resize as you like it so it shows the scene you like. Click on the frame layer and activate your magic wand tool. Click inside the frame and go to selections, modify, expand by 10. Back to the paper layer go to selections, invert then edit, clear. The selections, none. Now you have a nice new scene!
Then open the purple mushroom cluster. Resize it then copy and paste as a new layer below the frame layer. Place it somewhere in the bottom center of the frame. Adjust it as you like.

Now open your tube of choice. I used the second close up of the fairy, and copy and paste as a new layer. Move it to where you like, I move it to the right of the frame. Once you are happy with the placement, duplicate it then move one below the frame layer. Go back to the frame layer, and activate your magic wand tool. Click inside the frame and go to selections, modify, expand by ten. Then back to the bottom tube layer, go to selections, invert. Hit the delete key or go to edit, clear. Go to selections none. Back to the top tube layer, activate your eraser brush and remove the parts of the tube you don’t’ want seen outside the frame. To make it look like it’s “popping” out!
Open up the ivy branches, which is leaves 1. Resize then copy and paste as a new layer just above the frame layer. Yes still below the top tube layer. Move to the upper right of the frame. You may need to resize it again some. Adjust as you like. Duplicate it and go to image, mirror then image flip.

Then open the snail stand and resize it then copy and paste as a new layer. Move it to the upper left of the frame. You may need to adjust and resize it some.

Next open up the pond, resize it then copy and paste as a new layer to the bottom of the snail stand in the lower left corner of the frame.

Add the book to overlap the pond.

Now add a new raster layer and move it to the bottom of the layers so it’s below even the scene paper. Flood fill with your choice of color or paper and add your mask of choice!

Add your text, copyrights, tagger markings. Thank you for trying my tutorial!

Tuesday, May 17, 2011

Today's Attitude PTU


This tutorial was written on May 17, 2011 Shani aka Wicked Princess. The concept of the tag is mine and mine alone. Any resemblance to any other tag/tut is pure coincidence. This was written for those with working knowledge of http://www.blogger.com/img/blank.gifPSP.http://www.blogger.com/img/blank.gif

Supplies Needed:

++Paint Shop Pro ( I used 10 but any version should work)

++Scrap kit Toxic Candy by Rieka Rafita and you can find it here
http://www.blogger.com/img/blank.gif
++Template 95 by Creative by Nature HERE

++Tube of choice or the one I used the artwork of Lady Mishka and you can now find her work at Scraps and the City HERE


++Plug ins:
-penta.com-color dot


**NOTES:
-Add Drop shadow of choice as you go
-You can merger layers as you want to make things easier for yourself.

Open the template in PSP, using your shortcut keys on your keyboard (SHIFT+D) duplicate the template as a new image. Close the original.

Open several papers of choice, resizing as needed. For example, when I look at the blue bar where it tells me what I’ve opened (say like paper 2) it tells me what percentage I’m viewing it at. For me it’s usually 16%, so I resize to 16% bringing it to 100%. ( I hope that made sense!) Once you’ve done this, minimize for later use.

Next go to the bottom template layer and go to selections, select all, then float, selections defloat. Don’t forget to go to selections, none then delete the template layer. Repeat this process for the rest of the template.

Add a new raster layer and flood fill with your choice of paper. Add your mask of choice. Merge the group. Move to the bottom of the palette.

Open the glitter splatter of your choosing. Copy and paste as a new layer just above the mask layer. Move it to the upper right. Duplicate it and go to image, flip. Merge down one layer. Duplicate it again and go to image, mirror. Adjust as needed.

Next open the curly ribbon of your choice, resize then copy and paste as a new layer to the left of the canvas. Again, just above the glitter layer. Duplicate it and go to image, mirror.

On the right small rectangle, the faded one, change the opacity if you want to. I did and made it 100 percent. Open your tube and then copy and paste as a new layer. Adjust and move over the rectangle layer. Duplicate it then with the bottom layer active, go to adjust, blur, guassian blur, set it to 3.00. Then on the layers visibility, change it to overlay. Merge down one layer. Go to your plug in penta.com, color dots. Set it at your settings you like. Now go back to the rectangle layer and go to selections, float, selections, defloat , then selections invert. On the tube layer, hit delete. Then go to selections none. Change the visibility to 85.

Now copy and paste your tube again as a new layer. Duplicate it and with the bottom layer active go to adjust then guassian blur, set to 3.00. On the top layer set the layer to overlay. On the top set it where you like. Duplicate it and move one below the big rectangle layer. Using your magic wand tool, click inside the frame. Go to selections, invert and hit the delete key on the bottom tube layer. Go to selections none. Next go to the top layer, and remove the parts of the tube you don’t want seen outside the tube.

Open the flame and skull border. Resize it then copy and paste as a new layer. Move it to below the word art. Adjust as needed. Add the skull you like to the upper left of the canvas. Adjust as you like.

Next open the barbedwire heart…resize then copy and paste as a new layer. Move it to the bottom right of the canvas. Adjust as needed. Add the skull butterfly to the center left of the tag. Duplicate it and go to image, mirror. Add the lips to the left of the tube.

Finally add the copyrights, license information and your tagger markings. Thank you for trying my tutorial!

Saturday, February 5, 2011

Make Him HOt PTU ***SAC***


This tutorial was written on February 5, 2011 Shani aka Wicked Princess. The concept of the tag is mine and mine alone. Any resemblance to any other tag/tut is pure coincidence. This was written for those with working knowledge of PSP.
Supplies Needed:

++Paint Shop Pro ( I used 10 but any version should work)

++Scrap kit Dark Cravings 2 by Dianna of Digicat’s (and dogs) HERE

++ 5 tube of choice. I used the artwork of Elias Chatzoudis you can purchase his work from HERE

++Template 382 by Missy can be found HERE

++Font of choice

**NOTES:

-Add Drop shadow of choice as you go

-You can merger layers as you want to make things easier for yourself.

Open several papers of choice, resizing as needed. For example, when I look at the blue bar where it tells me what I’ve opened (say like paper 2) it tells me what percentage I’m viewing it at. For me it’s usually 16%, so I resize to 16% bringing it to 100%. ( I hope that made sense!) Once you’ve done this, minimize for later use.

++Font of choice

**NOTES:

-Add Drop shadow of choice as you go
-You can merger layers as you want to make things easier for yourself.
Open several papers of choice, resizing as needed. For example, when I look at the blue bar where it tells me what I’ve opened (say like paper 2) it tells me what percentage I’m viewing it at. For me it’s usually 16%, so I resize to 16% bringing it to 100%. ( I hope that made sense!) Once you’ve done this, minimize for later use.

Next go to the bottom template layer and go to selections, select all, then float, selections defloat. Don’t forget to go to selections; none then delete the template layer. Repeat this process for the rest of the template. Note I removed the dot layers…

Add a new raster layer and move it to the bottom. Open the metal chain fencing. Resize if you like, copy and paste as a new layer. Move it to the upper left hand corner of the canvas. Duplicate it and go to image, mirror then image, flip.

Next open the candelabra you like. Resize it then copy and paste as a new layer. Move it down below the word art layer. Move it to the left and adjust as you like. Duplicate it and go to image, mirror.

Open the first three tubes you want to use. Copy and paste your first tube, positioning it where you like in the first frame, but below the frame. Using your magic wand tool, click inside the frame on the left. Go to selections, modify, contract by 4. Go to selections, invert. On the tube layer, hit the delete key. Go to selections, none. Do this for the other three frames as well.

Now open the barbed wire, resize then copy and paste as a new layer. Move it above the frame layer, at the top of it. Duplicate it and then move one to the bottom frames. Add a rose to either side of the middle frame.

Then open the wand (they’re in an X) copy and paste as a new layer. Move to the right side of the frame, at the end of the barbed wire. Duplicate it then move to the in between of the frames. Add the silver mask to the center of each of those. Add a set of fuzzy cuffs to the top left side of the wands. Duplicate it and go to image, mirror.

Next open your one tube of choice. Resize then copy and paste as a new layer. Move to the bottom left side of the tag.

Open the other tube. Copy and paste as a new layer and move to the right side of the tag. Add the ball and chain to the bottom of the foot. Erase the parts where it would look like it was around the foot.

Now open the whip you like, resize then copy and paste as a new layer. Move to the left side of the tag on the bottom. Duplicate it and go to image, mirror. Add the regular handcuffs you like to the bottom left and right of those. Along with the heart of your choosing to the center.

Then open the ball cage, resize then copy and paste as a new layer. Move it to the top of it. Add a bow to the top the chain.

Finally add your text, copyrights and license number. Save and you’re done! Thank you for trying my tutorial.

Wednesday, January 26, 2011

Punk Princess PTU


**NOTE LOOK BELOW THE TUT FOR MORE EXAMPLES OF WHAT YOU CAN DO WITH THIS KIT!**

This tutorial was written on January 26, 2011 Shani aka Wicked Princess. The concept of the tag is mine and mine alone. Any resemblance to any other tag/tut is pure coincidence. This was written for those with working knowledge of PSP.
Supplies Needed:

++Paint Shop Pro ( I used 10 but any version should work)
++Scrap kit Called Retro Punk by Nikki of Creative Intentionz can be found HERE

++ 1 tube of choice. I used the artwork of Elias Chatzoudis you can purchase his work from HERE

++Template by Sarah called Punk Princess can be found HERE

++Font of choice
**NOTES:
-Add Drop shadow of choice as you go
-You can merger layers as you want to make things easier for yourself.
Open several papers of choice, resizing as needed. For example, when I look at the blue bar where it tells me what I’ve opened (say like paper 2) it tells me what percentage I’m viewing it at. For me it’s usually 16%, so I resize to 16% bringing it to 100%. ( I hope that made sense!) Once you’ve done this, minimize for later use.

Open a new canvas of 800x800 (yes this is large, you can resize it later!) Open the paper of your choice and flood fill your new canvas with it.
Next go to the bottom template layer and go to selections, select all, then float, selections defloat. Don’t forget to go to selections; none then delete the template layer. Repeat this process for the rest of the template. Note I removed the work art.

First open the beaded circle decoration you like. Resize then copy and paste as a new layer. Move it down below the template layers. Also to the upper right. Duplicate it then go to image, mirror then image, flip. Adjust as needed.
Now open the flower clip you like. Resize then copy and paste as a new layer. Angle it as you like. Move it to the upper left circle. Duplicate it and go to image mirror, then image, flip.

Open the winged heart, resize then copy and paste as a new layer. Move it to the upper center of the template.

Next open the flames, resize it then copy and paste as a new layer. Move it to the upper top of the rectangle. Make sure it’s above the dotted layer. Duplicate it and go to image, mirror then image, flip. Then move it to the right and angle it up so it frames the rectangle.

Now open the heart with the chain and horns. Resize then copy and paste as a new layer to the left of the rectangle.

Open your tube of choice, resize then copy and resize as a new layer. Move it below the word art. Adjust as needed.

Re color the glitter behind the word art and skulls as you like. Also the word art itself.

Add your copyrights, text, tagger markings and license numbers. Save and your done!

Thank you for trying my tutorial.


Tuesday, January 25, 2011

Happy Birthday-PTU


This tutorial was written on January 25, 2011 Shani aka Wicked Princess. The concept of the tag is mine and mine alone. Any resemblance to any other tag/tut is pure coincidence. This was written for those with working knowledge of PSP.

Supplies Needed:

++Paint Shop Pro ( I used 10 but any version should work)

++Scrap kit Called it’s my Party by Stina can be found HERE

++ Two tubes of choice. I used the artwork of Ismael Rac. You can find his artwork HERE

++Template by Sarah called Sweet love can be found HERE

++Font of choice

**NOTES:

-Add Drop shadow of choice as you go
-You can merger layers as you want to make things easier for yourself.
Open several papers of choice, resizing as needed. For example, when I look at the blue bar where it tells me what I’ve opened (say like paper 2) it tells me what percentage I’m viewing it at. For me it’s usually 16%, so I resize to 16% bringing it to 100%. ( I hope that made sense!) Once you’ve done this, minimize for later use.


Next go to the bottom template layer and go to selections, select all, then float, selections defloat. Don’t forget to go to selections; none then delete the template layer. Repeat this process for the rest of the template. Note I removed the work art.

Duplicate the rectangle layer. Go to Effects, texture effects then antique mosaic. I just went at the default settings I had on there.
Open the curtain, resize then copy and paste as a new layer. Move it just above the heart layers. Duplicate it and go to image, mirror. Adjust as needed.
Now open the disco ball you like, resize then copy and paste as a new layer to the left of the hearts. Erase the part of the string at the top. Add the bow you like. Duplicate it and go to image, mirror.

Then open the street lamp, resize it then copy and paste as a new layer to the left of the tag. Remember we are still just above the heart layer.
Open the first tube you like, resize it then copy and paste as a new layer. Move to the left heart, adjust it. On the heart layer go to selections, select all, then float, selections defloat. Then go to selections, invert. On the tube layer, hit the delete key. Repeat this for the opposite heart.

Next open the stair case, resize it then copy and paste as a new layer right in between the tubes on the heart layers.

Then open your second tube, resize if needed then copy and paste as a new layer right in the center of the tag. Adjust if needed.

Add the champagne bottle and glass you like to the right of the tube.
Open your word art of choice, resize then copy and paste as a new layer. Move to the top of the canvas Add the star spray bundle you like to each side of it.
Finally add your text, copyrights and license number. Save and you’re done! Thank you for trying my tutorial.

Friday, January 14, 2011

Christmas Fun Forum Set PTU


This tutorial was written January 14, 2011 Shani aka Wicked Princess. The concept of the tag is mine and mine alone. Any resemblance to any other tag/tut is pure coincidence. This was written for those with working knowledge of PSP.

Supplies Needed:

++Paint Shop Pro ( I used 10 but any version should work)

++Scrap kit By Carmin’s Creative Chaos called Santa’s Goodies and it can be found http://www.carminschaoticcreations.blogspot.com

++3 Tube of choice, I used the artwork of Leigh Young. You can visit her site for more info on where to purchase. www.leighyoung.com
++Eye Candy 4000 Gradient glow
++Font of choice

**NOTES:
-Add Drop shadow of choice as you go
-You can merger layers as you want to make things easier for yourself.

First we’re going to start with the forum Banner. Open a new canvas with a transparent backround with the size of 589 x 248.

Open the paper of choice you like. Flood fill the background with this paper.
Next open your tube of choice. Resize and crop as you like it. Copy and paste as a new layer. Move the one to the right side and set where you like it. Duplicate it and go to image, mirror. Merge down one layer and set the opacity on the layer to 60. Copy and paste your tube again, centering it. Adjust as needed.

Now open the star you like, resize and then copy and paste as a new layer to the upper left of the canvas. Duplicate it then go to image, mirror.

Then click on the layer below the tube in the center. Copy and paste your choice of candy cane, angle as you like. On the layer below that, resize and copy and paste the ornament you like.

Open the circle candy of your choosing. Resize then copy and paste as a new layer. Move to the bottom left corner of the banner. Duplicate it and go to image, mirror.
Next open the Christmas tree you like. Resize then copy and paste as a new layer. Move closer to the candy cane. Duplicate it then go to image, mirror.

Now open the two lights you like, resize then copy and paste as new layers. Arrange and move to the bottom left. Angle them slightly in opposite directions. Merge down one layer. Duplicate then go to image, mirror.

Then open the snowflake ornament you like. Resize then copy and paste as a new layer. Move to the upper left of the canvas. Duplicate then go to image mirror.
Add your copyrights, and text. Merge down. Go to selections, select all then selections defloat. Now go to selections, modify, select selection borders. Set it at 5. Add another layer and flood fill with your choice of color or paper. Go to selections, none.

Now go to adjust add noise. Set it at the setting you like and click ok. Add a thin gradient glow that you like and merge down.
Your banner is done! Great job!

The Avatar:
Open a new transparent canvas. Make it 200x200.

Flood fill with your choice of paper. Then open your tube, copy and paste as a new layer. Adjust and resize as you need to! I mirrored mine to the left side.
Open the tree you like, resize then copy and paste as a new layer to the right of the canvas.

Next open several of the circle candies, resize then copy and paste as a new layer. Group them below the tube layer to the right of the canvas on the bottom.
Then open one of the ornaments. Resize then copy and paste as a new layer. Move it to the upper center of the canvas.

Add a candy cane to the left of the tree and angle as you like it. Duplicate it and mirror it. Move to the left some and place where you like it.
Add your copyrights and initial.

Go to selections, select all then selections defloat. Now go to selections, modify, select selection borders. Set it at 5. Add another layer and flood fill with your choice of color or paper. Go to selections, none.

Now go to adjust add noise. Set it at the setting you like and click ok. Add a thin gradient glow that you like and merge down.

Now your avatar is done! Thank you for trying my tutorial and I hope you enjoyed it!

Thursday, November 11, 2010

Just one more moment...PTU


This tutorial was written on November 11, 2010 Shani aka Wicked Princess. The concept of the tag is mine and mine alone. Any resemblance to any other tag/tut is pure coincidence. This was written for those with working knowledge of PSP.

Supplies Needed:

++Paint Shop Pro ( I used 10 but any version should work)

++Scrap kit “Beyond Blue, Depression Awareness” kit by Designs by Stina which can be found at any of her stores on her blog HERE

++Choice of photo
++Font and mask of choice

**NOTES:
-Add Drop shadow of choice as you go
-You can merger layers as you want to make things easier for yourself.
Open several papers of choice, resizing as needed. For example, when I look at the blue bar where it tells me what I’ve opened (say like paper 2) it tells me what percentage I’m viewing it at. For me it’s usually 16%, so I resize to 16% bringing it to 100%. ( I hope that made sense!) Once you’ve done this, minimize for later use.
Open a new canvas of 800x800 (yes this is large, you can resize it later!) Open the paper of your choice and flood fill your new canvas with it.
Next open another paper of your choosing and copy and paste as a new layer. Move it towards the bottom of the canvas so it’s only showing about a quarter of the way. Open another paper of choice then copy and paste as a new layer. Move it to the left side with about a quarter of it showing also.
Open the postage stamp frame, resize it then copy and paste as a new layer. Open your photo of choice, and do what ever enhancements that you want to do to it. Copy and paste the picture below the frame. Using your magic wand tool, click inside the frame. Go to selections, expand, expand by 6. Go to seleections, invert. On the picture layer, hit the delete key. Go to selections, none. On the frame layer add your gradient glow of choice. Merge down one layer. Duplicate it and on the bottom one angle slightly.

Now open the bougainvillea flower of your choosing, resize then copy and paste as a new layer. Move it to the upper right of the frames, in between them. Duplicate it then go to image, mirror, then image flip. Adjust this one where you like it.
Now open the flower clip you like, resize it then copy and paste as a new layer. Move it to the bottom right hand corner of the frame. Duplicate it and spin it around where you like it. Add a flower you like over the top of these.
Next open a flower you like, resize then copy and paste as a new layer. Move it to the right side of the frame. Duplicate it several times and move it where you like it as a line down the side.

Then open the wrap ribbon you like, resize then copy and paste as a new layer and angled in the upper left hand corner.
Open the awareness ribbon of your choosing, resize it then copy and paste as a new layer to the bottom left of the frame. Add two butterflies where you like them.

Finally resize if you like, add any copyrights and texts.

Thank you for trying my tutorial!

Sunday, August 29, 2010

You've got a friend PTU


This tutorial was written on August 29, 2010 Shani aka Wicked Princess. The concept of the tag is mine and mine alone. Any resemblance to any other tag/tut is pure coincidence. This was written for those with working knowledge of PSP.

Supplies Needed:

++Paint Shop Pro ( I used 10 but any version should work)

++Scrap kit you’ve got a friend by Designs by Stina which can be found at any of her stores on her blog HERE

++Template 290 by Missy can be found HERE

++Tube of choice or the one I used the artwork of Suzanne Wolcott and it can be purchased from HERE

++Font and mask of choice

**NOTES:
-Add Drop shadow of choice as you go
-You can merger layers as you want to make things easier for yourself.

Open the template in PSP, using your shortcut keys on your keyboard (SHIFT+D) duplicate the template as a new image. Close the original.

Open several papers of choice, resizing as needed. For example, when I look at the blue bar where it tells me what I’ve opened (say like paper 2) it tells me what percentage I’m viewing it at. For me it’s usually 16%, so I resize to 16% bringing it to 100%. ( I hope that made sense!) Once you’ve done this, minimize for later use.

Next go to the bottom template layer and go to selections, select all, then float, selections defloat. Don’t forget to go to selections, none then delete the template layer. Add a gradient glow of your choosing. Repeat this process for the rest of the template.

Open up the fencing of your choosing, resize then copy and paste as a new layer. Move to the very bottom of the pallete. Adjust it so it fits about a quarter of the way up the canvas.

Now open the paw print frame you like, resize then copy and paste as a new layer. Adjust to the size you need more and move below the bottom circle layer on the right. Adjust it then duplicate it, go to image, mirror.

Then open the tree, resize it copy and paste as a new layer. Move to the left and add the flowers you like to it.

Next open the grass, resize then copy and paste as a new layer to the bottom portion of the canvas. Add the fencing you like to either side, to make it look like one large fence.

Now add the dog house to the bottom center. Add a bow on either side of it.

Open the felt paw print you like. Resize then copy and paste as a new layer. Move it to the center of the heart, angle it to the left a bit. Duplicate it and go to image, mirror. Adjust as you need too.

Add your tube of choice to the center of the paw prints. Adjust as needed.

Now open the bone element, resize then copy and paste as a new layer to the right. Adjust it and angle to the right. Duplicate it and rotate it the other way. Add a bow to the center of it.

Finally add your copyrights, license number, tagger markings and text of choice. Save and your done! Thank you for trying my tutorial.

Saturday, August 21, 2010

Beauty Within PTU


This tutorial was written on August 21, 2010 Shani aka Wicked Princess. The concept of the tag is mine and mine alone. Any resemblance to any other tag/tut is pure coincidence. This was written for those with working knowledge of PSP.

Supplies Needed:

++Paint Shop Pro ( I used 10 but any version should work)

++Scrap kit by Athena Designs called Fairytale and Dreams can be purchased HERE

++Template 94 by Missy can be found here

++Tube of choice or the one I used the artwork of Lindsey Cormier and her artwork can be purchased from MPT
++Font


**NOTES:
-Add Drop shadow of choice as you go
-You can merger layers as you want to make things easier for yourself.


Open the template in PSP, using your shortcut keys on your keyboard (SHIFT+D) duplicate the template as a new image. Close the original.


Open several papers of choice, resizing as needed. For example, when I look at the blue bar where it tells me what I’ve opened (say like paper 2) it tells me what percentage I’m viewing it at. For me it’s usually 16%, so I resize to 16% bringing it to 100%. ( I hope that made sense!) Once you’ve done this, minimize for later use.


Next go to the bottom template layer and go to selections, select all, then float, selections defloat. Don’t forget to go to selections, none then delete the template layer. Repeat this process for the rest of the template.

Open the green vines, resize then copy and paste as a new layer. Move it below the top circle layer on the left. Adjust as you like it then duplicate it and go to image, mirror.

Then open up the butterfly spray on the vine, resize then copy and paste as a new layer. Move it below the rectangle background layer on the left. Duplicate it and go to image, mirror.

Next open the green ivy bunches, resize then copy and paste as a new layer. Move it to the bottom left of the rectangle back ground. Duplicate it and go to image, mirror.

Now open the rainbow, resize tehen copy and paste as a new layer. Move below the rectangle background layer to the left. Duplicate it and go image, mirror.

Open the sun, resize it then copy and paste as a new layer. Move it to the left of the rectangle background layer, below it. Place where you like it. Duplicate it and go tomage, mirror.

Then open the glitter spray you like. Resize it then copy and paste as a new layer. Move it to the top left of the tag. Duplicate it and go to image, mirror.

Next open the tube of choice. Resize it then copy and paste as a new layer. Move it to the center of the rectangle frame. Duplicate it and move one below the frame. Erase the parts on the top one you do not want to be seen outside the frame. Also do the same for the bottom one.

Now open the bean stock, resize then copy and paste as a new layer to the left of the rectangle. Duplicate it and go to image, mirror.

Open the light ball, resize it then copy and paste as a new layer. Duplicate it then go to image, mirror. Add a bug to the top of each one.

Then open the water lily, resize it then copy and paste as a new layer to the bottom center of the rectangle. Add a bow on each side.

Finally add your text, copyrights and license number. Remember to save and your done! Thanks for trying my tutorial.

Friday, August 20, 2010

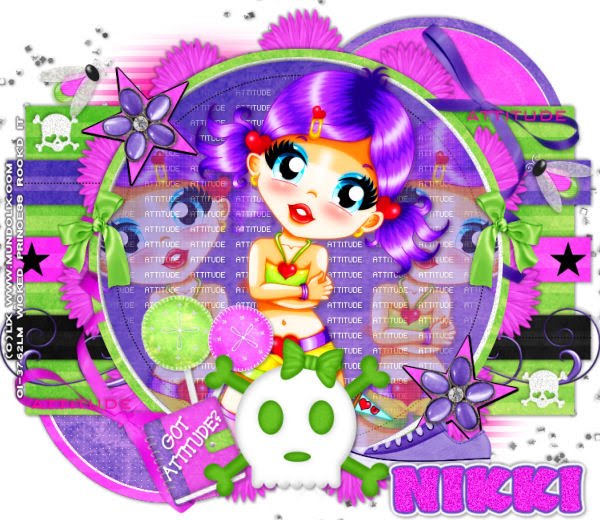
Got Attitude? PTU


This tutorial was written on August 20, 2010 Shani aka Wicked Princess. The concept of the tag is mine and mine alone. Any resemblance to any other tag/tut is pure coincidence. This was written for those with working knowledge of PSP.

Supplies Needed:

++Paint Shop Pro ( I used 10 but any version should work)

++Scrap kit Creative Intentionz called Emolicious and you can purchase it here

++Template 150 by Kristen can be found HERE

++Tube of choice or the one I used the artwork of Lix and it can be purchased from
CILM

++Font and mask of choice
++Plug ins:
-Muera Meister Copies


**NOTES:
-Add Drop shadow of choice as you go
-You can merger layers as you want to make things easier for yourself.

Open the template in PSP, using your shortcut keys on your keyboard (SHIFT+D) duplicate the template as a new image. Close the original.

Open several papers of choice, resizing as needed. For example, when I look at the blue bar where it tells me what I’ve opened (say like paper 2) it tells me what percentage I’m viewing it at. For me it’s usually 16%, so I resize to 16% bringing it to 100%. ( I hope that made sense!) Once you’ve done this, minimize for later use.

Next go to the bottom template layer and go to selections, select all, then float, selections defloat. Don’t forget to go to selections, none then delete the template layer. Repeat this process for the rest of the template.

Add a new raster layer and flood fill with your choice of paper. Add your mask of choice. Merge the group.

Next open the glitter splatter, resize as needed then copy and paste as a new layer. Move it to just above the oval mask.

Now open the flower clip you like, resize then copy and paste as a new layer. Make sure it’s in the center of the canval. Using your plug in muera meister copies, on the encircle options. Set each one to 70 for the x and y. Move these below the large circle layer. Adjust as needed.
Next open the doodle you like, resize then copy and pate as a new layer. Also move this below the large circle layer. Duplicate it and go to image, mirror.
Open the shoe string ribbon, resize then copy and paste as a new layer. Move below the circle layer, adjust as needed. Move it to the left. Open another ribbon of another color, and do the same but at the top of the canvas, still below the circle layer.
Now you will copy and paste your tube of choice to the left side of the top circle layer. Move it where you like it then duplicate it. Merge down one layer. Duplicate it and go to adjust, guassin blur, set to 3. Change the blend mode to overlay. Merge down again one layer. On the circle layer go to selection, float then selection defloat. Then Go to selections, invert and on the tube layer, hit the delete key. Go to selections, none. Change the opacity to the one you like.
Copy and paste your tube again, move it to the center of the circle. Duplicate it and go to adjust, guassin blur, set to 3. Change the blend mode to overlay.
Then open the two suckers you like, resize then copy and paste as a new layer to the bottom left of the tube. Arrange where you like.
Open the book, resize then copy and paste as a new alyer. Move it the left so it’s overlapping the suckers. Add the skull you like to the bottom center. Add the text you like to the book. Add the shoe you like to the bottom right.
Now open the bows you like to the center left and right of the circles. Then add the beaded flower to the stars you like.

Then add the firefly’s you like on the tag.

Finally add your text, copyrights and tagger markings. Save and your done!

Wednesday, July 21, 2010

Friendship Tree PTU


This tutorial was written on July 21, 2010 Shani aka Wicked Princess. The concept of the tag is mine and mine alone. Any resemblance to any other tag/tut is pure coincidence. This was written for those with working knowledge of PSP.

Supplies Needed:

++Paint Shop Pro ( I used 10 but any version should work)

++Scrap kit by Tootypup Scraps called A Care Bear For You and can be purchased at any of the stores listed on her blog HERE

++Template 159 by Ali at HERE

++Tube of choice or the one I used. I used the artwork of Suzanne Wolcott and you can purchase her work from HERE


++Font and mask of choice


**NOTES:
-Add Drop shadow of choice as you go
-You can merger layers as you want to make things easier for yourself.

Open the template in PSP, using your shortcut keys on your keyboard (SHIFT+D) duplicate the template as a new image. Close the original.

Open several papers of choice, resizing as needed. For example, when I look at the blue bar where it tells me what I’ve opened (say like paper 2) it tells me what percentage I’m viewing it at. For me it’s usually 16%, so I resize to 16% bringing it to 100%. ( I hope that made sense!) Once you’ve done this, minimize for later use.

Next go to the bottom template layer and go to selections, select all, then float, selections defloat. Don’t forget to go to selections, none then delete the template layer. Repeat this process for the rest of the template. Add a gradient glow also of your choosing to each template layer.

Add a new raster layer and flood fill with your choice of paper. Add your mask of choice. Merge the group.

First open the vined flower you like. Resize then copy and paste as a new layer. Move it to above the large rectangle layer. Duplicate it and then go to image, mirror then image flip.

Then open your first tube, resize then copy and paste as a new layer to the upper right of the rectangle. Adjust as needed. Erase parts you don’t want seen outside of the rectangle.

Now open the heart cluster you like with the flowers. Center in the frame, but below the frame. Using your magic wand tool and click inside the frame. Go to selections, modify, expand it by 3. Go to selections, invert. On the heart layer, hit the delete key. Go to selections, none.

Now open the other tube of choice, resize it then copy and paste as layer over the frame layer. Adjust and arrange as you like it.

Next open the butterfly of your choosing, resize it then copy and paste as a new layer. Move it at an angle to the upper right hand corner of the frame. Duplicate it and go to image, mirror then image, flip. Move it to the bottom left hand corner.

Then open the flower cluster you like then resize it. Copy and paste it as a new layer to the upper left hand corner of the rectangle. Duplicate it and go to image, mirror then image flip. Move to the bottom right hand corner of the rectangle layer. Add a bow of choice to the center of the rectangle at the top.

Finally add your copyrights, license info and tagger markings

Save and your done! Thanks for trying my tutorial.

Sunday, July 11, 2010

Till Death Do Us Part PTU


This tutorial was written on July 11, 2010 Shani aka Wicked Princess. The concept of the tag is mine and mine alone. Any resemblance to any other tag/tut is pure coincidence. This was written for those with working knowledge of PSP.

Supplies Needed:

++Paint Shop Pro ( I used 10 but any version should work)

++Scrap kit by called Dark Wedding by Gothic Witch Creations can be purchased from any of her stores on her blog HERE

++Template 331 by Missy can be found HERE

++Tube of choice or the one I used. I used the artwork of Lisa at Sophisticated imaging. The tube is included in the kit.

++Font and mask of choice


**NOTES:
-Add Drop shadow of choice as you go
-You can merger layers as you want to make things easier for yourself.

Open the template in PSP, using your shortcut keys on your keyboard (SHIFT+D) duplicate the template as a new image. Close the original.

Open several papers of choice, resizing as needed. For example, when I look at the blue bar where it tells me what I’ve opened (say like paper 2) it tells me what percentage I’m viewing it at. For me it’s usually 16%, so I resize to 16% bringing it to 100%. ( I hope that made sense!) Once you’ve done this, minimize for later use.

Next go to the bottom template layer and go to selections, select all, then float, selections defloat. Don’t forget to go to selections, none then delete the template layer. Repeat this process for the rest of the template.

Add a new raster layer and flood fill with your choice of paper. Add your mask, merge the group.

Open the windows, resize then copy and paste as a new layer. Duplicate it and move it below the center rectangle. On the double circle layer, go to selections, float, selections defloat, then selections, invert. On the gate layer, hit the delete key. Go to selections, none. On the top gate layer, erase the parts you don’t want seen outside of the circles.

Next open the heart pin with beads. Resize then copy and paste as a new layer to the left and at an angle. You want to move it just above the middle of the circle.

Then open the fan of your choosing, resize then copy and paste as a new layer to the left of the canvas. And also place at the bottom of the left rectangle. Duplicate it and go to image, mirror.

On the right side fan, copy and paste the corset of your choosing and then thesash bag and pillow you like . Place the pillow and sash bag on either side. Add the candle with flowers, centered in front of the fan.

Now open the wedding cake, resize it then copy and paste as a new layer in front of the fan on the left. Resize as needed. Add the knife and cake spatula behind it at an angle. Then add the present, garter and booth you like in front oof the cake.

Open the stage, resize it then copy and paste as a new layer. Move to the center of the tag, towards the bottom.

Next open the banner, resize then copy and paste as a new layer. Move to the top of the rectangle. Duplicate it and go to image, flip.

Now open the rose bouquet, resize then copy and paste as a new layer just to the left of the banner at the top. Duplicate it and go to image, mirror. Add the heart pillow to the top of both of those. Then add the bell with ribbon you like.

Finally add your tube of choice to the center of the canvas.

Add your text, copyrights, tagger markings and license number if needed.

Save and your done.

Thanks for trying my tutorial.

Sunday, July 4, 2010

Natural Beauty PTU


This tutorial was written on July 4, 2010 Shani aka Wicked Princess. The concept of the tag is mine and mine alone. Any resemblance to any other tag/tut is pure coincidence. This was written for those with working knowledge of PSP.

Supplies Needed:

++Paint Shop Pro ( I used 10 but any version should work)

++Scrap kit by Nikki of Creative Intentionz called Oh So Natural can be purchased from HERE

++Template 333 By Missy can be found HERE

**NOTE: Scroll down on her blog and look on the left hand side to find the bundled template download links.


++ Tube of choice or the one I used. I used the work Jamie kidd which can be purchased from CILM

++Font and mask of choice

++Plug Ins:


-penta, dot and cross
-muera meister copies


**NOTES:
-Add Drop shadow of choice as you go
-You can merger layers as you want to make things easier for yourself.

Open the template in PSP, using your shortcut keys on your keyboard (SHIFT+D) duplicate the template as a new image. Close the original.

Go to image, canvas size, and change the canvas size to 800 by 650. This gives us more room to work with!

Open several papers of choice, resizing as needed. For example, when I look at the blue bar where it tells me what I’ve opened (say like paper 2) it tells me what percentage I’m viewing it at. For me it’s usually 16%, so I resize to 16% bringing it to 100%. ( I hope that made sense!) Once you’ve done this, minimize for later use.

Next go to the bottom template layer and go to selections, select all, then float, selections defloat. Don’t forget to go to selections, none then delete the template layer. Repeat this process for the rest of the template. **NOTE I deleted the word art.

Add a new raster layer and flood fill with your choice of paper. Send it to the bottom of the palette and add your mask of choice. Merge the group.

Open up the daisy flower you like, resize then copy and paste as a new layer. Use your plug in muera meister copies and set on encircle with shift x and y to 80. Which ever number on the flowers you like.

Then open your leaves on the vine. Resize then copy and paste as a new layer. Move to the left of the tag, and just above the bottom circle layer. Duplicate then go to image, mirror.

Now open the bow and ribbon you like. Resize then copy and paste as a new layer to the upper left, adjust as you need to. Duplicate it and go to image, mirror.

Next open your tube, resize it then copy and paste as a new layer. I used the close up tube that came in the pack I purchased. Move to above the small rectangle layer at the left. Resize and adjust where you like it. Duplicate, then go to adjust, blur by 3.00 then change the blend mode to overlay. Merge down one layer. Go to texture, blinds, and set to 2 and then to the opacity you like. Next add the plug in penta, on dot and cross. Whatever setting you would like. Duplicate it and go to image, mirror. On the rectangle layer go to selections, float, selections, defloat and then invert. Hit delete on the tube layers. Go to selection, none.

Open the fog element, resize then copy and paste as a new layer above the top circle layer. go to selections, float, selections, defloat and then invert. Hit delete on the fog layer.

Then open the folded paper hearts trails, resize then copy and paste as new layers. Move to the left of the circle. . go to selections, float, selections, defloat and then invert. Hit delete on the hearts layers.

Open your tube of choice again, resize then copy and paste as a new layer to the right of the circle. Duplicate it, we’re going to make it look like it’s popping out of the circle. On the circle layer go to selections, float, selections, defloat and then invert. Hit delete on the bottom tube layer. On the top tube layer, erase the parts on the bottom you don’t want seen outside of the circle. Add the bow of choice to the top of the circle, below the top tube layer.

Next open the rusty key, resize then copy and paste as a new layer. Move it to the bottom of the circles, angle it to the left. Duplicate it and go to image, mirror.

Now copy and paste the scroll beading, resize it then angle it to the left. Duplicate it and go to image, mirror. Add the cardboard heart of your choosing. Add a butterfly of your choosing where you like them.

Finally add your text, copyrights and tagger markings. Save and your done!

Thanks for trying my tutorial!

Fairytale Moments PTU


This tutorial was written on July 4th 2010 Shani aka Wicked Princess. The concept of the tag is mine and mine alone. Any resemblance to any other tag/tut is pure coincidence. This was written for those with working knowledge of PSP.

Supplies Needed:

++Paint Shop Pro ( I used 10 but any version should work)

++Scrap kit by Designs by Stina called Stinarella can be purchased at any of the stores listed on her blog.

++Template 250 By Missy can be found HERE

++Tube of choice or the one I used. I used the tube that was included in the kit. The tube is by Medi and you can look at her work further by going HERE

++Font and mask of choice


**NOTES:
-Add Drop shadow of choice as you go
-You can merger layers as you want to make things easier for yourself.

Open the template in PSP, using your shortcut keys on your keyboard (SHIFT+D) duplicate the template as a new image. Close the original.

Open several papers of choice, resizing as needed. For example, when I look at the blue bar where it tells me what I’ve opened (say like paper 2) it tells me what percentage I’m viewing it at. For me it’s usually 16%, so I resize to 16% bringing it to 100%. ( I hope that made sense!) Once you’ve done this, minimize for later use.

Next go to the bottom template layer and go to selections, select all, then float, selections defloat. Don’t forget to go to selections, none then delete the template layer. Repeat this process for the rest of the template.

Add a new raster layer and flood fill with your choice of paper. Use the mask of your choice and merge the group.

On the bottom template layer, duplicate it. Go to effects, texture effects, and then click on mosaic antique. Set to the settings you like. Merge down one.

Open the flower heart spray you like, resize then copy and paste as a new layer to the left corner, upper. Move it below the bottom template layer. Adjust where you are happy with it, then duplicate, image, mirror.

Below the frame layer, add the castle you like. Adjust it and move it where you like. Erase the parts you don’t want seen outside the frame.

Now open the silver scalloped frame, resize it then copy and paste as a new layer. Move it over the existing frame. Set it as you like it.

Then open the flower on the vine. Resize it then copy and paste as a new layer. Move it to the bottom of the frame. Duplicate it and go to image, flip.

Open the stair case of your choosing, resize it then copy and paste as a new layer. Move it to eh left, so it looks like its coming out of the top of the silver frame.

Next open the light pole with the clock. Resize it then copy and paste as a new layer.

Now open your tube of choice, resize then copy and paste as a new layer. Move to the bottom left of the tag. Just at the bottom of the stair case.

Then open the rose cluster, resize then copy and paste as a new layer. Move to the upper left of the silver frame. Duplicate it and go to image, mirror then image, flip. Move and adjust so that it’s in the bottom right corner of the silver.

Now add the carriage you like to the bottom right of the tag.

Add your text, copyrights and tagger markings. Save and your done!

Thanks for trying my tutorial.

Tuesday, June 29, 2010

Kiss This PTU


This tutorial was written on June 29, 2010 Shani aka Wicked Princess. The concept of the tag is mine and mine alone. Any resemblance to any other tag/tut is pure coincidence. This was written for those with working knowledge of PSP.

Supplies Needed:

++Paint Shop Pro ( I used 10 but any version should work)

++Scrap kit by Nikki of Creative Intentionz called Yeah Kiss This can be purchased from HERE

++Template 271 By Missy can be found HERE

**NOTE: Scroll down on her blog and look on the left hand side to find the bundled template download links.


++ Tube of choice or the one I used. I used the work of Elias Chatzoudis and you can purchase it from MPT

++Font and mask of choice

++Plug Ins:


-penta, dot and cross
-muera meister copies


**NOTES:
-Add Drop shadow of choice as you go
-You can merger layers as you want to make things easier for yourself.

Open the template in PSP, using your shortcut keys on your keyboard (SHIFT+D) duplicate the template as a new image. Close the original.

Open several papers of choice, resizing as needed. For example, when I look at the blue bar where it tells me what I’ve opened (say like paper 2) it tells me what percentage I’m viewing it at. For me it’s usually 16%, so I resize to 16% bringing it to 100%. ( I hope that made sense!) Once you’ve done this, minimize for later use.

Next go to the bottom template layer and go to selections, select all, then float, selections defloat. Don’t forget to go to selections, none then delete the template layer. Repeat this process for the rest of the template.

Add a new raster layer and flood fill with your choice of paper. Send it to the bottom of the palette and add your mask of choice. Merge the group.

Now open the binder clip flower you like. Resize then copy and paste as a new layer. Use your plug in Muera Meister copies with the x and y set to 80. Also to whatever number of clips you like. Adjust as needed then move to the bottom of the palette just above the mask layer.

Then open the ribbon you like, resize then copy and paste as a new layer. Move it to the left, and the bottom rectangle layer. Adjust and duplicate. Go to image, mirror.

Open the barbed wire strand, resize then copy and paste as a new layer. Move it to just above the top rectangle layer.

Next open the flower vine bundle you like, resize then copy and paste as a new layer to the left hand corner, just below the small circle layer. Duplicate it then go to image, mirror then image, flip.

Now open your tube of choice. Copy and paste as a new layer. Duplicate then go to adjust, blur, guassian blur set to 3. Set the blend mode to overlay and merge down one layer. Duplicate the tube again, then move over the top of the circle in the upper left hand corner. Adjust where you want it. Add your plug in penta dot and cross. Duplicate it one more time and move it over to the circle on the bottom. On the circle layer go to selections, select all, selections, float then selections defloat then selections, invert. On the tube layer, hit the delete key. Repeat this for the other circle and tube.

Now make sure you tube is centered the way you like it in the center of the circles.
Add the lips tube to the “rear” of the tube.

Then open the winged heart. Resize then copy and pste as a new layer towards the bottom of the rectangle layers. Also to the left. Duplicate it and go to image, mirror.

Open the emo bunny, top hat, sucker and lipstick. Copy and paste them in a grouping to the bottom left of the tag.

Open the butterfly you like and then copy and paste around the circle as you like them. In between the two bottom ones, copy and paste the skull you like. Add the skull chain to the right of the tag towards the top.

Add the word art you like in the kit, to the bottom right of the tag.

Finally add your test, copyrights, license number and tagger markings, save and your done!

Thanks for trying my tutorial

She's So Dangerous PTU


This tutorial was written on June 28, 2010 Shani aka Wicked Princess. The concept of the tag is mine and mine alone. Any resemblance to any other tag/tut is pure coincidence. This was written for those with working knowledge of PSP.

Supplies Needed:

++Paint Shop Pro ( I used 10 but any version should work)

++Scrap kit by JT Designs called Temptation can be found HERE

++Template 291 By Missy can be found HERE


++Tube of choice or the one I used. I used the artwork of Ed Mirounik and can be purchased from HERE

++Font and mask of choice

++Plug Ins:

-Eye candy 4000


**NOTES:
-Add Drop shadow of choice as you go
-You can merger layers as you want to make things easier for yourself.

Open the template in PSP, using your shortcut keys on your keyboard (SHIFT+D) duplicate the template as a new image. Close the original.

Open several papers of choice, resizing as needed. For example, when I look at the blue bar where it tells me what I’ve opened (say like paper 2) it tells me what percentage I’m viewing it at. For me it’s usually 16%, so I resize to 16% bringing it to 100%. ( I hope that made sense!) Once you’ve done this, minimize for later use.

Next go to the bottom template layer and go to selections, select all, then float, selections defloat. Don’t forget to go to selections, none then delete the template layer. Repeat this process for the rest of the template. NOTE: I only added a gradient glow to She’s So.

Go to the background layer at the bottom of the layers palette, and flood fill the background layer with your choice of paper. Add your mask of choice.

Open the folded ribbon of choice. Add to the left of the tag, towards the bottom. Duplicate it and go to image, mirror.

On the large circle behind the others, copy and paste the barb wire. Erase the parts that are hanging over the circle. Do this I go to Selections, float then selections defloat. Then go to selections, invert. On the wire layer, hit the delete key.

Then open the moon, and move it below the big circle layer and move to the right. Adjust it so it sits kind of centered behind the word art.

Now add the light pole, behind the top circle layer to the left a bit.

Open the beaded rain, resize then copy and paste as a new layer. Move it so it’s over the circle layer. go to Selections, float then selections defloat. Then go to selections, invert. On the beaded rain layer, hit the delete key.

Next open the tree and resize, copy and paste as a new layer over the top circle layer and move to the right. Add your choice of flowers through out the tree and a butterfly.

Now open your tube of choice. Resize then copy and paste as a new layer into the center of the circle. Duplicate it and on the bottom layer we’re going to erase some. On your circle layer go to Selections, float then selections defloat. Then go to selections, invert. On the bottom tube layer, hit the delete key. On the top tube layer erase the parts on the bottom you don’t want seen outside the circle.

Then open the handcuffs, corset, zippered heart, candle and boot you like. Cluster them together on te bottom left of the tag. Add the butterfly of your choice into the center of the ribbons where they meet. Add the bows you like to other side.

Finally add any text you like, copyrights, license info and tagger markings. Save and your done! Thanks for trying my tutorial.