This week I will be revamping the blog using one of my newer kits. I want to make a bunch of changes and will be focusing more on kits and re arranging than tuts. I will try to get out a few FTU tuts this week!
Sorry for the mess!
Shani
Monday, August 31, 2009
Sunday, August 30, 2009
I hope you Dance PTU

I hope you dance PTU
This tutorial was written on August 30, 2009 by Shani aka Wicked Princess. The concept of the tag is mine and mine alone. Any resemblance to any other tag/tut is pure coincidence. This was written for those with working knowledge of PSP.
Supplies Needed:
++Paint Shop Pro ( I used 10 but any version should work)
++Scrap kit by Stargazer Musings called Purple Beauty can be purchased HERE
++Template 89 by Blissfully Beth can be found HERE
++Tube of choice or the one I used. I used the work of Angela Newman which can be purchased HERE
++Font and mask of choice
Let’s get started!
**NOTES:
-Add Drop shadow of choice as you go
-You can merger layers as you want to make things easier for yourself.
Open the template in PSP, using your shortcut keys on your keyboard (SHIFT+D) duplicate the template as a new image. Close the original.
Open several papers of choice, resizing as needed. For example, when I look at the blue bar where it tells me what I’ve opened (say like paper 2) it tells me what percentage I’m viewing it at. For me it’s usually 16%, so I resize to 16% bringing it to 100%. ( I hope that made sense!) Once you’ve done this, minimize for later use.
Next go to the bottom template layer and go to selections, select all, then float, selections defloat. Add a gradient glow of your choice.Don’t forget to go to selections, none then delete the template layer. Repeat this for the remainder of the template.
Add a new raster layer, and send to the bottom Flood fill with your choice of paper and add your mask and remember to merge group.
Open the doodle of choice, resize then copy and pate as a new layer. Move it angle it, moving it towards the upper left hand corner of the tag. Move this layer below the template. Duplicate it and go to image, mirror then image flip.
Next open the rose of choice. Copy and paste as a new layer in the center of the frame template layer.
Then open the bow swag of your choice. Resize then copy and paste as a new layer. Move it to the left of the frame, centering it. Duplicate it and go to image, mirror. Add a bouquet of flowers you like. Duplicate it and place each on the bow swag.
Next add your tube of choice to the center of the tag. Adjust and move as you like.
Randomly place the dragon flies and butterflies of choice through out the tag.
Add your text, copyrights and license info.
Save and your done!
Thank you for trying my tutorial!
Saturday, August 29, 2009
More FTU tuts coming!
I have a few FTU tags I need to write tuts for over the weekend. I'm doing them as I can in between everything else this weekend. I realize I haven't made a terrible lot of them lately, so I'll try to get as many as I can up!
It's a busy weekend around here, as I'm sure it is for everyone!
Much love
Shani
It's a busy weekend around here, as I'm sure it is for everyone!
Much love
Shani
Friday, August 28, 2009
Wake Me Up PTU

Wake Me up PTU
This tutorial was written on August 28, 2009 by Shani aka Wicked Princess. The concept of the tag is mine and mine alone. Any resemblance to any other tag/tut is pure coincidence. This was written for those with working knowledge of PSP.
Supplies Needed:
++Paint Shop Pro ( I used 10 but any version should work)
++Scrap kit by me called Remembering La La can be purchased from HERE
++Template 15 by Alyssa can be found HERE
++Tube of choice or the one I used. I used the artwork of Suzanne Wolcott. You can purchase her work from HERE
++Plug ins:
-Muera Meister Copies
-Eye Candy 4000 Gradient Glow
++Mask and font of choice.
Let’s get started!
**NOTES:
-Add Drop shadow of choice as you go
-You can merger layers as you want to make things easier for yourself.
Open the template in PSP, using your shortcut keys on your keyboard (SHIFT+D) duplicate the template as a new image. Close the original.
Open several papers of choice, resizing as needed. For example, when I look at the blue bar where it tells me what I’ve opened (say like paper 2) it tells me what percentage I’m viewing it at. For me it’s usually 16%, so I resize to 16% bringing it to 100%. ( I hope that made sense!) Once you’ve done this, minimize for later use.
Next go to the bottom template layer and go to selections, select all, then float, selections defloat. Add a gradient glow of your choice.Don’t forget to go to selections, none then delete the template layer. Repeat this for the remainder of the template.
Add a new raster layer, and send to the bottom Flood fill with your choice of paper and add your mask and remember to merge group.
Open frames 1, 2 and 3.Copy and paste each as new layers into the center of the canvas. Move them below the bottom template layer. Angle each of them slightly so that you can see all three of them splayed out.
Next open the glitter rain of choice. Copy and paste it as a new layer, and move above the second circle layer. Go to the circle layer, then go to selections, float, selections, delfoat and then invert. Back to the rain layer, and hit delete on your keyboard. Go to selections none.
Then open a flower of choice, resize it then copy and paste as a new layer. Use your plug in, muera meister copies, on the encircle setting. Set to shift x and y to 50. Move this layer below the bottom circle layer.
Open another set of glitter rain. Copy and paste as a new layer. Move just below the square frame layer. Using your magic wand tool, click inside the frames. Go to selections, modify expand by 8. Go to selections, invert and then on the rain layer hit the delete key. Go to selections, none.
Now open the greenery, resize it. Then rotate it to the right 90 degree’s by going to image, free rotate. Make sure the box is checked for right and 90. Copy and paste as a new layer and move to the top upper right portion of the frames. Duplicate it and go to image, mirror. Add a flower of choice to the corner of the frames on top.
Add a bow to the middle space between the left and right frame. Check tag to get the better measurements. Then add the star comet of choice to the bottom of the left and right frames.
Now add your tube of choice, centered into the middle frame as you like.
Add any text, copyrights, license info and tagger markings
Save and your done!
Thank you for trying my tutorial!
Princess PTU
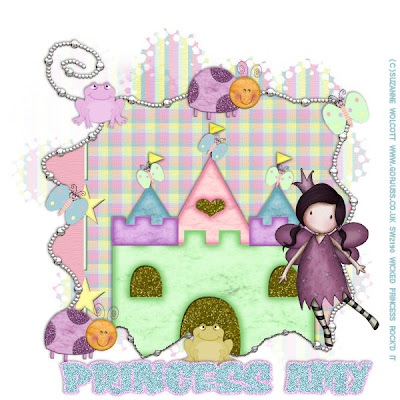
Princess PTU
This tutorial was written on August 28, 2009 by Shani aka Wicked Princess. The concept of the tag is mine and mine alone. Any resemblance to any other tag/tut is pure coincidence. This was written for those with working knowledge of PSP.
Supplies Needed:
++Paint Shop Pro ( I used 10 but any version should work)
++Scrap kit called Fairy Tale by Amy’s Scrap designs can be purchased HERE
++Tube of choice or the one I used. I used the artwork of Suzanne Wolcott which can be purchased HERE
++Font and mask of choice
Open a new canvas of 600 x 600. Flood fill with your choice of paper and add your mask. Merge the group.
Open the chain frame, resize it. Then copy and paste as a new layer into the center of your canvas. Using your magic wand tool, click inside the frame and go to selections, modify, expand by 5. Add a new raster layer and flood fill with your choice of paper. Go to selections, none.
Next open the castle, resize it. Then copy and paste as a new layer, centering into the frame. Use your magic wand tool again and click inside your frame. Go to selections, modify, expand by 5. Go to selections, invert. On the castle layer, hit the delete key. Remember to go to selections, none.
Then add your tube of choice, to the right of the tag. Resize it and adjust as needed.
Now add the butterflies of choice to the castle flags. Resize and angle the way you like them.
Add a butterfly to the upper right hand side of the frame, above the tube. Then add a lady bug to the left of it in the center of the frame on top.
Then to the left of the lady bug, add a frog.
Move down the left hand side of the frame, and add a butterfly again. Below that one add a lady bug. Then the center bottom, a frog.
Add your text, copyrights, license info and tagger markings.
Save and your done.
Thanks for trying out my tutorial.
Inner Fairy PTU
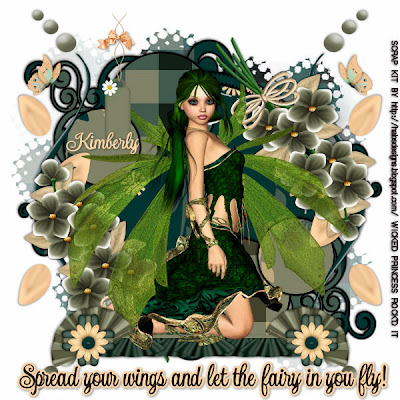
Inner Fairy PTU
This tutorial was written on August 28, 2009 by Shani aka Wicked Princess. The concept of the tag is mine and mine alone. Any resemblance to any other tag/tut is pure coincidence. This was written for those with working knowledge of PSP.
Supplies Needed:
++Paint Shop Pro ( I used 10 but any version should work)
++Scrap kit by Halo Designs called Emerald Fantasy can be purchased HERE
++Template 8 by Wacky Scraps can be found HERE
++Tube of choice or the one I used. I used the tube from the kit. If you choose to use this tube and the kit with no extra’s, please credit the designer for the kit with their url.
++Font and mask of choice
Let’s get started!
**NOTES:
-Add Drop shadow of choice as you go
-You can merger layers as you want to make things easier for yourself.
Open the template in PSP, using your shortcut keys on your keyboard (SHIFT+D) duplicate the template as a new image. Close the original.
Open several papers of choice, resizing as needed. For example, when I look at the blue bar where it tells me what I’ve opened (say like paper 2) it tells me what percentage I’m viewing it at. For me it’s usually 16%, so I resize to 16% bringing it to 100%. ( I hope that made sense!) Once you’ve done this, minimize for later use.
Next go to the bottom template layer and go to selections, select all, then float, selections defloat. Add a gradient glow of choiceDon’t forget to go to selections, none then delete the template layer. Repeat this process for the rest of the template.
Add a new raster layer and flood fill with your choice of paper. Add your mask and merge group.
Open the doodle of your choice. Resize then copy and paste as a new layer. Move this to the upper left part of the tag. Duplicate it and go to image, mirror. Duplicate it again and to image, flip. Then once more duplicate it and go to image, mirror.
Next open the flower bouquet bundle of your choice. Resize then copy and paste as a new layer at the bottom of the tag. Angle it slightly. Duplicate it then go to image, mirror then image, flip.
Then open your choice of lace. Resize it then copy and paste as a new layer towards the bottom of the tag. Add a fan of choice to either side of it and then a flower.
Next open the tube of choice from the kit, resize it then copy and paste as a new layer. Center into the middle of the tag. Adjust as needed.
Open a butterfly of choice, resize it then copy and paste as a new layer. Duplicate it and move to where you want them.
Add a tag and bow of choice to the upper left part of the canvas.
Add any text, copyrights and tagger markings. Save and your done.
Thank you for trying my tutorial.
Thursday, August 27, 2009
Imperfect PTU
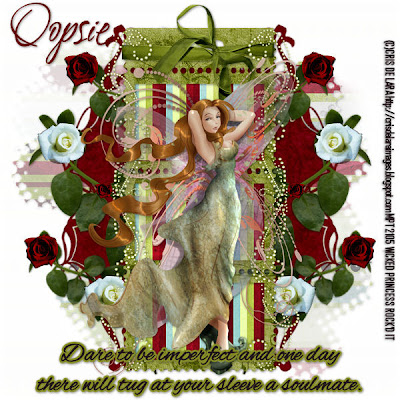
Imperfect PTU
This tutorial was written on August 27, 2009 by Shani aka Wicked Princess. The concept of the tag is mine and mine alone. Any resemblance to any other tag/tut is pure coincidence. This was written for those with working knowledge of PSP.
Supplies Needed:
++Paint Shop Pro ( I used 10 but any version should work)
++Reminise Scrap kit by Oopsie-Daisy can be purchased HERE or HERE
++Tube of choice or the one I used. I used the artwork of Cris De Lara an you can purchase it
HERE
++Font and Mask of choice
Let’s get Started!
**NOTES:
-Add Drop shadow of choice as you go
-You can merger layers as you want to make things easier for yourself.
Open several papers of choice, resizing as needed. For example, when I look at the blue bar where it tells me what I’ve opened (say like paper 2) it tells me what percentage I’m viewing it at. For me it’s usually 16%, so I resize to 16% bringing it to 100%. ( I hope that made sense!) Once you’ve done this, minimize for later use.
Next open a new canvas of 600x600. Remember you can always resize later. Flood fill with your choice of paper and add your mask. Merge the group.
Next open frame3 and resize it. Copy and paste into the center of the canvas. Angle it slightly to the left. Duplicate it and angle this one to the right.
Then open frame 4 and resize it. Copy and paste it as a new layer into the center. Use your magic wand tool and click inside each square. Hold the shift key and click inside the other squares. Go to selections, modify expand by 5. Add a new raster layer and flood fill with your choice of paper. Go to selections, none and move this layer below the frame layer.
Open the leaf element. Resize it and copy and paste as a new layer. Move it below the frame background layer, adjusting to about the center of the frame. Duplicate it and go to image, mirror. Then duplicate it again, resizing it slightly smaller and move it to the bottom of the frame. Duplicate and go to image mirror. Duplicate once more, make it smaller and move to the top of the frame. Duplicate it and go to image, mirror.
Next your going to open both roses, and resize them. Copy and paste them on to each of the leaf stems where you like. You’ll note I did mine towards the end and the end by the frame.
Now open up a wrap bow you like, resize it then copy and paste as a new layer at the top of the frame. Adjust it as needed to make sure it looks right.
Open the Pearly doodle, resize it then copy and paste as a new layer. Move it to the left top of the frame. Duplicate it then go to image, mirror. Duplicate it again and go to image, flip then duplicate it once more and go to image, mirror.
Add your tube of choice, resizing as needed and center in the middle of the frame.
Add your text, license info, copyrights and tagger markings. Save and your done!
Thank you for trying my tutorial.
Misty Rains PTU (Animated)
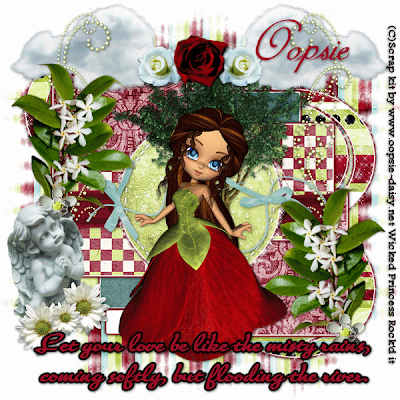
**Click on thumbnail to view animation**
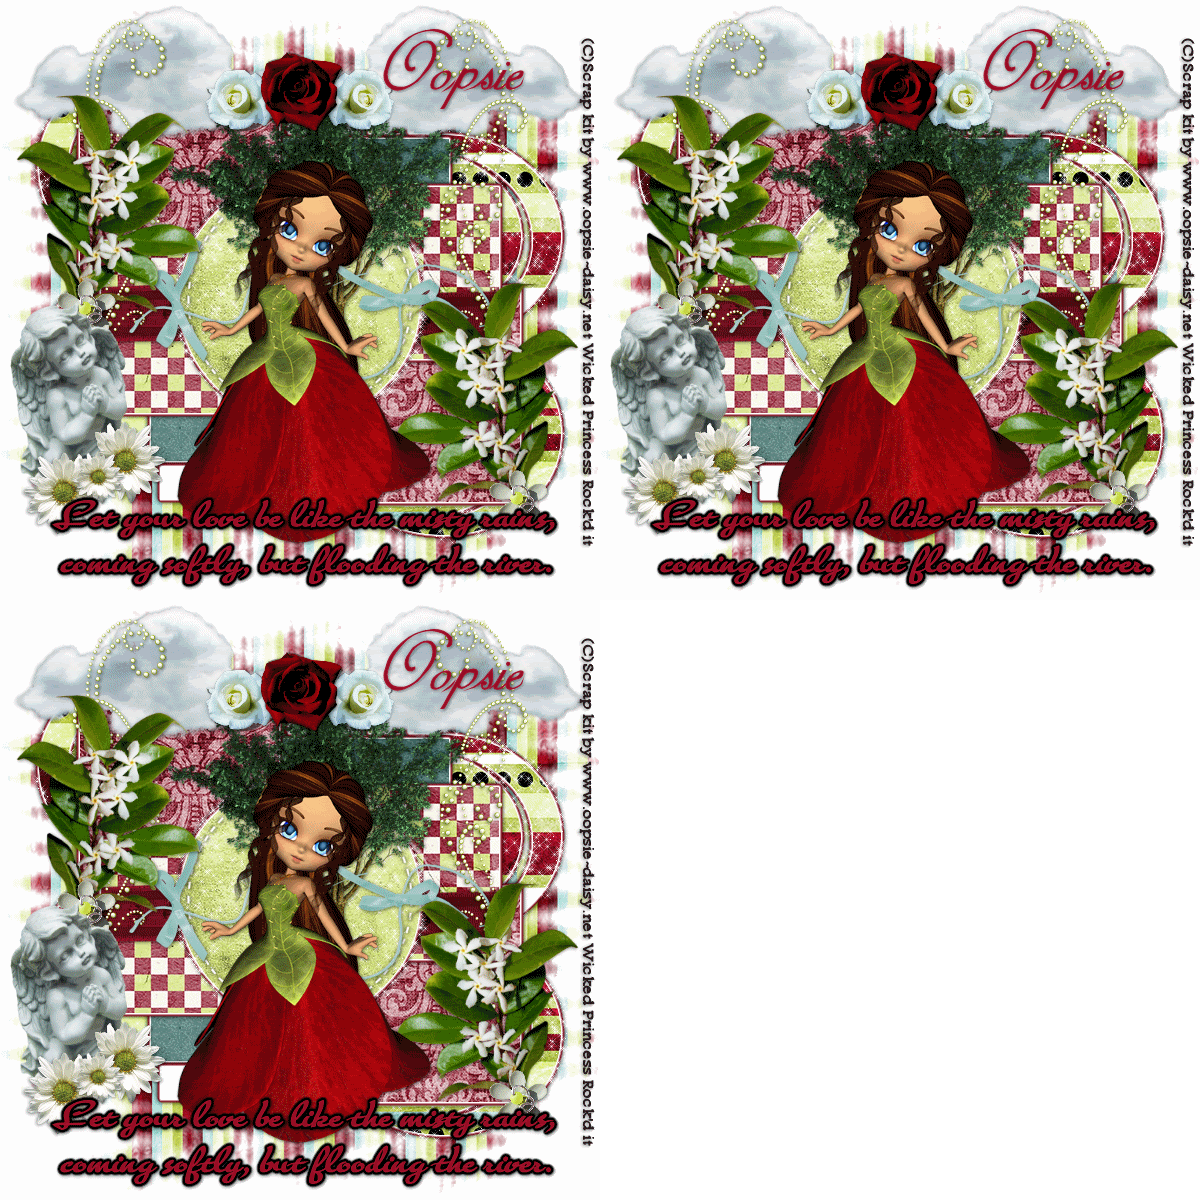
Misty Rains PTU (Animated)
This tutorial was written on August 27, 2009 by Shani aka Wicked Princess. The concept of the tag is mine and mine alone. Any resemblance to any other tag/tut is pure coincidence. This was written for those with working knowledge of PSP.
Supplies Needed:
++Paint Shop Pro ( I used 10 but any version should work)
++Jasc Animation Shop 3
++Reminise Scrap kit by Oopsie-Daisy can be purchased HERE or HERE
++Template 7 by Wacky Scraps can be found HERE
++Tube of choice or the one I used. I used the tube that was included in the kit. If you choose to not use any other artist tube, please credit the designer on the tag with the url to their site. Thank you!
++Plug in:
-Alien Skin Xenofex 2
-Eye Candy 4000 Gradient Glow
++Font and Mask of choice
Let’s get Started!
**NOTES:
-Add Drop shadow of choice as you go
-You can merger layers as you want to make things easier for yourself.
Open the template in PSP, using your shortcut keys on your keyboard (SHIFT+D) duplicate the template as a new image. Close the original.
Open several papers of choice, resizing as needed. For example, when I look at the blue bar where it tells me what I’ve opened (say like paper 2) it tells me what percentage I’m viewing it at. For me it’s usually 16%, so I resize to 16% bringing it to 100%. ( I hope that made sense!) Once you’ve done this, minimize for later use.
Next go to the bottom template layer and go to selections, select all, then float, selections defloat. Add your gradient glow of choice. Don’t forget to go to selections, none then delete the template layer. Repeat this process for the rest of the template.
Add a new raster layer and flood fill with your choice of paper. Add your mask and merge the group. Move this layer to the bottom of your layer palette.
At this point close off all layers, except for the two bottom template layers, the swirly’s. Merge these two layers together. Open all layers back up.
Open the wrap ribbon of choice. Resize it then copy and paste as a new layer. Move below the circle template layer.
Next open the clouds of choice, resize then copy and paste as a new layer. Move to the upper right then duplicate it. Go to image, mirror.
Then add the tree, centering it into the circle template layer.
Open the pearly swirl element. Resize the copy and paste as a new layer. Move to the left of the tag, right about in the squares. Duplicate it and go to image, mirror.
Now open the ribbon with the loops and bows in it. Resize it then copy and paste as a new layer, centering into the circle template layer.
Next open the flower/leaf set. Resize then copy and paste as a new layer. Move to the left of the square up top. Duplicate it and go to image, mirror. Then move it to the bottom square on the outer side.
Open the rose of choice, resize then copy and paste as a new layer, centering in tree. Add another one to either side of that one. Adjust and resize as needed.
Open your tube of choice, resize then copy and paste as a new layer into the center of the tag. Adjust as needed.
Next open the small flower of choice, copy and paste as a new layer to the bottom of the flower and leaf bundles.
Then open the angel statue, resize and copy and paste as a new layer to the bottom left of the tag. Add three daisy’s of choice to the bottom of it.
Add your text, copyrights and tagger markings. Save as a psp image if you choose to go on with the animation. If not save as a jpeg or png and your done.
ANIMATION:
Open up animation shop and minimize it. We’ll go back to it in a few moments.
Go gack to PSP, and find your template swirle layer. Duplicate it twice so you now have three.
Do the same for the circle template layer.
On the bottom swirl layer, using your plug in, Xenofex 2 , Constellation with the following settings:
Star Size: 0.03
Size Variation: 44
Edge Star Density: 18
Overall Star Density: 18
Overdrive 100
Twinkle Amount 97
Twinkle Rotation 45
Click ok.
Go to the next layer up, and use your plug in again but hit random seed. Repeat this for the last swirl layer.
Now go to your circle template layers, first the bottom one and repeat these steps.
Once done with that close off the top two of the swirl layers and the circle layers. Go to edit, copy merged.
Over into animation shop, right click and click on paste as a new animation.
Back to PSP close off the bottom two layers, and open the middle ones on both the swirls and the circle. Go to edit, copy , merged and back to animation shop. Go to edit, paste after current animation.
Repeat this process for the last set.
Save as a gif and your done!
Thanks for trying my tutorial.
Autumn Leaves PTU (Animated)

**Click on the thumbnail to see the animation!**

Autumn Leaves PTU (Animated)
This tutorial was written on August 27, 2009 by Shani aka Wicked Princess. The concept of the tag is mine and mine alone. Any resemblance to any other tag/tut is pure coincidence. This was written for those with working knowledge of PSP.
Supplies Needed:
++Paint Shop Pro ( I used 10 but any version should work)
++Jasc Animation Shop 3
++Signs of Fall Scrap kit by Crazed Creations can be purchased HERE
++Tube of choice or the one I used. I used the work of Suzanne Wolcott and her work can be purchased HERE
++Font and Mask of choice
++Font and Mask of choice
Let’s get Started!
**NOTES:
-Add Drop shadow of choice as you go
-You can merger layers as you want to make things easier for yourself.
Open several papers of choice, resizing as needed. For example, when I look at the blue bar where it tells me what I’ve opened (say like paper 2) it tells me what percentage I’m viewing it at. For me it’s usually 16%, so I resize to 16% bringing it to 100%. ( I hope that made sense!) Once you’ve done this, minimize for later use.
Open a new canvas of 600x600. Remember you can always resize later. Flood fill the canvas with your choice of paper. Add your mask, and merge the group.
Next open the leaf frame. Copy and paste as a new layer into your working canvas. Open the pinecone frame and copy and paste as a new layer over the leaf frame.
Go back to the leaf frame, and use your magic wand tool and click inside the frame. Go to selections, modify expand by 8. Add a new raster layer and fill with your choice of paper. Move this layer below the frame layer. Go to selections, none.
Next open the doodle of your choice, resize it then copy and paste as a new layer. Angle it and move it to the upper left hand side of the tag. Move this layer down below the frame layers, just above the mask layer. Duplicate it and go to image, mirror then, image flip.
Open the grass with rocks layer, resize it then copy and paste as a new layer and move it to below the leaf layer. Erase any parts that are showing beyond the frame.
Then open your sunflower, resize it if needed and copy and paste as a new layer. Angle it slightly and move to the upper left side of the tag. Move this layer just above the pinecone frame layer. Duplicate it and go to image, mirror. Add the bow of choice to both flowers.
Open the wooden bench then copy and paste it as a new layer. Center it into the bottom portion of the frames.
Add a pumpkin of choice to either side of the bench. Add two leaves behind the pumpkins.
Open your tube of choice, then copy and paste as a new layer into the center of the tag. Place in front of the bench to look as if she is sitting on the bench or leaning on it.
Next open the moon and copy and paste as a new layer to the top left portion of the tag. Resize it and adjust as needed.
Open three of the leaves you like, copy and paste as new layers, towards the top. Arrange them as you like.
Add your text, license info, and copyrights. Save as a psp image if you choose to animate, if not save as a jpeg or png.
ANIMATION:
Open your animation shop and minimize it.
This is kind of tedious but the end result is pretty cool.
In PSP, move your moon slightly to the right. Then move and arrange the leaves slightly moving them to the right. Go to edit, copy merged and over to animation shop.
Right click and go to paste as new animation.
Back to PSP, repeat the process, moving the moon and leaves a little more. Edit, copy merged and back to animation shop. Go to edit, paste after current frame.
Back to PSP and repeat the process until you have all the frames you like.
In Animation shop go to animation, animation properties and change it to the speed you like. I changed mine to 30 but you can make it higher to make it slower if you like.
Save as a gif and your done!
Thank you for trying my tutorial!
Wednesday, August 26, 2009
Excuse the mess!
I was having issues with photobucket, so I'm changing accounts and moving everything. Its all going to look like crap for a few hours while I get it straitened out. I'm sorry ya'll!
Shani
Shani
Hocus Pocus PTU (Animated)
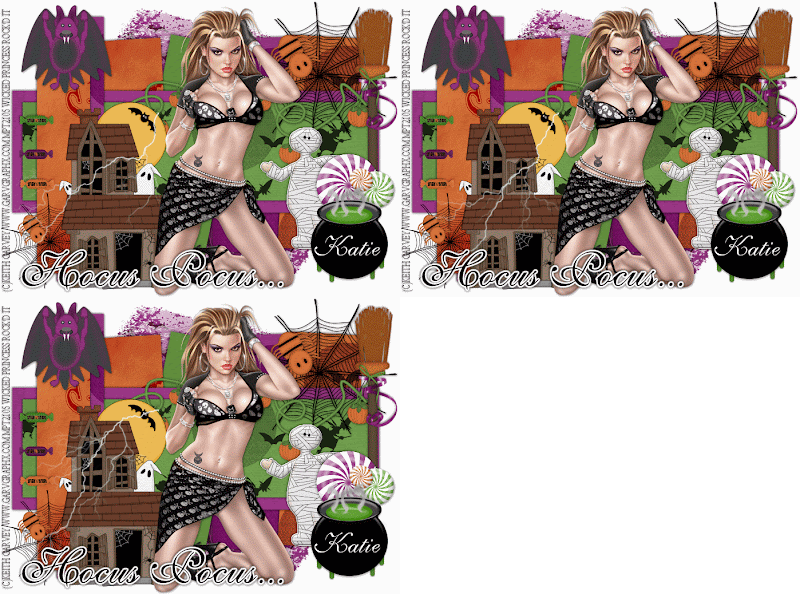
**this is an animated tag, click the thumbnail to see the animation**
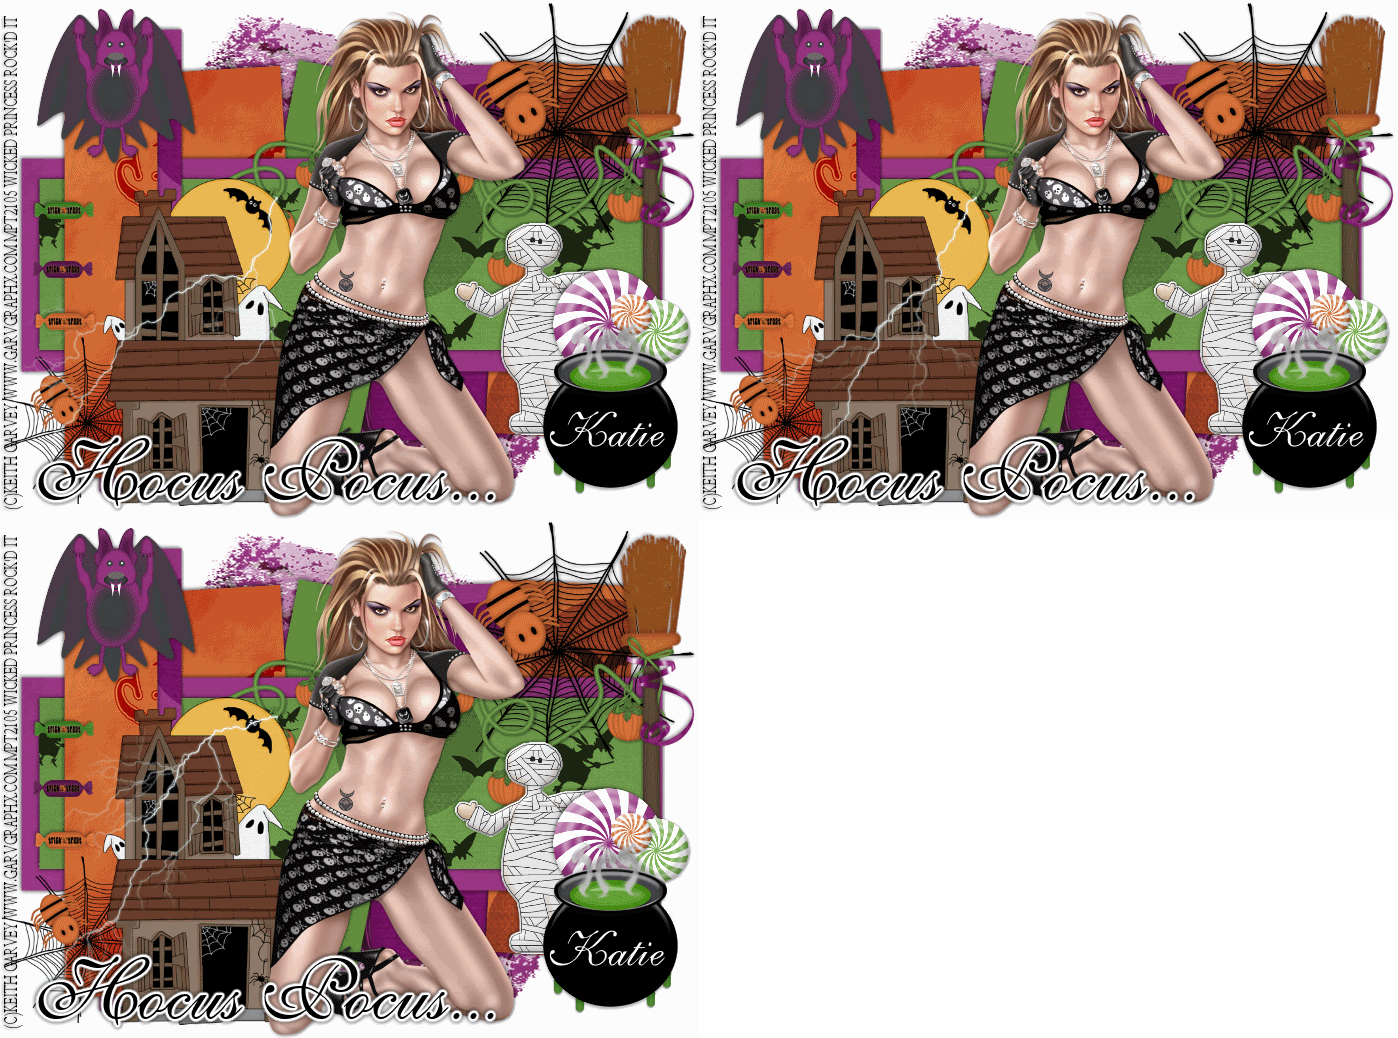
Hocus Pocus PTU (animated)
This tutorial was written on August 26, 2009 by Shani aka Wicked Princess. The concept of the tag is mine and mine alone. Any resemblance to any other tag/tut is pure coincidence. This was written for those with working knowledge of PSP.
Supplies Needed:
++Paint Shop Pro ( I used 10 but any version should work)
++Jasc Animation Shop 3
++Hocus Pocus Scrap kit by Crazed Creations can be purchased <HERE
++Template 161 by Designs by Ali can be found HERE
++Tube of choice or the one I used. I used the artwork of Keith Garvey which can be purchased HERE
++Plug ins:
Eye Candy 4000-Smoke
Xenofex 2-lightening
++Font and Mask of choice
Let’s get Started!
**NOTES:
-Add Drop shadow of choice as you go
-You can merger layers as you want to make things easier for yourself.
Open the template in PSP, using your shortcut keys on your keyboard (SHIFT+D) duplicate the template as a new image. Close the original.
Open several papers of choice, resizing as needed. For example, when I look at the blue bar where it tells me what I’ve opened (say like paper 2) it tells me what percentage I’m viewing it at. For me it’s usually 16%, so I resize to 16% bringing it to 100%. ( I hope that made sense!) Once you’ve done this, minimize for later use.
Next go to the bottom template layer and go to selections, select all, then float, selections defloat. Don’t forget to go to selections, none then delete the template layer. Repeat this process for the rest of the template.
Add a new raster layer and flood fill with your choice of paper. Add your mask and merge the group. Move this layer to the bottom of your layer palette.
Open the spider web and resize. Copy and paste as a new layer to the upper right hand corner of the tag.
Next open the pumpkin string, resize it then copy and paste as a new layer. Move it below the left sided rectangles. Adjust as you like it.
Then open the haunted house, resize then copy and paste to the bottom left side of the tag. You’ll need to center it there the way you think it looks best. I had a hard time adjusting it and messed with it quite a bit lol.
Open the bat you like and resize. Copy and paste as a new layer, at the top left corner of the tag.
Add a broom, ribbon and bow you like to the right side of the tag. Place the broom first, with the bottom up towards the top. Then the ribbon at the center bottom of the broom bristles, and the bow on top of that.
Choose all three of the wrap candy’s and resize by 20%. Copy and paste as new layers, and move into a row on the left hand side. I placed them so they were half over the two rectangles.
Open the mummy sticker, resize then copy and paste as a new layer towards the right, bottom of the tag.
Next open the three hard candies, resize them to different sizes and copy and paste them as new layers. Move them and arrange them to overlap to the right of the mummy. Add the cauldron next right below those.
Open your tube of choice, and resize a bit. Copy and paste and center into your tag.
Add your copyrights, license number, text and tagger markings.
Save this as a pspimage so you have it in layers for later use and before we start the process for animation.
If your not animating, then save as a jpeg or png and your done!
ANIMATION—
Open Animation Shop and minimize it, we’ll be back to it in a minute.
Next go back to PSP, with your current tag up select the haunted house layer and duplicate it twice so you now have 3.
Repeat this for the cauldron also.
Go back to the cauldron, and on the bottom cauldron layer and use your plug in Eye Candy 4000 smoke. I went to settings, and chose small puffs. Go to your second cauldron (the one right above it) and use the plug in again, but hit random seed. Do this the same for the last one.
Next go to the haunted house layer, the one on the bottom. Using your plug in xenofex 2, lightening add the distant lightening setting to it. Go to the second one up, and add it again, but on the random seed setting. Do the same for the last one.
Now close off the top two haunted houses, and the top to cauldrons. Go to edit, copy merged and go to animation shop. Right click and click on paste as new animation.
Back to PSP, close off the bottom layers on each the haunted house and cauldron and open the middle ones. Edit, copy merged, and go to animation shop. Edit, paste after current frame.
Back to PSP and repeat this process for the last one.
Once all done, you should have three frames total in animation shop. Click on the filmstrip button up in the animation tool bar and you should see your animated tag!
Save as a gif and your done.
Thanks for trying my tutorial!
Tuesday, August 25, 2009
Second Spring PTU

Second Spring PTU
This tutorial was written on August 26, 2009 by Shani aka Wicked Princess. The concept of the tag is mine and mine alone. Any resemblance to any other tag/tut is pure coincidence. This was written for those with working knowledge of PSP.
Supplies Needed:
++Paint Shop Pro ( I used 10 but any version should work)
++Scrap kit by me called Autumn Garden can be purchased HERE OR HERE
++Plug ins:
-Alien Skin Xenofex 2, little fluffy clouds
++Font and Mask of choice
Let’s get Started!
**NOTES:
-Add Drop shadow of choice as you go
-You can merger layers as you want to make things easier for yourself.
Open a new canvas of 600x600. You can always resize later. Open your paper of choice, flood fill the canvas and add your mask. Merge the group.
Next open your frame of choice, then copy and paste as a new layer into the center of the canvas.
Open the grass hill element. Resize it then copy and paste as a new layer below the frame layer.
Use your magic wand tool and click inside of the frame. Go to selections, modify expand by 10. Add a new raster layer and move it below the hill layer. Add your plug in light fluffy clouds. I used the hazy setting.
Now we’re going to build our scene. Open the windmill, resize it then copy and paste as a new layer. Make sure this is below the frame layer. Move it to the upper left, just above the hill. Then open the pumpkin “patch” and resize. Copy and paste it then move towards the bottom of the frame on the left.
Open the tree, and sunflower. Copy and paste the tree and move it to the upper right hand side, make it look as though its on the hill, and “planted” there. Add the sunflower to the lower right hand side.
Add the bear with a hose clip art and move it so the hose and water are spraying on the pumpkins. You may need to resize and adjust the bear.
Now open the birdhouse and a bow. Resize them then copy and paste as a new layer. Move to the bottom left of the frame next to the pumpkin patch.
Next open the garden of weedin’ sign and resize. Copy and paste it as a new layer, move it to the upper left next to the windmill.
Open the bag and bucket with gloves clip art and the carrot. Resize then copy and paste as a new layer by the base of the tree.
Then open the rainbow and the sun elements. Copy and paste as new layer to the upper right hand side of the frame. Move the rainbow at an angle.
Next open the flower doodle of your choice. Copy and paste as a new layer to the upper right of the template. Angle it slightly to the right.
Open the shovel and pitch fork and resize. Copy and paste each on the opposite sides of the frame.
Add the window box clipart to the bottom of the frame on the right hand side. Add a bow to either side of the bottom of the frame.
Open the basket and the seed packets. Resize then copy and paste as new layers to the left hand side of the frame on the bottom.
Add two bee’s randomly through out the tag where you like.
Finally add your text. If you choose not to use a tube for this, please do credit me for the kit with my url such as I have.
Save and your done.
Thanks for trying my tutorial.
Monday, August 24, 2009
Dangerously Sweet PTU

Dangerously Sweet PTU
This tutorial was written on August 22, 2009 by Shani aka Wicked Princess. The concept of the tag is mine and mine alone. Any resemblance to any other tag/tut is pure coincidence. This was written for those with working knowledge of PSP.
Supplies Needed:
++Paint Shop Pro ( I used 10 but any version should work)
++Scrap kit by me called Dangerously Sweet can be purchased HERE OR HERE
++Template 51 by Yvette can be found HERE*Scroll all the way to the bottom for the labels to find the link.
++Tube of choice or the one I used. I used the tube provided. If you do use this tube and the scrap kit please credit me by using my URL for my blog! Thank you!
++Plug ins:
-Eye Candy 4000 Gradient glow
-Muera Meister copies
++Font and Mask of choice
Let’s get Started!
**NOTES:
-Add Drop shadow of choice as you go
-You can merger layers as you want to make things easier for yourself.
Open the template in PSP, using your shortcut keys on your keyboard (SHIFT+D) duplicate the template as a new image. Close the original. Because this template is taking up the whole space we need to add more. Go to image, canvas size and make it 600x600.
Open several papers of choice, resizing as needed. For example, when I look at the blue bar where it tells me what I’ve opened (say like paper 2) it tells me what percentage I’m viewing it at. For me it’s usually 16%, so I resize to 16% bringing it to 100%. ( I hope that made sense!) Once you’ve done this, minimize for later use.
Next go to the bottom template layer and go to selections, select all, then float, selections defloat. Add your gradient glow of choice. Don’t forget to go to selections, none then delete the template layer. Repeat this process for the rest of the template.
Add a new raster layer and flood fill with your choice of paper. Add your mask and merge the group. Move this layer to the bottom of your layer palette.
Open the babies breath. Copy and paste as a new layer and move to the upper left of the tag as well as below the template. Duplicate it and go to image, mirror. Then duplicate it again go to image, flip. One more time and go to image, mirror. You should now have one on each side at the top and bottom.
Next open the long stem rose, copy and paste as a new layer and move it to below the template layer. Move it to the top of the tag, duplicate it then go to image, mirror.
Open the pearl flower of your choice, copy and paste as a new layer. Use your plug in Muera Meister copies on the encircle option and set the shift x and y to 60. Move this layer below the circle template layer.
Then add the glitter rain of your choice, copy and paste as a new layer, moving it up towards the top of the circle template layer. On the circle layer, go to selections, float then defloat then invert. On the glitter rain layer, hit your delete key. Go to selections, none. Duplicate it and go to image flip.
Open the heart chain, copy and paste it as a new layer on the circle template layer. Erase the parts you don’t want seen outside the circle layer.
Then open the rose of your choice. Resize it then copy and paste as a new layer. Use your plug in Muera Meister copies on the encircle option and set the shift x and y to 60. Move this layer below the circle template layer.
Add a bow of choice to the two corners on the top rectangle. Angle it slightly.
Then add your tube of choice and center it. Resize and adjust as needed.
Next open the cupcake, lollipop, cell phone, purse, polish, lipstick and jelly bean of choice and copy and paste them after resizing. Place to the left of the tag in the arrangement you choose.
Finally add your text, any copyrights and tagger markings.
Save and your done!
Thank you for trying my tutorial.
Punk Cutie PTU
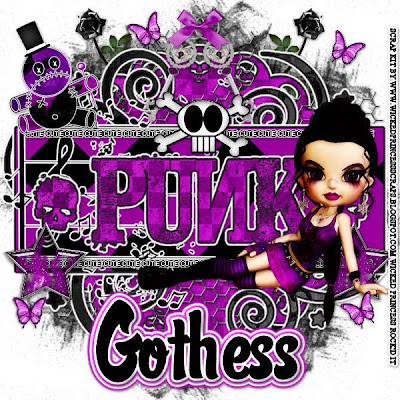
Punk Cutie PTU
This tutorial was written on August 22, 2009 by Shani aka Wicked Princess. The concept of the tag is mine and mine alone. Any resemblance to any other tag/tut is pure coincidence. This was written for those with working knowledge of PSP.
Supplies Needed:
++Paint Shop Pro ( I used 10 but any version should work)
++Scrap kit by me called Gothess can be purchased HERE OR HERE
++Template 77 by Kristin can be found HERE
++Tube of choice or the one I used. I used the tube included in the kit.
++Plug ins:
-Eye Candy 4000 Gradient glow
++Font and Mask of choice
Let’s get Started!
**NOTES:
-Add Drop shadow of choice as you go
-You can merger layers as you want to make things easier for yourself.
Open the template in PSP, using your shortcut keys on your keyboard (SHIFT+D) duplicate the template as a new image. Close the original.**NOTE when a template is not large enough, you'll need to make more of a canvas around it. To do this go to image, canvas size and increase it to what you want. I usually go with 600x600.
Open several papers of choice, resizing as needed. For example, when I look at the blue bar where it tells me what I’ve opened (say like paper 2) it tells me what percentage I’m viewing it at. For me it’s usually 16%, so I resize to 16% bringing it to 100%. ( I hope that made sense!) Once you’ve done this, minimize for later use.
Next go to the bottom template layer and go to selections, select all, then float, selections defloat. Add your gradient glow of choice. Don’t forget to go to selections, none then delete the template layer. Repeat this process for the rest of the template.
Add a new raster layer and flood fill with your choice of paper. Add your mask and merge the group. Move this layer to the bottom of your layer palette.
Open the long stem rose you like. Copy and paste as a new layer and move to the upper left of the tag. Move this down to just above the mask layer. Duplicate it and go to image, mirror.
Then open the chicken wire element, copy and paste it as a new layer, moving it below the doodle layer.
Next open the musical notes you like, resize then add a fat gradient glow you like. Resize it then copy and paste as a new layer and move to just above the rectangle layer, below the word art.
Open the star with fire you like. Resize then copy and paste as a new layer towards the bottom of the rectangle on the left. Duplicate it and go to image, mirror.
Add your tube of choice to the bottom right hand side of the rectangle. Adjust and resize as you need to.
Next open the key, resize then copy and paste as a new layer. Move towards the top of the tag and angle slightly. Duplicate it and go to image, mirror. Add a bow to the center of the loops.
Open the skull sticker and resize it. Copy and paste as a new layer just below the keys.
Then open the voodoo doll and resize it. Copy and paste as a new layer towards the top of the rectangle on the left hand side
Open the butterfly or butterflies you like. Resize then copy and paste as new layers and paste through the tag as you like.
Add your text, and any copyrights. If you use just my kit and the tube included, please credit me for the kit the with my blog url please.
Save and your done.
Thank you for trying my tutorial!
Sunday, August 23, 2009
Modern Girl FTU

Modern Girl FTU
This tutorial was written on August 22, 2009 by Shani aka Wicked Princess. The concept of the tag is mine and mine alone. Any resemblance to any other tag/tut is pure coincidence. This was written for those with working knowledge of PSP.
Supplies Needed:
++Paint Shop Pro ( I used 10 but any version should work)
++Scrap kit by Blue Dream Designs called I Am A Modern Girl can be found HERE
++Template 13 by Horseplays Pasture can be found HERE
++Tube of choice or the one I used. I used the artwork of Popeye Wong, which is a FTU artist. Please make sure you credit him in your tag. You can find his work HERE
++Mask and Font of choice
Let’s get Started!
**NOTES:
-Add Drop shadow of choice as you go
-You can merger layers as you want to make things easier for yourself.
Open the template in PSP, using your shortcut keys on your keyboard (SHIFT+D) duplicate the template as a new image. Close the original.
Open several papers of choice, resizing as needed. For example, when I look at the blue bar where it tells me what I’ve opened (say like paper 2) it tells me what percentage I’m viewing it at. For me it’s usually 16%, so I resize to 16% bringing it to 100%. ( I hope that made sense!) Once you’ve done this, minimize for later use.
Next go to the bottom template layer and go to selections, select all, then float, selections defloat. Don’t forget to go to selections, none then delete the template layer. Repeat this process for the rest of the template.
Add a new raster layer and flood fill with your choice of paper. Add your mask and merge the group. Move this layer to the bottom of your layer palette.
Open the phone and laptop elements. Copy and paste after resizing them into the center of the frame layer, and arrange and angle the way you like them.
Then open the notecard of your choice, copy and paste it into the canvas angle it slightly and move to the upper left of the tag. Add two pencils you like and arrange them the way you like.
Open your tube of choice and resize if needed. Copy and paste as a new layer, moving it to the right of the tag.
Add a bow to them. You’ll note I chose to add a bow to the behind of the tube lol
Open the monitor and CPU elements, copy and paste after resizing to the bottom left of the tag. I added word art to the screen.
Next open the chain charm of your choice, resize then copy and paste as a new layer. Move below the butterfly template layer.
Add the word art you like and several flowers through the tag.
Add any text, copyrights and tagger markings.
Save and your done
Thank you for trying my tutorial.
Princess That I Am PTU
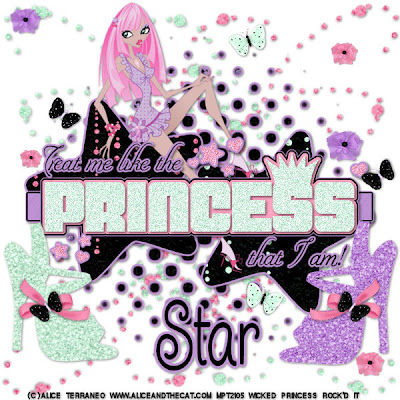
This tutorial was written on August 22, 2009 by Shani aka Wicked Princess. The concept of the tag is mine and mine alone. Any resemblance to any other tag/tut is pure coincidence. This was written for those with working knowledge of PSP.
Supplies Needed:
++Paint Shop Pro ( I used 10 but any version should work)
++Scrap kit called Glamorous by Stargazer Muzings can be purchased HERE
++Template 24 by Kristin can be found HERE
++Tube of choice or the one I used. I used the work of Alice Terraneo and it can be purchased
HERE
++Plug ins:
Eye Candy 4000 Gradient Glow
++Mask and Font of choice
Let’s get Started!
**NOTES:
-Add Drop shadow of choice as you go
-You can merger layers as you want to make things easier for yourself.
Open the template in PSP, using your shortcut keys on your keyboard (SHIFT+D) duplicate the template as a new image. Close the original.
Open several papers of choice, resizing as needed. For example, when I look at the blue bar where it tells me what I’ve opened (say like paper 2) it tells me what percentage I’m viewing it at. For me it’s usually 16%, so I resize to 16% bringing it to 100%. ( I hope that made sense!) Once you’ve done this, minimize for later use.
Next go to the bottom template layer and go to selections, select all, then float, selections defloat. Add your gradient glow of choice. Don’t forget to go to selections, none then delete the template layer. Repeat this process for the rest of the template.
Add a new raster layer and flood fill with your choice of paper. Add your mask and merge the group. Move this layer to the bottom of your layer palette.
Open your glitter doodle of choice. Resize, then copy and paste as a new layer. Move to the upper right hand side of the canvas. Move it to the bottom layer below the mask layer. Duplicate it and go to image, mirror, image flip. Open another one and repeat this process.
Add your tube of choice and move below the word art. A leaning or sitting tube is the best to use for this. I resized her and positioned in to fall on the star a bit.
Next open the two glitter shoes you like. Copy and paste them as new layers, opposite each other on the bottom of the tag. Add a bow and butterfly of choice to them.
Open several flowers of choice, resize them and copy and paste as a new layer. Duplicate them and move them randomly through out the tag.
Open another butterfly and resize. Copy and paste through the tag as you like.
Add your text, license and copyright info and tagger markings
Save and your done
Thanks for trying my tutorial.
Dance of Love PTU

Dance of Love PTU
This tutorial was written on August 22, 2009 by Shani aka Wicked Princess. The concept of the tag is mine and mine alone. Any resemblance to any other tag/tut is pure coincidence. This was written for those with working knowledge of PSP.
Supplies Needed:
++Paint Shop Pro ( I used 10 but any version should work)
++Scrap kit called My Loving Heart by Stargazer Muzings can be purchased HERE
++Template 4 by Horseplays Pastures can be found HERE
++Two tubes of choice, or the ones I used. I used the artwork of Keith Garvey and you can purchase it HERE
++Plug ins:
-Xero Radiance
-Xero Soft Mood
-Tramages Tow the line
+Mask and font of choice
Let’s get Started!
**NOTES:
-Add Drop shadow of choice as you go
-You can merger layers as you want to make things easier for yourself.
Open the template in PSP, using your shortcut keys on your keyboard (SHIFT+D) duplicate the template as a new image. Close the original.
Open several papers of choice, resizing as needed. For example, when I look at the blue bar where it tells me what I’ve opened (say like paper 2) it tells me what percentage I’m viewing it at. For me it’s usually 16%, so I resize to 16% bringing it to 100%. ( I hope that made sense!) Once you’ve done this, minimize for later use.
Next go to the bottom template layer and go to selections, select all, then float, selections defloat. Don’t forget to go to selections, none then delete the template layer. Repeat this process for the rest of the template.
Add a new raster layer and flood fill with your choice of paper. Add your mask and merge the group. Move this layer to the bottom of your layer palette.
Open the heart pin element, resize it then copy and paste as a new layer. Move it to the layer above the mask layer. Duplicate it and move them to either end of the rectangle layers.
On the rectangle layers, use your plug in Tramages, Tow the line with the following settings
Control 0: 80
Control1: 54
Control2: 48
Control3: 9
Dot this for both the rectangle layers.
On the first heart layer from the bottom, which is the upper left one, your going to add your tube of choice. Remember your going to use this for all three of them. Ok open the tube, resize it then copy and paste as a new layer. Position it on that heart where you know you would like it. Go to the heart layer, and go to selections, select all then selections, defloat then selections, invert. Go back to your tube layer and hit delete. Then selections none. Use your plug in Xero, Radiance on the random setting of your choice. Then use Xero, Softmood on a random setting of your choice.
Go to the next heart, which is going to be the one on the middle, and copy and paste your tube in the position you like. Note that I mirrored mine and had it going the other way. I also resized it a bit. You adjust and resize as you like. Repeat the steps to place it like you did the last one BUT change the blend mode to luminance.
Go to the final heart, the one on the bottom and repeat the same steps as above. Again not I changed the positioning a bit and adjusted it. Do change the blend mode on this one also.
Open the two roses you like. Resize them then copy and paste each of them as a new layer. Place them side by side up towards the top of the bottom rectangle. You are going to duplicate them several times, alternating them to make a row of roses. Do this until you have a full line you are happy with. Close off ALL layers and merge visible. Open them all back up and then back to the row of roses, duplicate it and go to image, mirror. Move it to the bottom of the top rectangle.
Next open two of the charm and bows you like. Resize them then copy and paste as new layers. Move the one to the end of the top rose row. Duplicate it and go to image, mirror. Moving it to the other end. Move the other one you opened after copying and pasting to the center of the rose row. Repeat this for the bottom row.
Open the heart charm with bow you like, copy and paste after resizing it to the bottom of the bottom heart.
Then open three flowers you like. Resize them then copy and paste as new layers. Move one around one of the hearts in several spots and repeat the same for the other two flowers and the other hearts.
Add you final tube to the right side of the tag. Add the Xero radiance plug in again. Use it at the random setting you like. Adjust it as you need to.
Add your text, copyrights and license number. Don’t forget your tagger markings!
Save and your done.
Thank you for trying my tutorial.
Saturday, August 22, 2009
Tangled Web PTU
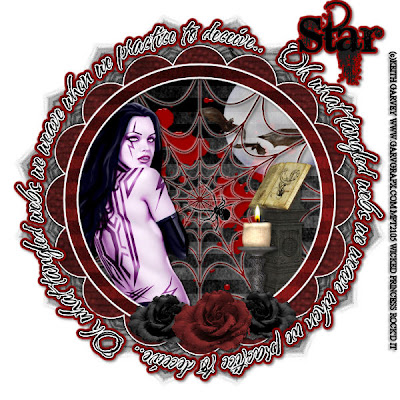
Tangled Web PTU
This tutorial was written on August 22, 2009 by Shani aka Wicked Princess. The concept of the tag is mine and mine alone. Any resemblance to any other tag/tut is pure coincidence. This was written for those with working knowledge of PSP.
Supplies Needed:
++Paint Shop Pro ( I used 10 but any version should work)
++Scrap kit called Vampire Kiss by Stargazer Muzings can be purchased HERE
+Template 64 by Kristin @ Toxic Desirez can be found HERE
++Tube of choice or the one I used. I used the artwork of Keith Garvey which can be purchased HERE
++Plug ins:
-Eye candy 4000 Gradient glow
-Xero, Radiance
++Font and Mask of choice
++Font and Mask of choice
Let’s get Started!
**NOTES:
-Add Drop shadow of choice as you go
-You can merger layers as you want to make things easier for yourself.
Open the template in PSP, using your shortcut keys on your keyboard (SHIFT+D) duplicate the template as a new image. Close the original.
Open several papers of choice, resizing as needed. For example, when I look at the blue bar where it tells me what I’ve opened (say like paper 2) it tells me what percentage I’m viewing it at. For me it’s usually 16%, so I resize to 16% bringing it to 100%. ( I hope that made sense!) Once you’ve done this, minimize for later use.
Next go to the bottom template layer and go to selections, select all, then float, selections defloat. Add a gradient glow of your choice. Don’t forget to go to selections, none then delete the template layer. Repeat this process for the rest of the template.
Add a new raster layer and flood fill with your choice of paper. Add your mask and merge the group. Move this layer to the bottom of your layer palette.
Open the blood splatter element, resize it then copy and paste as a new layer into the center of the canvas. Move it below the web layer.
Next open the moon and bats, resize it then copy and paste as a new layer. Move below the web layer and move it to the upper left part of the circle frame. Using your magic wand tool click inside the frame, go to selections, modify expand by 8. Go to selections, invert. On your moon layer, tap delete on your keyboard and then go to selections, none.
Open the pedestal with the book, resize then copy and paste as a new layer, moving below the circle frame layer. Move and adjust it to the right side of the frame. Using your eraser brush tool, erase the part of the pedastal that is sticking out below the frame on the right, bottom.
Add your tube of choice to the right side, below the frame layer. Add your plug in Xero, radiance on the random setting of your choice. Using your magic wand tool, click inside the circle frame. Go to selections, modify expand by 8. Go to selections, invert and then on your tube layer, tap the delete key. Go to selections, none.
Open the candle you like and resize it. Copy and paste as a new layer and move to the right slightly by the pedestal.
Add the first rose you like to the bottom center of the frame. Then add a second one to the right and left of that one.
Add any other text you like, copyrights, license numbers and tagger markings.
Save and your done!
Thank you for trying my tutorial.
Beautiful View FTU

Beautiful View FTU
This tutorial was written on August 22, 2009 by Shani aka Wicked Princess. The concept of the tag is mine and mine alone. Any resemblance to any other tag/tut is pure coincidence. This was written for those with working knowledge of PSP.
Supplies Needed:
++Paint Shop Pro ( I used 10 but any version should work)
++Scrap kit by Doris @ Scraps Dimensions called by Diamond Blues can be found on her blog HERE
++Template 32 by Bev can be found HERE
++Tube of choice or the one I used. I used the artwork of Kate Lightfoot, which can be found HERE She does give permission to use her work, please give proper credit when you do use it.
++Font and Mask of choice
Let’s get Started!
**NOTES:
-Add Drop shadow of choice as you go
-You can merger layers as you want to make things easier for yourself.
Open the template in PSP, using your shortcut keys on your keyboard (SHIFT+D) duplicate the template as a new image. Close the original.
Open several papers of choice, resizing as needed. For example, when I look at the blue bar where it tells me what I’ve opened (say like paper 2) it tells me what percentage I’m viewing it at. For me it’s usually 16%, so I resize to 16% bringing it to 100%. ( I hope that made sense!) Once you’ve done this, minimize for later use.
Next go to the bottom template layer and go to selections, select all, then float, selections defloat. Don’t forget to go to selections, none then delete the template layer. Repeat this process for the rest of the template. **NOTE! One you have flood filled the layer for the burnt paper layer, go to blend mode on the layers palette and change it to overlay. Once you did this you can not delete the template layer. That’s ok.
Using your magic wand tool, click inside the frame layer. Go to selections, modify expand by 8 and add a new raster layer. Flood fill with your choice of paper. Go to selections, none.
Open your tube of choice and resize it. Copy and paste as a new layer and move it below the frame layer. Using your magic wand tool, click inside the frame and go to selections, modify, expand by 8. Then go to selections, invert. On your tube layer tap the delete key. Go to selections, none.
Add a new raster layer and flood fill with your choice of paper. Add your mask and merge the group. Move this layer to the bottom of your layer palette.
Open the plant element. Resize it then copy and paste as a new layer, move below the frame and frame background layer. Arrange and adjust as needed. Duplicate it and go to image mirror. Duplicate it once more, and move to the top of the frame. Angel it so that it “sprays” outward toward the right. Duplicate it and go to image mirror. Close off all layers except for these two then merge visible. Duplicate this layer and go to image, flip. Open all layers. Adjust the plants as needed.
Add the heart pin of your choice to either side of the frame. Then add a the rose swag to the bottom of the frame.
Open the bow of choice and resize it. Add it to the top of the frame.
Next open the rose with stem of your choice, resize it then copy and paste it as a new layer. Move it below the frame layer and angle it as needed. Duplicate it and go to image, mirror.
Next open up the flower and butterflies of choice, resize them and copy and paste as new layers through out the tag where you like.
Add your text, copyrights and tagger markings
Save and your done!
Thank you for trying my tutorial.
Hey Sexy PTU
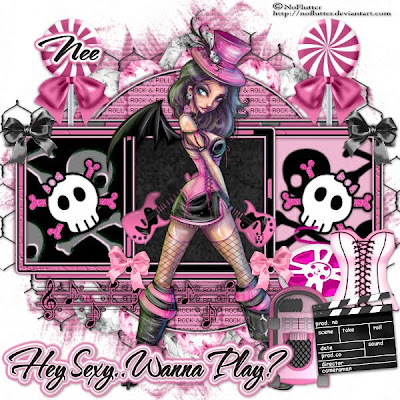
Hey Sexy PTU
This tutorial was written on August 22, 2009 by Shani aka Wicked Princess. The concept of the tag is mine and mine alone. Any resemblance to any other tag/tut is pure coincidence. This was written for those with working knowledge of PSP.
Supplies Needed:
++Paint Shop Pro ( I used 10 but any version should work)
++Scrap kit called Pink Punkby Nee @ Envied and Admired Scraps can be purchased HERE OR HERE OR HERE
++Template 73 by Kristin @ Toxic Desirez can be found HERE
++Tube of choice or the one I used. I used the work of Jen aka NoFlutter it is a FTU tube and you can find her work HERE
++Plug ins:
-Eye Candy 4000 Gradient Glow
-Muera Meister Copies
++Font and Mask of choice
Let’s get Started!
**NOTES:
-Add Drop shadow of choice as you go
-You can merger layers as you want to make things easier for yourself.
Open the template in PSP, using your shortcut keys on your keyboard (SHIFT+D) duplicate the template as a new image. Close the original.
Open several papers of choice, resizing as needed. For example, when I look at the blue bar where it tells me what I’ve opened (say like paper 2) it tells me what percentage I’m viewing it at. For me it’s usually 16%, so I resize to 16% bringing it to 100%. ( I hope that made sense!) Once you’ve done this, minimize for later use.
Next go to the bottom template layer and go to selections, select all, then float, selections defloat. Add a gradient glow of your choice. Don’t forget to go to selections, none then delete the template layer. Repeat this process for the rest of the template. **NOTE! I removed the word art layer and the large music note layers. We won’t need those for this tag.
Add a new raster layer and flood fill with your choice of paper. Add your mask and merge the group. Move this layer to the bottom of your layer palette.
Open the wire fencing element. Resize it then copy and paste as a new layer and move to the bottom layer just above the mask layer.
Next open the pink gem of choice, resize it slightly then copy and paste as a new layer into the center of the canvas. Use your plug in muera meister copies on the encircle option. Click ok then move this to just above the fencing layer. Arrange as a needed.
Open the other gem of choice and repeat the process. Adjust and arrange as needed and move this layer below the pink gem layer.
Next open the lollipop of choice and resize. Copy and paste as a new layer, move it below the frame and background layers to the right. Duplicate it and go to image, mirror. Adjust as needed.
Open the guitar of choice, resize it then copy and paste as a new layer and place into the center of the canvas. Angle it to the left slightly. Add another guitar and do the same.
Choose the skull and crossbones element, resize then copy and paste into the left and right frames, angling slightly. Adjust as needed.
Next open the juke box, corset, board marker and film reel. Resize them then copy and paste them accordingly into the canvas and move to the bottom right hand side of the tag.
Open two bows you like, copy and paste them both, duplicating each once. Move one of the bows to each of the outside frame in the right corners. Then move the others to the opposite corners on the bottom inside.
Finally add your text and copyrights as well as tagger markings.
Save and your done! Thanks for trying my tutorial.
Tuesday, August 18, 2009
Rubber Ducky PTU

Rubber Ducky PTU
This tutorial was written on August 18, 2009 by Shani aka Wicked Princess. The concept of the tag is mine and mine alone. Any resemblance to any other tag/tut is pure coincidence. This was written for those with working knowledge of PSP.
Supplies Needed:
++Paint Shop Pro ( I used 10 but any version should work)
++Scrap kit called Row, Row, Out to Sea by Sticky Kisses Designs can be purchased HERE
++Tube of choice or the one I used. I used the artwork of Suzanne Wolcott which can be found HERE
++Font of choice
Let’s get Started!
**NOTES:
-Add Drop shadow of choice as you go
-You can merger layers as you want to make things easier for yourself.
Open several papers of choice, resizing as needed. For example, when I look at the blue bar where it tells me what I’ve opened (say like paper 2) it tells me what percentage I’m viewing it at. For me it’s usually 16%, so I resize to 16% bringing it to 100%. ( I hope that made sense!) Once you’ve done this, minimize for later use.
Open a new canvas of 600x600 you can always resize and crop later.
Next open the first flower frame you want to use. Note this one will be on the bottom layer. Resize it then copy and paste into your canvas. Open a second one, resize it to be smaller then copy and paste as a new layer. Adjust and move where you like it.
Next draw out a circle using your preset shapes. Make it a bit smaller than the bottom frame. Convert it to a raster layer and move to the bottom of the layer s palette.
Open the waves, resize then copy and paste as a new layer, move it below the frame layer. Add the lighthouse just above this layer to the right.
Add the bubbles after resizing to either side of the top frame layer. Then on one side, the rubber duckie button and on the other side the paper hat.
Open the Flower of your choice, resize it then copy and paste as a new layer on the bottom left hand side of the frame. Duplicate it and go to image, mirror. Add the pinwheel after resizing to the center between the flowers. Move this layer below the flowers layer.
Next open the cloud and sun, resizing them. Copy and paste them at opposite sides of the canvas towards the top.
Add your text, copyrights, license number and tagger markings
Save and your done! Thank you for trying my tutorial.
Hoppin In PTU

Hoppin In PTU
This tutorial was written on August 18, 2009 by Shani aka Wicked Princess. The concept of the tag is mine and mine alone. Any resemblance to any other tag/tut is pure coincidence. This was written for those with working knowledge of PSP.
Supplies Needed:
++Paint Shop Pro ( I used 10 but any version should work)
++Scrap kit by me called Hippity Hoppity and you don’t stop… can be purchased from HERE OR HERE
++Template 11 by Nee at Envied and Admired can be found HERE
++Two tubes of choice or the ones I used. I used the artwork of Elias Chatzoudis which can be purchased HERE
++Plug ins:
-Muera Meister Copies
+Font of choice
Let’s get Started!
**NOTES:
-Add Drop shadow of choice as you go
-You can merger layers as you want to make things easier for yourself.
Open the template in PSP, using your shortcut keys on your keyboard (SHIFT+D) duplicate the template as a new image. Close the original.
Open several papers of choice, resizing as needed. For example, when I look at the blue bar where it tells me what I’ve opened (say like paper 2) it tells me what percentage I’m viewing it at. For me it’s usually 16%, so I resize to 16% bringing it to 100%. ( I hope that made sense!) Once you’ve done this, minimize for later use.
Next go to the bottom template layer and go to selections, select all, then float, selections defloat. Don’t forget to go to selections, none then delete the template layer. Repeat this process for the rest of the template.
Open the doodle of choice, resize it then copy and paste as a new layer. Angle it and then move it to the upper right hand portion of the tag, place where you like it. Move this layer below the octagon layer. Duplicate it and go to image, mirror then image, flip.
Next open the button flower you like, resize it . Then copy and paste as a new layer in opposite corners, moving below the octogan layer also.
Open the frame of choice, copy and paste as a new layer into the center of the octagan. Open a flower you like resize it then copy and paste as a new layer. Use your plug in, muera meister copies with the shift x and y set at 65 and the number of flowers is up to you. Move this layer below the frame. With the frame layer activated, click inside the frame and go to selections, modify expand by 6. Go to selections, invert and on the flower layer, hit delete. Go to selections, none.
Next add your choice of bubbles, resize then copy and paste as a new layer, moving it below the flower layer. Adjust as you like. Open the cattail clip art, resize then copy and paste as a new layer below the flower and frame layer. Move to the right slightly. Duplicate it and go to image, mirror. Place a flower you like into the center of where the leaves meet.
Open your tubes of choice and copy and paste them into the frame. Move them, arrange and erase as you like. You’ll notice I made mine overlapping each and certain parts hidden in the frame.
Next add the frogs of your choice to opposite corners. Add several butterflies through out the tag and place them where you like.
Finally add your text, copyrights and license number.
Save and your done!
Thank you for trying my tutorial.
Monday, August 17, 2009
Attittude Is... PTU

Attitude Is… PTU
This tutorial was written on August 17, 2009 by Shani aka Wicked Princess. The concept of the tag is mine and mine alone. Any resemblance to any other tag/tut is pure coincidence. This was written for those with working knowledge of PSP.
Supplies Needed:
++Paint Shop Pro ( I used 10 but any version should work)
++Scrap kit by Halo Designs called Friends can be purchased HERE
++Template 7 by Wacky Scraps can be found HERE
++Tube pf choice or the one I used. I used the artwork of Leigh Young which can be purchased HERE
Let’s get started!
**NOTES:
-Add Drop shadow of choice as you go
-You can merger layers as you want to make things easier for yourself.
Open the template in PSP, using your shortcut keys on your keyboard (SHIFT+D) duplicate the template as a new image. Close the original.
Open several papers of choice, resizing as needed. For example, when I look at the blue bar where it tells me what I’ve opened (say like paper 2) it tells me what percentage I’m viewing it at. For me it’s usually 16%, so I resize to 16% bringing it to 100%. ( I hope that made sense!) Once you’ve done this, minimize for later use.
Next go to the bottom template layer and go to selections, select all, then float, selections defloat. Don’t forget to go to selections, none then delete the template layer. Repeat this process for the rest of the template.
Add a new raster layer and flood fill with your choice of paper. Add your mask and merge group. Note: I duplicated my mask and went to image, mirror and image flip to get the effect I wanted.
Open the doodle of choice, resize it. Then copy and paste as a new layer, angling it to the right slightly. Move this layer below the bottom template layer and move up to the upper right hand corner. Duplicate it and go to image, mirror.
Next open your tube of choice, and resize. Copy and paste as a new layer and move to the center of the tag.
Open the flower element you like, resize it. Then copy and paste as a new layer to the bottom left hand corner. Duplicate it and move it to the upper right hand corner.
Add a heart of choice to the upper left hand corner. Duplicate it then move to the opposite corner.
Next add a heart charm of your choice, to the left side of the tag, angling it slightly to the left or right. Resize and adjust as you like. Move it below the heart layer.
Add your text, copyrights, license number and tagger markings.
Save and your done!
Thanks for trying my tutorial.
Embrace PTU
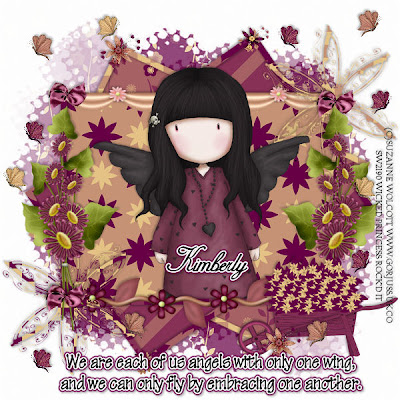
Embrace PTU
This tutorial was written on August 17, 2009 by Shani aka Wicked Princess. The concept of the tag is mine and mine alone. Any resemblance to any other tag/tut is pure coincidence. This was written for those with working knowledge of PSP.
Supplies Needed:
++Paint Shop Pro ( I used 10 but any version should work)
++Scrap kit by Halo Designs called Friends can be purchased HERE
++Template by Me which can be found HERE
++Tube of choice or the one I used. I used the artwork of Suzanne Wolcott which can be purchased HERE
Let’s get started!
**NOTES:
-Add Drop shadow of choice as you go
-You can merger layers as you want to make things easier for yourself.
Open the template in PSP, using your shortcut keys on your keyboard (SHIFT+D) duplicate the template as a new image. Close the original.
Open several papers of choice, resizing as needed. For example, when I look at the blue bar where it tells me what I’ve opened (say like paper 2) it tells me what percentage I’m viewing it at. For me it’s usually 16%, so I resize to 16% bringing it to 100%. ( I hope that made sense!) Once you’ve done this, minimize for later use.
Next go to the bottom template layer and go to selections, select all, then float, selections defloat. Don’t forget to go to selections, none then delete the template layer. Repeat this process for the rest of the template.
Add a new raster layer and flood fill with your choice of paper. Add your mask and merge group. Note: I duplicated my mask and went to image, mirror and image flip to get the effect I wanted.
Next open the flower wire border you like. Resize it then copy and paste as a new layer to the bottom of the frame. Move it below the doodle flower layer.
Open the swag with flowers of your choice, copy and paste after resizing to the top part of the frame. Move it below the doodle flower layer.
Choose the flower bundle you like. Resize it then copy and paste as a new layer to the left of the frame. Duplicate it and go to image, mirror. Add a bow of choice to the end of the one on the left.
Go back and add a bow of choice to each corner on the top.
Add the wheelbarrow and resize it. Copy and paste as a new layer and move to the bottom right hand corner.
Open your tube of choice and center it in the middle of the template canvas. Note: I duplicated my tube, moved one below the frame layer and elements and then on the top tube layer, erased the parts I wanted hidden.
Open several butterflies you like, resize them. Copy and paste at various positions through out the tag.
Finally add your text of choice, copyright info, license info and tagger markings.
Save and your done!
Thank you for trying my tutorial.
Sunday, August 16, 2009
Cure PTU

This tutorial was written on August 16, 2009 by Shani aka Wicked Princess. The concept of the tag is mine and mine alone. Any resemblance to any other tag/tut is pure coincidence. This was written for those with working knowledge of PSP.
Supplies Needed:
++Paint Shop Pro ( I used 10 but any version should work)
++Scrap kit by Gina called Dr. I Feel Bad can be purchased HERE
++Template 11 by Wacky Scraps can be found HERE
++Tube of Choice or the one I used. I used the artwork of Elias Chatzoudis which can be purchased HERE
++Plug ins:
-Eye Candy 4000 Gradient Glow
-Alien Skin, Xenofex 2-Crack effect
++Font and mask of choice
Let’s get started!
**NOTES:
-Add Drop shadow of choice as you go
-You can merger layers as you want to make things easier for yourself.
Open the template in PSP, using your shortcut keys on your keyboard (SHIFT+D) duplicate the template as a new image. Close the original.
Open several papers of choice, resizing as needed. For example, when I look at the blue bar where it tells me what I’ve opened (say like paper 2) it tells me what percentage I’m viewing it at. For me it’s usually 16%, so I resize to 16% bringing it to 100%. ( I hope that made sense!) Once you’ve done this, minimize for later use.
Next go to the bottom template layer and go to selections, select all, then float, selections defloat. Add a gradient glow of your choosing. Don’t forget to go to selections, none then delete the template layer. Repeat this process for the rest of the template.
Add a new raster layer and flood fill with your choice of paper. Add your mask and merge the group.
On your heart layer of the template your going to use your Xenoefex plug in on the Crack effect.
Use the following settings:
Crack Length: 56.69
Crack Spacing 9.92
Crack Width 2.55
Edge Roughness 49
Open one of the band aids. Resize then copy and paste as a new layer. Angle and adjust it across the top rectangle layers. Add the medical cross to the center of the bandaid. Resize it as needed.
Next open the clipboard you like and resize it. Copy and paste as a new layer, angling it slight and move to the upper left hand side of the tag. Add the RX symbol to it and adjust as needed.
Open several of the pill elements and copy and paste as a line down the middle of the two rectangles on the right. Angle them slightly as you go so they look scattered.
Then open the syringe and copy and paste as a new layer and move to the left, below the heart layer. Add the pen and stethascope of your choice, angle and adjust as you like them.
Add the stitches after resizing to the heart layer. Make sure you center it as best as you can.
Open the stat line and copy and paste it as a new layer. Resize and adjust, move it below the heart layer.
Next open the pill bottle and notebook along with the heart with the H on it. Resize them and copy and paste them as new layer to the right of the stat. Arrange them as you like.
Add your tube of choice, resizing as needed. Move this below the rectangle layer so that it sits just behind it.
Add your text, copyrights, license info and tagger markings.
Save and your done.
Thanks for trying my tutorial.
Subscribe to:
Posts (Atom)
