
Thursday, June 25, 2009
Excuse..
Excuse my mess! :) I'm redoing the blog and transferring over to a scrap blog too. So things might look a bit jumbled for a bit!
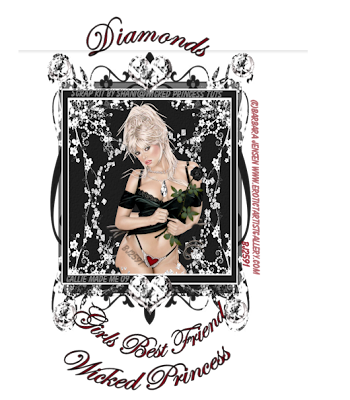
New Tags for me!

This beautiful tag was made by my friend and fellow designer Natasha! She used my kit Fairly Otelia. It's beautiful and she did an amazing job.. I so love this. Thank you my friend for the gorgeous tag! You can find her tut forum HERE and you can find her scrap blog Sticky Kisses Designs HERE Make sure you stop by and check her out! She's such a sweetheart :) Leave her some love and tell her I sent ya ;)

This one was done with my Fairly Otelia Kit also, by Susan aka HippieDaze. I'm always amazed by her tags and tuts but so thrilled! I so love this and its so pretty! Make sure you jump over to her blog and check her out! You can find her HEREShe's now making scraps has some templates and rockin' tuts! Show her some love and tell her I sent ya! :) Thank you my sweet friend for the awesome tag!
Wednesday, June 24, 2009


Updating...
Today I'll be updating the blog and kind of organizing a bit better. I'm trying to make a new layout but having issues with it, because I'm a moron with coding lol, so things might be a mess for a bit :) Stay tuned though!
Hugs
Shani
Hugs
Shani
Tuesday, June 23, 2009
Awww I got an award!

My sweet friend Susan aka HippieDaze gave me this awesome award! Bless her heart! I first met Susan a few months back through the blog actually :) She used one of my very first tutorials and sent me the results.. from there our friendship just grew! She's a super sweetheart and incredibly talented. She has a TON of tuts,templates and even a scrap kit on her blog! Make sure you check her out :) Click on her blinkie on the sidebar :)
Now off to send it to 4 more!:)
1. Nee @ Envied and Admired
2.Caitlin @ Cupcake Sprinkles
3.Monica @ Simply Sensational Scraps
4 Alyssa @ Alyssa's Scraps and such AND Alyssa's Tutorials :D
Monday, June 22, 2009
Peace, Love & Happy Times

Peace, Love and Happy Times-FTU
This tutorial was written on June 22, 2009 by Shani aka Wicked Princess. The concept of the tag is mine and mine alone. Any resemblance to any other tag/tut is pure coincidence. This was written for those with working knowledge of PSP.
Supplies Needed:
++Paint Shop Pro ( I used 10 but any version should work)
++Scrap kit by Susan aka HippieDaze can be found HERE
++Template 009 by Susan aka HippieDaze can be found HERE
++3 tubes of choice. I used the artwork of Popeye Wong, it is FTU however please give credit where credit is due, and give him credit on the tag. You can find his work HERE
++Plug ins:
-Eye Candy 4000 Gradient Glow
Let’s Get Started!
**NOTES:
-Add Drop shadow of choice as you go
-You can merger layers as you want to make things easier for yourself.
Open the large rectangle of your choice. Using your keyboard short cut keys, (Shift+D) duplicate the frame as a new image.
Open several papers of choice, resizing as needed. For example, when I look at the blue bar where it tells me what I’ve opened (say like paper 2) it tells me what percentage I’m viewing it at. For me it’s usually 16%, so I resize to 16% bringing it to 100%. ( I hope that made sense!) Once you’ve done this, minimize for later use
Next go to the bottom template layer and go to selections, select all, then float, selections defloat. Don’t forget to go to selections, none then delete the template layer. Add a gradient glow on the fat setting the colors of your choice. Repeat this process for the rest of the template.
Open the large flower of your choice, copy and paste as a new layer. Move below the round frame layer on the template. Add a heart embellishment of your choice to the center of that flower.
Next open two of the tubes you want to use, crop them and resize as needed. Copy and paste as new layers below the postage stamp frame layers. Using your magic wand tool, click inside the one frame. Go to selections, modify expand by 6. Go to selections, invert then go to your tube layer. Hit delete on your keyboard. Repeat this process for the other frame. Add your final tube to the right of the tag.
Open several butterflies and flowers of your choosing. Place a butterfly each on the postage frames. Place where ever you like also.
Add one flower to the upper left hand part of the frame, the other to the hip of the girl tube. Add any other flowers you like.
Add your copyright info and tagger markings along with any text you like.
Save and your done!
Thanks for trying my tutorial!
I LOVE THE USA-PTU

I love the U.S.A-PTU
This tutorial was written on June 22, 2009 by Shani aka Wicked Princess. The concept of the tag is mine and mine alone. Any resemblance to any other tag/tut is pure coincidence. This was written for those with working knowledge of PSP.
Supplies Needed:
++Paint Shop Pro ( I used 10 but any version should work)
++Scrap Kit by Natasha called Pure America can be purchased from HERE
++Template 68 by Ali can be found HERE
++Tube of choice. I used the artwork of Suzanne Wolcott. You must have a valid license in order to use her work. You can purchase it HERE
++Mask and Font of choice
Let’s get started!
**NOTES:
-Add Drop shadow of choice as you go
-You can merger layers as you want to make things easier for yourself.
Open the large rectangle of your choice. Using your keyboard short cut keys, (Shift+D) duplicate the frame as a new image.
Open several papers of choice, resizing as needed. For example, when I look at the blue bar where it tells me what I’ve opened (say like paper 2) it tells me what percentage I’m viewing it at. For me it’s usually 16%, so I resize to 16% bringing it to 100%. ( I hope that made sense!) Once you’ve done this, minimize for later use
Next go to the bottom template layer and go to selections, select all, then float, selections defloat. Don’t forget to go to selections, none then delete the template layer. Repeat this process for the rest of the template.
Add a new raster layer and move it to the bottom of the layers palette. Flood fill with your choice of paper and add your mask and merge group. I chose to duplicate it and go to image, mirror.
Open the tag and move it below the star frame and back ground layer. Angle it slightly and add the staple. Duplicate the staple and add it to the other end of the star, where the three tags from the template are.
Add the star, bow and heart from the embellishments, to the end of the tag up at the top. Arrange and place as you like.
Open your tube of choice and place in the center of the star frame. Resize and adjust as you need to.
Next open the basket, candle platter, and rug. Resize then copy and paste each as a new layer, arranging as needed to the bottom right hand corner of the template.
Add the “ewe” s. a. sign to the top left of the star, tilting slightly and add another staple.
Finally add your text of choice, copyright info, license info and tagger markings.
Remember to save and your done!
Thank you for trying my tutorial!
Candy Girl-FTU

Candy Girl-FTU
This tutorial was written on June 22, 2009 by Shani aka Wicked Princess. The concept of the tag is mine and mine alone. Any resemblance to any other tag/tut is pure coincidence. This was written for those with working knowledge of PSP.
Supplies Needed:
++Paint Shop Pro ( I used 10 but any version should work)
++Scrap kit by Laura at Creations by Laura can be found HERE
++Template 17 by Missy can be found HERE
++Tube of choice. I used the artwork of Chrissy Clark, you must have a valid license in order to use her work and you can purchase it from HERE
++Plug ins needed:
-Eye Candy 4000 Gradiant glow
Let’s get started!
**NOTES:
-Add Drop shadow of choice as you go
-You can merger layers as you want to make things easier for yourself.
Open the large rectangle of your choice. Using your keyboard short cut keys, (Shift+D) duplicate the frame as a new image.
Open several papers of choice, resizing as needed. For example, when I look at the blue bar where it tells me what I’ve opened (say like paper 2) it tells me what percentage I’m viewing it at. For me it’s usually 16%, so I resize to 16% bringing it to 100%. ( I hope that made sense!) Once you’ve done this, minimize for later use
Next go to the bottom template layer and go to selections, select all, then float, selections defloat. Don’t forget to go to selections, none then delete the template layer. Add a gradient glow on the fat setting the colors of your choice. Repeat this process for the rest of the template.
Open the glitter heart string of your choice, resize it then copy and paste as a new layer. Move it to just above the bottom template layer.
Choose one of the candy sticks you like, resize and copy and paste as a new layer below the hearts layer to the left of the template. Add the jelly bean string to the bottom of the template, under the hearts.
Open two suckers of your choosing and place one larger one, up on the upper left hand side of the template and then a smaller one next to it, also below the hearts layer. Add a folded ribbon of your choice behind the large one.
Pick several jelly beans and copy and paste them as new layers coupled together in the left hand corner and arrange as you like them.
Add your tube of choice, placing where you like. I moved it to the right hand side of the template.
Add your text, tagger markings, license info, and copyright info. Save and your done!
Thank you for trying my tutorial!
Sunday, June 21, 2009
Romance Me-FTU

Romance Me-FTU
This tutorial was written on June 21, 2009 by Shani aka Wicked Princess. The concept of the tag is mine and mine alone. Any resemblance to any other tag/tut is pure coincidence. This was written for those with working knowledge of PSP.
Supplies Needed:
++Paint Shop Pro ( I used 10 but any version should work)
++Scrap kit by Monica of Simply Sensational Scraps called Gothic Romance can be found HERE
++Template 117 by Ali can be found HERE
++Two Tubes of choice. I used the artwork of Elias Chatzoudis. You can purchase his work from HERE
++Plug Ins:
-Xero Radiance
-Xero Grey Scale
-Xero Fritallry
-Eye Candy 4000 Gradient Glow
++Texture Effects:
-Mosaic Antique
**NOTES:
-Add Drop shadow of choice as you go
-You can merger layers as you want to make things easier for yourself.
Open the large rectangle of your choice. Using your keyboard short cut keys, (Shift+D) duplicate the frame as a new image.
Open several papers of choice, resizing as needed. For example, when I look at the blue bar where it tells me what I’ve opened (say like paper 2) it tells me what percentage I’m viewing it at. For me it’s usually 16%, so I resize to 16% bringing it to 100%. ( I hope that made sense!) Once you’ve done this, minimize for later use
Next go to the bottom template layer and go to selections, select all, then float, selections defloat. Don’t forget to go to selections, none then delete the template layer. Add a gradient glow on the fat setting the colors of your choice. Repeat this process for the rest of the template.
Add a new raster layer and flood fill with your choice of paper. Add your mask and merge group.
Open your close up tube, copy and paste as a new layer after resizing. Place below the frame layer. Duplicate it moving the bottom one slightly to the right. Use your texture effects, mosaic antique. I used the default setting. Go back to original tube layer, and use the Xero grey scaler at the default setting. Then use Xero Radiance.
Using your magic wand tool and click inside the frame. Go to selections, modify and expand by 5. On each of the tube layers, hit delete on your keyboard. Go to selections, none.
Open the fan of your choice and place in the bottom center of the doodle at the bottom of the frame. Add a corset, book and bag of your choice, clumped together to the left of the template.
Add a pin of your choice to the middle tag on the template layer. Add a rose to the top doodle layer, and a flower bunch to the bottom right hand side.
Open your other tube, use your plug in Xero Radiance. Copy and paste as a new layer and add to the right of the tube. Resize as needed.
Add copyright info, text, license info and tagger markings.
Save and your done!
Thank you for trying my tutorial
Tags made with my kits!


Laura made these beautiful tags with my Sweet Rock Kit! These turned out so awesome and she did a beautiful job! I love her choice of tubes and the idea behind them :) Thank you Laura again for sharing!
Sweet Tags!


 These were all done by Laura at Creations by Laura, by following several of my tutorials! She did an amazing job didn't she? They are all beautiful! Thank you Laura!!!!! You should check out her blog,
HERE She is also making some really pretty quick pages for me with several of my kits! Thank you Laura for sharing!
Friday, June 19, 2009
Fairly Peaceful-PTU

Fairly Peaceful-PTU
This tutorial was written on June 18, 2009 by Shani aka Wicked Princess. The concept of the tag is mine and mine alone. Any resemblance to any other tag/tut is pure coincidence. This was written for those with working knowledge of PSP.
Supplies Needed:
++Paint Shop Pro ( I used 10 but any version should work)
++Scrap kit by me called “Fairly Otelia” can be purchased from HERE
++Template by Alyssa can be found HERE
++Tube of choice. I used the tube provided in the kit.
Let’s get started!
**NOTES:
-Add Drop shadow of choice as you go
-You can merger layers as you want to make things easier for yourself.
Open the template in PSP, using your shortcut keys on your keyboard (SHIFT+D) duplicate the template as a new image. Close the original.
Open several papers of choice, resizing as needed. For example, when I look at the blue bar where it tells me what I’ve opened (say like paper 2) it tells me what percentage I’m viewing it at. For me it’s usually 16%, so I resize to 16% bringing it to 100%. ( I hope that made sense!) Once you’ve done this, minimize for later use.
Next go to the bottom template layer and go to selections, select all, then float, selections defloat. Don’t forget to go to selections, none then delete the template layer. Repeat this process for the rest of the template.
**Note at this point, I closed off all the layers accept the scroll ones, the top frame and the top background. Then I merged visible, this is optional**
Open the fairy wings of choice and copy and paste as a new layer, resizing as needed. Move it below the top paper and frame layer. Adjust and arrange as needed.
Pick the three sparkles you like, resize then copy and paste as news layers. Arrange them accordingly, spaced out a bit. Check my tag to get an idea of what you would like to do.
Open the cloud and moon of your choice. Resize then copy and paste as new layers into the left hand corner of the template.
Next open the flower bunch of your choice, copy and paste as a new layer after resizing. Place to the left side of the top frame. Duplicate then go to image, mirror.
Add a large flower of choice to the upper right hand corner of the frame, and also to the left bottom corner. Add a tag of your choice below the upper right hand flower.
Open the toadstool, resize and copy and paste towards the bottom of your canvas.
Add your tube of choice. If you just use the one provided please credit me on the tag!
Add any other text and tagger markings you need to.
Save and your done!
Thank you for trying out my tutorial!
Thursday, June 18, 2009
Let's Let Freedom Ring-FTU

Let’s Let Freedom Ring-FTU
This tutorial was written on June 18, 2009 by Shani aka Wicked Princess. The concept of the tag is mine and mine alone. Any resemblance to any other tag/tut is pure coincidence. This was written for those with working knowledge of PSP.
Supplies Needed:
++Paint Shop Pro ( I used 10 but any version should work)
++Scrap kit “Independence Day” by Alyssa can be found HERE
++Template132 by Ali can be found HERE
++Tube of choice. I used the artwork of Tracy Lee and it can be purchased HERE
Let’s get started!
**NOTES:
-Add Drop shadow of choice as you go
-You can merger layers as you want to make things easier for yourself.
Open the template in PSP, using your shortcut keys on your keyboard (SHIFT+D) duplicate the template as a new image. Close the original.
Open several papers of choice, resizing as needed. For example, when I look at the blue bar where it tells me what I’ve opened (say like paper 2) it tells me what percentage I’m viewing it at. For me it’s usually 16%, so I resize to 16% bringing it to 100%. ( I hope that made sense!) Once you’ve done this, minimize for later use.
Next go to the bottom template layer and go to selections, select all, then float, selections defloat. Don’t forget to go to selections, none then delete the template layer. Repeat this process for the rest of the template.
Choose one of the sparkles you like out of the kit and copy and paste as a new layer. Move this layer to the bottom and move it to the upper left corner of the tag. Duplicate it and go to image, mirror. Duplicate it again and go to image, flip. Then once more duplicate it and go to image, mirror. Adjust as needed.
Open one of the stitches, resizing then copy and paste as a new layer towards the bottom of the template frame. Make sure that the ends are just right at the frame edge.
Next open one of the dangle elements and resize. Copy and paste as a new layer, moving it to below the frame layer. Open the other one, resizing smaller and paste as a new layer above the star but below the star frame layer. Using your magic wand tool, click inside the star frame and go to selections, modify, expand and expand by 4. Go back to the dangle layer and hit delete.
Choose a balloon from the elements. Resize then copy and paste as new layer. Move to the left on the frame, duplicate then go to image mirror. Adjust as needed. Add a butterfly of choice to the balloon itself. Resize and adjust as needed.
Add your tube, and move into center of the star area.
Open a bow and rose of your choice. Resize then copy and paste as new layers. Place one set to the left of the tag on the bottom rectangle frame. Duplicate then go to image, mirror. Adjust as needed.
Next open the tiny stars, resize then copy and paste as new layer. Move them to the top of the rectangle frame , to the left. Duplicate then go to image, mirror.
Open the flag, and pin of choice. Copy and paste as new layers to the left of the rectangle frame. Place the pin accordingly. Paste a star of choice on the opposite side.
Add text of choice, copyright info, license info and tagger markings.
Save and your done!
Thank you for trying my tutorial.
Sweet Rockstar-PTU

Sweet RockStar-PTU
This tutorial was written on June 17, 2009 by Shani aka Wicked Princess. The concept of the tag is mine and mine alone. Any resemblance to any other tag/tut is pure coincidence. This was written for those with working knowledge of PSP.
Supplies Needed:
++Paint Shop Pro ( I used 10 but any version should work)
++Scrap kit by me can be purchased from HERE
++Template 52 by Kristin at Wicked Scrapz can be found HERE
++Tube of choice. I used the artwork of Kenny Kiernan which can be purchased from HERE
++Plug ins:
-Eye Candy 4000 Gradient glow
-Xero Radiance
Let's get started!
**NOTES:
-Add Drop shadow of choice as you go
-You can merger layers as you want to make things easier for yourself.
Open the template in PSP, using your shortcut keys on your keyboard (SHIFT+D) duplicate the template as a new image. Close the original.
Open several papers of choice, resizing as needed. For example, when I look at the blue bar where it tells me what I’ve opened (say like paper 2) it tells me what percentage I’m viewing it at. For me it’s usually 16%, so I resize to 16% bringing it to 100%. ( I hope that made sense!) Once you’ve done this, minimize for later use.
Next go to the bottom template layer and go to selections, select all, then float, selections defloat. Don’t forget to go to selections, none then delete the template layer. Add a gradient glow on the fat setting the colors of your choice. Repeat this process for the rest of the template.
Go to the dot overlay layers, and delete both of those. We won’t be using them this time! Also colorize the dotted line on the side to your choice of color from the kit.
Open the metal and bead doodle of your choice. Resize, then copy and paste as a new layer, moving it below the lower rectangle layer. Adjust and place where you like then duplicate it. Go to image, mirror. Add a button of your choice to the center of it, where the doodles meet.
Add the tape of your choice, resizing so it fits just inside the lower rectangle. Place towards the bottom of the rectangle.
Open the speaker and guitar of your choice, resize and paste as new layers to the left of the rectangles. Angle the guitar slightly to the left.
Next open the drum set, resize and paste as a new layer to the right of the tag. You will need to move and adjust as you like. I moved it below the word art. Add a pin of your choosing to the top rectangle.
Insert your tube of choice and use the plug in, Xero Radiance at a random setting you like. Move behind the wordart and guitar. Add a gradient glow of your choice.
Add the copyright info, tagger markings and license info.
Remember to save!
Thanks for trying my tutorial!
Wednesday, June 17, 2009
Girly Girl-PTU

Girly Girls Rule –PTU
This tutorial was written on June 17, 2009 by Shani aka Wicked Princess. The concept of the tag is mine and mine alone. Any resemblance to any other tag/tut is pure coincidence. This was written for those with working knowledge of PSP.
Supplies Needed:
++Paint Shop Pro ( I used 10 but any version should work)
++Scrap kit by Nee at Envied and Admired can be purchased HERE
++Tubes of choice. I used the work of Elias Chatzoudis. You can purchase his work from HERE
++Wicked Word Art #2 by me can be found HERE
++Plug in
-Eye Candy 4000 Gradient Glow
++Mask and font of choice
Let’s get started!
**NOTES:
-Add Drop shadow of choice as you go
-You can merger layers as you want to make things easier for yourself.
Open several papers of choice, resizing as needed. For example, when I look at the blue bar where it tells me what I’ve opened (say like paper 2) it tells me what percentage I’m viewing it at. For me it’s usually 16%, so I resize to 16% bringing it to 100%. ( I hope that made sense!) Once you’ve done this, minimize for later use.
Open a canvas of 600 x 600, remember you can always resize and crop later! Flood fill with your choice of paper. Add your mask and merge group.
Choose one of the glitter frames you like, resize then copy and paste as a new layer to the top left of the frame. Duplicate it then go to image, mirror then image flip.
Next open the triple black frame and resize as needed. Rotate it to the left 90 degrees by going to image, free rotate. Add a fat white gradient glow. Copy and paste a s a new layer onto your working canvas. Move it to the upper left hand side then duplicate it and go to image, mirror then image, flip.
Using your magic wand tool, click inside each of the frame pieces and expand by 6. Add a new raster layer and flood fill each square with your choice of paper. Go to selections none.
Next open the glow element, resize and copy and paste as a new layer. Erase the parts you don’t want seen outside of the frame. Open your choice of tubes, and place inside each of the frames.
Open several bows of choice, resize then place in several places you like on the frames.
Add the bead doodle element, resizing and placing to the top right of the canvas. Duplicate then go to image mirror then image flip. Send both layers to the bottom just above the mask layer.
Choose several of the girly elements and place where you like along the frames and canvas. You can go back and look at my finished tag to see the example. Add the word art with your choice of paper added to it and a gradient glow.
Add your copyright info, tagger markings and license number.
Thanks for trying my tutorial!
Tuesday, June 16, 2009
New Taggies!

This so rocks! My girl MamaCita @ BFF Kreationz made this beautiful tag with my template 14. Isn't it perfect? LOL She knows it is.. Thank you girl for the sweet tag! Make sure you check out her and my other homie SisterDuck.. you can click on the tag below. BTW yes.. I made that for them awhile back. I'm here tootin my own horn! :)


This one I got from Yolanda in an email yesterday :) She did my Celebrate Freedom Tutorial using Nee's FTU 4th of July kit. I really like the tube Yolanda used! She did a fabulous job and she really rock'd this tag! Thank you hon for sharing your work with us! :)
Guess who's the Birthday Girl?
That's right NEE! WOO HOOO! lol.. Happy birthday sweetie! If you haven't done so already go over and stop by Nee's blog and give her some love :) She's climbing that hill of "older age" along with us.. so give her that push of motivation to get up there some more :P JK Nee you know I love ya girl! :D Have beautiful and peaceful day and give everyone hell!


Sunday, June 14, 2009
Wicked Awesome Tags!~

This beautiful tag was made by Gaylene of Aussie Chic Tutorials. Made with my PTU kit Sweet Rock :)I love how she made everything just fit together! It's just beautiful! Thank you hon! You can find her tutorial for this tag AND blog by clicking the blinkie:


This gorgeous one was made by my girl Susan at HippieDaze tutorials. She also used my PTU kit Sweet Rock :) She always does amazing work and this one was an added bonus! I love it! I love how she added the red and made it really pop! You can find the tutorial for this tag AND blog by clicking the blinkie:


This one is from Alyssa who used my first PTU kit Sweet Rock. And She ROCK'D it! I so love this.. and I love the choice of tubes she used. So not what I expected! Thank you sweetie its gorgeous! You can find her tutorial for this tag AND her blog by clicking the blinkie below. BTW she also has a scrap blog.. make sure you check it out! You can get to it from her tutorial blog!


This one is from a very sweet lady named Nan :) She emailed me with a question about one of the tutorials and from there we were yacking! lol She sent me this as well as several other tags she had done with my tutorials :) I was blown away with how much this looked JUST like my tag! I was so thrilled that it came out the way it did and how awesome it was she did so good with it! I have more to post from her.. but my email ate them :O lol So as soon as Nan sends them back to me I'll post them!

Gorgeous! I always love to see beautiful creations, especially when made with my stuff! lol Laura rock'd this one for sure! I love the balance in color in the tag and the tube, one of my favorites! Laura is a super sweetheart and just started her own blog! Make sure you check her out here:
Creations By Laura
Thank you Laura for the stunning tag! Keep up the rockin' work! She should write tutorials :)
Happy Birthday To You-PTU

Happy Birthday To You-PTU
This tutorial was written on June 13, 2009 by Shani aka Wicked Princess. The concept of the tag is mine and mine alone. Any resemblance to any other tag/tut is pure coincidence. This was written for those with working knowledge of PSP.
Supplies Needed:
++Paint Shop Pro ( I used 10 but any version should work)
++Scrap Kit by Natasha at Sticky Kisses Designs can be found HERE
++Template 58 by Blissfully Beth can be found HERE
++Tube of choice. I used the artwork of Tori Beveridge which can be purchases from HERE
++Font of Choice
++Plug Ins:
-Eye Candy 4000 Gradient glow
-Muera Meister Copies
-Xero Fritallry
Let’s get Started!
**NOTES:
-Add Drop shadow of choice as you go
-You can merger layers as you want to make things easier for yourself.
Open the template in PSP, using your shortcut keys on your keyboard (SHIFT+D) duplicate the template as a new image. Close the original.
Open several papers of choice, resizing as needed. For example, when I look at the blue bar where it tells me what I’ve opened (say like paper 2) it tells me what percentage I’m viewing it at. For me it’s usually 16%, so I resize to 16% bringing it to 100%. ( I hope that made sense!) Once you’ve done this, minimize for later use.
Next go to the bottom template layer and go to selections, select all, then float, selections defloat. Don’t forget to go to selections, none then delete the template layer. Add a gradient glow on the fat setting the colors of your choice. Repeat this process for the rest of the template.
Open your ribbon of choice and resize. Copy and paste as a new layer. This is kind of tricky, you have to move it and adjust until you get it just right. Next go to your plug in muera meister copies and use the encircle option. Once satisfied, move it to the bottom of the layer pallet.
Go to your frame layer, and use your plug in Xero Fritillary. Use whatever random setting you like.
Add your tube of choice, centering it in the middle of the tag.
Open three balloons of choice from the kit and resize as needed. Arrange in close proximity and place behind the tube, almost as if she’s holding them.
Add a bow of choice to the little girls hair.
Open several of the elements of your choice, like the cake, cupcakes, hat etc and copy and paste as new layers. Resize and adjust as needed, arrange them to the right of the tag.
Next open the candle of choice from the kit, and resize. Copy and paste as a new layer and place to the left of the rectangle. Duplicate, then image mirror. Do this also for a button and bow of choice, placing overlapped on the candle.
Add your text of choice, copyright info, license info and tagger marking
Save and your done!
Thank you for trying my tutorial
Saturday, June 13, 2009
Sweet Sounds-PTU

Sweet Sounds –PTU
This tutorial was written on June 13, 2009 by Shani aka Wicked Princess. The concept of the tag is mine and mine alone. Any resemblance to any other tag/tut is pure coincidence. This was written for those with working knowledge of PSP.
Supplies Needed:
++Paint Shop Pro ( I used 10 but any version should work)
++Scrap kit by Nee at Envied and Admired can be purchased HERE
++Template 008 by Hippidaze can be found HERE
++Tube of choice. I used the artwork of Carlos Cartagena, you must have a proper license in order to use this artists work. You can purchase it from HERE
++Plug Ins:
-Eye Candy 4000 Gradient glow
-Xero Fritallry
++Mask and font of choice
Let’s get started!
**NOTES:
-Add Drop shadow of choice as you go
-You can merger layers as you want to make things easier for yourself.
Open the template in PSP, using your shortcut keys on your keyboard (SHIFT+D) duplicate the template as a new image. Close the original.
Open several papers of choice, resizing as needed. For example, when I look at the blue bar where it tells me what I’ve opened (say like paper 2) it tells me what percentage I’m viewing it at. For me it’s usually 16%, so I resize to 16% bringing it to 100%. ( I hope that made sense!) Once you’ve done this, minimize for later use.
Next go to the bottom template layer and go to selections, select all, then float, selections defloat. Don’t forget to go to selections, none then delete the template layer. Add a gradient glow on the fat setting the color white. Repeat this process for the rest of the template.
Open the bubbles you like, resize as needed. Copy and paste as a new layer and move to the bottom of the layers palette. Move into the upper left hand corner and then duplicate it. Go to image, mirror then image flip.
Add a new raster layer, moving it to just above the bubbles layer. Flood fill with your choice of paper. Add your mask and merge group. I chose to duplicate the layer then mirror it.
Choose one of the doodles you like and resize. Copy and paste as a new layer above the mask layer. Move it to the upper right hand corner and duplicate it. Go to image, mirror then image flip.
Go to the center circle layer and use your plug in Xero Fritallry. Use whatever random setting you like.
On the multiple frame layer, use an inner bevel of your choice also with the hearts layer.
Open several of the accessory elements of your choice and move to the left of the tag. Place and arrange where you like.
Add your tube of choice. You’ll notice I used a pair of the sunglasses from the kit and moved them onto her eyes.. the result making it look like she’s pretty cool lol.
Add a tag and butterfly you like to the upper right hand side of the tag.
Add your text of choice. Don’t forget your copyright, license info and tagger markings.
Save and your done!
Thanks for trying my tutorial!
Girlie Goth-FTU

Girlie Goth-FTU
*-* SPECIAL NOTE ABOUT THIS TUTORIAL : I originally made this tag for a friend because I swear this tube looks JUST like her! Lol.. I hope you enjoy it!
This tutorial was written on June 13, 2009 by Shani aka Wicked Princess. The concept of the tag is mine and mine alone. Any resemblance to any other tag/tut is pure coincidence. This was written for those with working knowledge of PSP.
Supplies Needed:
++Paint Shop Pro ( I used 10 but any version should work)
++ Scrap kit by Cupcake Sprinkles called Girly Goth can be found HERE
++Tube of choice or the one I used. I used the artwork of Elias Chatzoudis. You can purchase his work from HERE
++Plug ins:
-Eye Candy 4000 Gradient glow
-Muera Meister Copies
++Mask of choice and font of choice
Let’s get started!
**NOTES:
-Add Drop shadow of choice as you go
-You can merger layers as you want to make things easier for yourself.
Open a new canvas, 600x600. Remember you can crop or resize later.
Open several papers of choice, resizing as needed. For example, when I look at the blue bar where it tells me what I’ve opened (say like paper 2) it tells me what percentage I’m viewing it at. For me it’s usually 16%, so I resize to 16% bringing it to 100%. ( I hope that made sense!) Once you’ve done this, minimize for later use.
Flood fill the layer with your choice of paper. Add mask of your choice and remember to merge group. From there duplicate this layer and go to image, mirror.
Open the frame of choice and resize. Copy and paste as a new layer and place at an angle. Using your magic wand tool, click inside the frame and go to selections, expand. Add a new raster layer and flood fill with your choice of paper.
Next open the star with ribbon, resize and copy and paste into the center of the canvas. Use your Muera Meister Copies plug in, use the encircle setting and set to the setting you like.
Open the crossbones element. Add a large gradient glow using white and a color from the kit. Use the magic wand tool and click on the inside of the cross bones. Go to selections modify and expand by 4. Add a new raster layer and flood fill with your choice of paper. Got to edit, copy merged and add as a new raster layer onto the working canvas.
Add a bow of choice, adjusting and resizing as needed. Stretch it as needed too.
Add your tube of choice, resizing and placing where you like. I duplicated the tube and moved one below the frame layer. On the top layer, I erased the parts I didn’t want visible. This way she looks like she’s jumping out of the frame.
Open the crown element, resize then copy and paste as a new layer. Make sure its at the top of the layer palette. Place it above her head, as if she is wearing a crown. Add a gradient glow of your choosing.
Place a bow of choice at the bottom hole, and bracket. Open your roses of choice, resize as needed then copy and paste as new layers, duplicating and alternating. Move them to the edge of the frame on the left hand side.
Add your word art of choice or text of choice.
Don’t forget you copyright, license info and tagger markings. Thanks for trying my tut!
Blah Blah Blah-FTU

BLAH BLAH BLAH-FTU
This tutorial was written on June 13, 2009 by Shani aka Wicked Princess. The concept of the tag is mine and mine alone. Any resemblance to any other tag/tut is pure coincidence. This was written for those with working knowledge of PSP.
Supplies Needed:
++Paint Shop Pro ( I used 10 but any version should work)
++Scrap kit by Yvette called A bit of attitude can be found HERE
++Template 11 by HippieDaze can be found HERE
++Tube of choice. I used the artwork of Big Chris. You can purchase his work HERE you must have a valid license in order to use his work.
++Plug Ins:
-Muera Meister Copies
-Eye Candy 4000 Gradient Glow
Let’s Get started!
**NOTES:
-Add Drop shadow of choice as you go
-You can merger layers as you want to make things easier for yourself.
Open the template in PSP, using your shortcut keys on your keyboard (SHIFT+D) duplicate the template as a new image. Close the original.
Open several papers of choice, resizing as needed. For example, when I look at the blue bar where it tells me what I’ve opened (say like paper 2) it tells me what percentage I’m viewing it at. For me it’s usually 16%, so I resize to 16% bringing it to 100%. ( I hope that made sense!) Once you’ve done this, minimize for later use.
Next go to the bottom template layer and go to selections, select all, then float, selections defloat. Don’t forget to go to selections, none then delete the template layer. Add a gradient glow on the fat setting with two colors that coordinate with the kit. Repeat this process for the rest of the template.
Pick the flower you like, resize then copy and paste as a new layer. Use your plug in muera meister copies with the shift x and y set to 70 and whatever number for the flowers that you think looks best. Hit ok. Move this layer to just above the circle frame layer.
Add your tube of choice, you can place where ever you like. I placed the tube in the center of the frame, below the frame layers. Then I duplicated it and moved one to the top of the layer palette. Using the eraser brush, I erased the parts I wanted hidden behind the frame. This was done on the top tube layer btw. On the bottom tube layer I erased the parts that were hanging out the bottom of the frame. This way she looks like she is popping out of the frame.
Take several of the elements of your choice and cluster them to the left of the tag. Make sure you resize as you want them.
Next take a binder clip, bow and tag and place at the upper right hand corner as you like it.
You can either use the text of your choice or use the word art supplied in the kit.
Add your copyright info, license info and tagger markings.
Remember to save and your done! Thank you for trying out my tutorial.
Friday, June 12, 2009
Sweet Serenity-PTU

Sweet Serenity-PTU
This tutorial was written on June 10, 2009 by Shani aka Wicked Princess. The concept of the tag is mine and mine alone. Any resemblance to any other tag/tut is pure coincidence. This was written for those with working knowledge of PSP.
Supplies Needed:
++Paint Shop Pro ( I used 10 but any version should work)
++Misery Loves Company by Kikeka Kits can be purchased from HERE
++Template 012 by HippieDaze can be found HERE
++Tube of choice, I used the artwork of Regan Kubecek which can be found HERE Right now it is a FREE tube from MPT, however you MUST have a valid license in order to use it.
++PLUG INS
-Muera Meister Copies
Let’s get started!
**NOTES:
-Add Drop shadow of choice as you go
-You can merger layers as you want to make things easier for yourself.
Open the template in PSP, using your shortcut keys on your keyboard (SHIFT+D) duplicate the template as a new image. Close the original.
Open several papers of choice, resizing as needed. For example, when I look at the blue bar where it tells me what I’ve opened (say like paper 2) it tells me what percentage I’m viewing it at. For me it’s usually 16%, so I resize to 16% bringing it to 100%. ( I hope that made sense!) Once you’ve done this, minimize for later use.
Next go to the bottom template layer and go to selections, select all, then float, selections defloat. Don’t forget to go to selections, none then delete the template layer.
Open the glitter doodle of your choice, resize, copy and paste as a new layer. Move this layer to the bottom. Adjust and move the doodle to the left corner as you like it. Duplicate I, then go to image, mirror. Duplicate it then go to image, flip. Duplicate this one then image flip.
Next choose a flower you like from the elements. Resize, copy and paste as a new layer. Use your plug in muera meister copies with the shift x and y set at 70 and however many flowers you like. Move this layer down to just above the circle frame layer.
Open the flower string of your choice. Resize, copy and paste as a new layer and place on the left side of the frame. Make sure this is moved up to the top layer. Duplicate it then go image, mirror.
Then open the heart element of your choice, resize then copy and paste as a new layer and place to the top of frame.
Open your tube of choice and resize. Copy and paste as a new layer and move below the frame layer, centering it.
Add the leaf of your choice, then a flower on top of that. Add your text, license info, copyright info and save.
Thank you for trying my tutorial!
Wednesday, June 10, 2009
Playing Catch Up...
That's what the plan is for tomorrow! I've done some tonight.. finally posting the new kit for purchase :) I also updated the list of those I'm on a CT for. I have some tuts to write and stuff to finish up tomorrow as well as a ton of tags to post! So please don't think I'm ignoring anyone, I've got to make time to finish up tomorrow. A week away from everything really threw me off.
Things should be back to normal though now!
Thank you everyone for the love and support!
Shani
Things should be back to normal though now!
Thank you everyone for the love and support!
Shani
Saturday, June 6, 2009
NEW! More Beautiful tags for me :)
This week I've had the honor of recieving stunning tags from those who have either used my templates, kits or done my tuts. I always get excited too what everyone does! Thank you so much everyone!
The first one is from the incredible and stunning tag is from my girl Alyssa :) You can find her at Alyssa\'s Tutorials ! She's such a sweetheart and does amazing work :)

The next few come from my girls at Alyssa\'s Tutorials They are so awesome. Always can make me smile and have supported myself, Alyssa and my girl Nee at BFF Kreationz . They are forever hard at work making new and gorgeous tags for us :) Please stop by and see them.. tell them I sent you :)


Callie over at Pink Cherry Blossom Creations Made this awesome tag with my Wickedly Dark Scrap KIt and she did a fantastic job! I love the quote she used too! She's done some really good work and continues to work hard for her sequesters. She's a sweetheart and takes a lot of pride in what she does :) Stop by and see her and tell her I sent ya!
I got this one as a surprise email from Gaylene at Aussie Chic Tutorials I was honestly blown away by how beautiful it turned out. Not because she isn't talented lmao.. but because she did such an awesome job with my kit! As a new designer I'm not sure of my creations.. even with tagging lol.. so when something like this comes through its like WOW! I love ALL the tags that have come through with my kit :) Beautiful work. Make sure you stop by and check out Gaylene! Leave her some love and tell her I sent ya :)

Finally I got these in an email last night from Laura Jean.. I was so excited! She did all of these from several of my tutorials. I love how they turned out and so blown away! Thank you so much for sharing with me :) These are awesome. She'll be starting a blog soon, so when she does I'll make sure to link her :) These are so cool :) She really did justice to the tuts and it's neat to see someone use the tuts and able to follow them :)


The first one is from the incredible and stunning tag is from my girl Alyssa :) You can find her at Alyssa\'s Tutorials ! She's such a sweetheart and does amazing work :)

The next few come from my girls at Alyssa\'s Tutorials They are so awesome. Always can make me smile and have supported myself, Alyssa and my girl Nee at BFF Kreationz . They are forever hard at work making new and gorgeous tags for us :) Please stop by and see them.. tell them I sent you :)


Callie over at Pink Cherry Blossom Creations Made this awesome tag with my Wickedly Dark Scrap KIt and she did a fantastic job! I love the quote she used too! She's done some really good work and continues to work hard for her sequesters. She's a sweetheart and takes a lot of pride in what she does :) Stop by and see her and tell her I sent ya!

I got this one as a surprise email from Gaylene at Aussie Chic Tutorials I was honestly blown away by how beautiful it turned out. Not because she isn't talented lmao.. but because she did such an awesome job with my kit! As a new designer I'm not sure of my creations.. even with tagging lol.. so when something like this comes through its like WOW! I love ALL the tags that have come through with my kit :) Beautiful work. Make sure you stop by and check out Gaylene! Leave her some love and tell her I sent ya :)

Finally I got these in an email last night from Laura Jean.. I was so excited! She did all of these from several of my tutorials. I love how they turned out and so blown away! Thank you so much for sharing with me :) These are awesome. She'll be starting a blog soon, so when she does I'll make sure to link her :) These are so cool :) She really did justice to the tuts and it's neat to see someone use the tuts and able to follow them :)


Thursday, June 4, 2009
She's A Girly Girl-PTU

This tutorial was written on June 4, 2009 by Shani aka Wicked Princess. The concept of the tag is mine and mine alone. Any resemblance to any other tag/tut is pure coincidence. This was written for those with working knowledge of PSP.
Supplies Needed:
++Paint Shop Pro ( I used 10 but any version should work)
++Scrap kit by Tishia called Girly Girl can be purchased HERE
++Template 47 by Yvette can be foundHERE (Scroll all the way to the bottom to get the links)
++Tube of choice. I used the artwork of Tori Beveridge which can be purchased HERE You must have a proper license in order to use her work.
++Plug Ins:
Xero, Frittalry
++Font of Choice
Let’s get Started!
**NOTES:
-This is a FULL size kit! You must resize as you go along!
-Add Drop shadow of choice as you go
-You can merger layers as you want to make things easier for yourself.
Open several papers of choice, resizing as needed. For example, when I look at the blue bar where it tells me what I’ve opened (say like paper 2) it tells me what percentage I’m viewing it at. For me it’s usually 16%, so I resize to 16% bringing it to 100%. ( I hope that made sense!) Once you’ve done this, minimize for later use.
Next go to the bottom template layer and go to selections, select all, then float, selections defloat. Add a new raster layer and flood fill with your choice of paper. Don’t forget to go to selections, none then delete the template layer. Repeat this process for the rest of the template.
Activate the top layer. Go to selections, select all. Then go to modify contract and contract it by 10. Hit delete on your keyboard, you know have a frame. Go to selections none. Using the magic wand tool, click inside the frame. Add a new raster layer and flood fill with your choice of paper. Add the plug in Frittalry at what ever random setting you like.
Open your frame of choice, resize as needed and paste as a new layer. Move to just above the circle layer. Next open two binder clips you like. Resize, then copy and paste as new layers. Move one to the left side of the top templates layer, where the points are. Adjust where you like it then duplicate, image, mirror. With the other one, move towards the top left of the frame. Angle it slightly and duplicate it. Go to image, mirror. Add your bow of choice to the top two binder clips. Add another bow to the top center of the frame.
Add your tube of choice, adjusting and placing where you like it.
Open the girl clip art, MP3, and purse of choice. Arrange these three to the left of the tag to make them look like the items are “in” the purse. Open two flower of your choice and resize rather small to place on the handles of the purse. Add a heart of your choosing to the purse as well to the bottom of the template frame.
Add your tex,t, copyright info, tagger info and license info! Remember to save and your done!
Thank you fro trying my tutorial.
Subscribe to:
Posts (Atom)