Showing posts with label Tutorial FTU. Show all posts

Monday, September 22, 2014

New FTU Tut! Simple watermarking!

Hi guys! First I'd like to give a little background as to why I decided to do this tut. Many times over the last year I've seen so much ripping of tags, tubes, even items out of a designers kit preview. It's frustrating and it can be fixed to make it harder on these pirates to get what they want.

I personally use a watermark over my kit previews so that you can see it, but not so much that it deters from the quality of the kit.

You can pretty much follow this tut for either tagger watermark or designer water mark.

Here we go!


This tutorial was written on September 22, 2014 by Shani aka Wicked Princess. The concept of this tag is mine , and mine alone. Any resemblance to any other tag/tut is pure coincidence. This was written for those with working knowledge of paint shop pro.

Supplies Needed:

++Paint Shop Pro (I use version 11, but any will work)


* Click on the screen shot to view it at full size. Easier to read this way.

It is YOUR responsibility as a tagger/designer to protect yourself from idiot pirates. You can put the blame on them (rightfully so) but you also need to make sure that you covered yourself so to speak.

Now you're probably at the point of asking yorurself "How the heck do I make a water mark?"

Never fear! Shani is here!~ *cue super hero music* Ta da! *whips cape around*

Ready? Let's go!


* Click on the screen shot to view it at full size. Easier to read this way.


* Click on the screen shot to view it at full size. Easier to read this way.


* Click on the screen shot to view it at full size. Easier to read this way.


* Click on the screen shot to view it at full size. Easier to read this way.


* Click on the screen shot to view it at full size. Easier to read this way.


And there you have it! I hope this all made sense. Please use this tutorial, and share the link It's important to be educated in the PSP community. Help to teach each other rather than be oblivious.


Also on the watermark I did for my kits is visible on a recent kit preview I finished:


Visit my blog HERE to find out where to buy it!


Tuesday, January 31, 2012

My friends...mini Tut FTU


This tutorial was written on January 31, 2012 by Shani aka Wicked Princess. The concept of the tag is mine and mine alone. Any resemblance to any other tag/tut is pure coincidence. This was written for those with working knowledge of Paint Shop Pro.
Supplies Needed:


++Paint Shop Pro ( I used 10 but any version should work)


++ Four tubes of choice. I used the artwork of Suzanne Wolcott and you can get her work HERE

++Cluster frame by me that I made using the kit “The Hippo Song” You can get to Gina’s blog HERE to check out the kit and to my scrap blog HERE to get the cluster frame

++ Mask of choice

Open a new canvas of 800x800, transparent. Remember you can resize later.

Next open the cluster frame, copy and paste as a new layer. Resize it and adjust as you like.

Back to the transparent layer, we’re going to flood fill with a gradient. Change your foreground and background colors to complimenting colors, and then change the foreground color to the gradient. I set the repeat to 1 and flood filled.
Now go to blur>Gaussian blur and figure out what setting you want it to be…..any setting you are happy with is fine. Now go to effects>distortion and set it to twirl. Pick whatever setting you like. Add your mask of choice.

Then open your tubes, each one copy and paste behind the frame. Use your magic wand tool in the opening, go to selections, modify expand (I think by 10) and on the tube layer go to selections, invert. Hit the delete key on the tube layer. Go to selections none. Use your eraser tool for any stray pixels. Repeat it for the three openings on the tube. Add a final tube to the left hand side of the frame and adjust as you want.

Don’t forget your copyrights and tagger markings as well as license number! Save and you are done!


Saturday, December 24, 2011

Sting FB Cover FTU NO Scraps!


This tutorial was written on December 24, 2011, Shani aka Wicked Princess. The concept of the tag is mine and mine alone. Any resemblance to any other tag/tut is pure coincidence. This was written for those with working knowledge of Paint Shop Pro.
Supplies Needed:


++Paint Shop Pro ( I used 10 but any version should work)


++ Tubes of choice or the ones I used, which is “Sting” by James Adams and can be found at AIL Note you MUST have a valid license to use.

++My Template which you can get HERE

++Plug ins: Muera Meister Copies

**NOTE ADD DROP SHADOWS OF YOUR CHOOSING AS YOU LIKE! AND SAVE AS YOU GO!

Open a new canvas, transparent and the dimensions of 850 x 315. Flood fill with your choice of color or gradient. I used a red and black gradient that I felt would compliment the tube. Now go to effects, texture effects, texture and set it to what texture you like. I personally used Brick Wall.

Then open up your template, copy and paste as a new layer. Yes it may just overlap a little, that’s ok. Change the color of the template to what you like. You can flood fill it or use your manual correction button. Go to selections, float, selections, defloat. Then to selections, modify, expand by 6. Add a new raster layer and flood fill it with the color or gradient of your choosing. I used a gold gradient. Go to selections none. Add the noise effect by going to adjust, add/remove noise. Move this layer below the template layer.

Open up your tube in PSP. I used a tube that had several close ups with it. My suggestion is do that if you can! Copy and paste the biggest close up and paste it as a new layer into your canvas. Feel free to resize it if you need to. Then go to your plug in, muera meister copies and set it to tile (angle) set the Number to 3 and both shifts to 50. Go to the template layer and go to selections, float, and selections defloat. On the angled tube layer go to selections, invert then hit the delete key on your keyboard. Go to selections, none.

Now go to effects, texture effects, blinds and set it what you like. Make sure that horizontal is unchecked. Change the blend mode to luminance legacy. It should look pretty cool now!

Next draw out a long rectangle in the coordinating color you did for the back ground. Make it so it ‘s kind of centered. Add your text and merge down. Duplicate it then rotate it so it goes across the X’s. Angle the other one you did too. Now it should look like a big X. Change the blend modes to luminance legacy.

We’re going to add the tubes now. Use another close up tube and copy and paste as a new layer. Move it to the left side, where you see the diamond opening. Duplicate the tube and move it below the template layer, but above the gold one. Using your magic wand tool, click inside the area on the first template layer. Go to the bottom tube layer and go to selections, invert and hit the delete key on your keyboard. Go to selections, none. Now on the top tube layer, and using your eraser tool, erase the parts of the tube you don’t want seen outside of that diamond area. You’re making it look like the person is popping out of the diamond. Repeat this process for the opposite side.

Then add your tube of choice to the middle of the canvas. Adjust as needed. Add your copyrights and licensing information. Save this as a PSP image as it is. Once saved merge visible.
Go to selections, select all then go to selections, modify, selection borders. Set it for 5, and add a new raster layer. Flood fill it with the choice of color or gradient. Add the noise of your choosing. Go to selections none. Add any more text and save! Thank you for trying out my tutorial!

Thursday, December 22, 2011

Rock Princess FTU tut


This tutorial was written on December 22, 2011, Shani aka Wicked Princess. The concept of the tag is mine and mine alone. Any resemblance to any other tag/tut is pure coincidence. This was written for those with working knowledge of Paint Shop Pro.
Supplies Needed:


++Paint Shop Pro ( I used 10 but any version should work)


++ Tubes of choice or the ones I used, which is by Lix called “Malena” which is an Art of Giving Exclusive. You can purchase it HERE

++Scrap kit of choice, I used a FTU one called “Rock Envy” by me, Wicked Princess Scraps and can be found on my scraps blog HERE


++Template by Deb , which can be found on the Pimpin’ PSPers blog HERE

++Plug ins: Eye candy 400 gradient glow
-Penta.com Dots and Cross

++Fonts of your choice. I used Tektron

**NOTE ADD DROP SHADOWS OF YOUR CHOOSING AS YOU LIKE! AND SAVE AS YOU GO!

Open the template in PSP, using your shortcut keys on your keyboard (SHIFT+D) duplicate the template as a new image. Close the original.

Open several papers of choice, resizing as needed. For example, when I look at the blue bar where it tells me what I’ve opened (say like paper 2) it tells me what percentage I’m viewing it at. For me it’s usually 16%, so I resize to 16% bringing it to 100%. ( I hope that made sense!) Once you’ve done this, minimize for later use.

First open the banner template for the forum set.

Next go to the bottom template layer and go to selections, select all, then float, selections defloat. Don’t forget to go to selections, none then delete the template layer. Repeat this process for the rest of the template. On the diamond layers, add a gradient of your choosing. I did a complimentary green and white and fixed the repeat for 3.
Add a soft gradient glow to your second rectangle.

Open up the skull circle frame, and then copy and paste as a new layer. Move it to just above the second rectangle layer. Adjust it as you need too.

Now open up the pin of your choice. I used the white one. Copy and paste as a new layer and move it to the right. Then move it to under the diamond layers. I angled mine. Duplicate it then go to image, flip. Merge down one layer then duplicate it again. Go to image, mirror.

Next open your tube of choice. Copy and paste as a new layer. Move it to just above the diamond layer. Adjust it like y ou want it. Duplicate it and go to image, mirror. Back to the first one, add your plug in, penta.com>dot and cross. Set it to whatever you want. Back to the diamond layer below, go to selections, float, selections, defloat, then select the tube layer again. Go to selections, invert and hit the delete key on your keyboard. Go to selections, none. Repeat this for the opposite side. Add a soft gradient glow to the diamonds

Copy and paste your tube again, and center it into your banner. Adjust as needed. Add a crown to either side of the oval.

What I do here is save……
Now merge all then go to selections, float, selections defloat. Then add a new layer. Go to selections, modify, select selections border and set it to 3. On the new raster layer flood fill with a complimentary color. Then add a soft gradient gloss

Add your copyrights and license info along with y our tagger markings. Save and your done!

Repeat the steps for the avvy.

Ty for trying my tutorial!

Lix Forum Set FTU


This tutorial was written on December 22, 2011, Shani aka Wicked Princess. The concept of the tag is mine and mine alone. Any resemblance to any other tag/tut is pure coincidence. This was written for those with working knowledge of Paint Shop Pro.
Supplies Needed:


++Paint Shop Pro ( I used 10 but any version should work)


++ Tubes of choice or the ones I used, which is by Lix and called “Mew” and “mirta” andyou can find them at PSP Tubes Emporium HERE and Here You must have a valid license to use these tubes. Please be mindful of copyrights!

++Scrap kit of choice, I used a FTU one called “Death Becomes Her” by me, Wicked Princess Scraps and can be found on my scraps blog HERE


++Template Twisted T, which can be found on the Pimpin’ PSPers blog HERE

++Plug ins: Eye candy 400 gradient gloss

++Fonts of your choice. I used Americana

**NOTE ADD DROP SHADOWS OF YOUR CHOOSING AS YOU LIKE! AND SAVE AS YOU GO!

Open the template in PSP, using your shortcut keys on your keyboard (SHIFT+D) duplicate the template as a new image. Close the original.

Open several papers of choice, resizing as needed. For example, when I look at the blue bar where it tells me what I’ve opened (say like paper 2) it tells me what percentage I’m viewing it at. For me it’s usually 16%, so I resize to 16% bringing it to 100%. ( I hope that made sense!) Once you’ve done this, minimize for later use.

First open the banner template for the forum set.

Next go to the bottom template layer and go to selections, select all, then float, selections defloat. Don’t forget to go to selections, none then delete the template layer. Repeat this process for the rest of the template. On the arrows layers, use a gradient that is complimentary to your tube. For example, I used dark purple and black. And the repeat was set at I think 4.

On the bottom circle frame layer, add a glitter…go to adjust, add/remove noise and set it to what you want. I did a random one.

Then open up one of your tubes. For example I used the Mirta tube. Using the close up (if you have one) copy and paste as a new layer. Move it to just above the arrow layers. Adjust it where you like it. Duplicate it and go to image, mirror. Adjust if you need to. Go back to the first one. With it activated go to effects, textures, blinds. I used the default setting it was already set to. Click ok. Do it again, but either check or uncheck horizontal (which ever is the opposite of what you had) and click ok. Do this for the opposite one too.
Back to activating the first close up layer (for me this was the left. I work from left to right lol) and go to the arrow right below it. Go to selections, float, selections defloat then edit clear. Now selections none. You should have the close up in the shape of the arrow. Do the same for the opposite arrow. Change the blend mode to luminance legacy.

Now we’re going to add the flames! Open up your flames elements from the kit. Copy and paste it as a new layer above the arrow layers. Adjust it and resize as you like it. Add a soft gradient glow, I chose white. Now activiate the bottom circle layers frame. Using your magic wand tool, click inside the frame. Go to selections, invert. Click on the frames layer and then go to edit, clear. Now selections, none. The flames should look like they’re coming up out of the frame layer and onto the arrows.

With this layer still activated, change the blend mode to luminance legacy. It should take on the appearance of the arrow layers some. Look at mine to make sure that’s what it looks like. Make adjustments as you like!
Now open up the main tube you are using, in my case, Mew. I used the close up once again. Copy and paste as a new layer. Move it below the top circle frame layer. Adjust it where you want it to be. We’re going to make her look like she’s popping out of the frame. Duplicate it and move it above the circle frame layer. On the frame layer use your magic wand tool and click inside the frame. Go to selections, modify, expand by two. Now click on the bottom tube layer (in the layers palette) and go to selections invert, then edit, clear. On your top tube layer, erase the parts you don’t want seen outside the frame layer. For example, I removed her lower half.

Next add the teddy bear to either side of the tube, to where it’s facing in. Add the skulls to the top of the arrows at an angle.

Don’t forget your copyright information. You can notice that I used a pixel font on mine and the color white. What I did was add it to the top of the tube layer and lowered the opacity so it didn’t take away from the set but it could be seen as well.

Follow the similar steps for the avvy!

Add any text you want, save as a png and you’re done!

Thank you for trying my tutorial!


Tuesday, December 20, 2011

The music moves me 2 FTU


This tutorial was written on December 20, 2011, Shani aka Wicked Princess. The concept of the tag is mine and mine alone. Any resemblance to any other tag/tut is pure coincidence. This was written for those with working knowledge of Paint Shop Pro.
Supplies Needed:


++Paint Shop Pro ( I used 10 but any version should work)


++ Tube of choice or the one I used, which is one by Alicia Mujica called "Don't stop the music" and you can find her work at PTE. Note you must have a valid license in order to use it!

++Scrap kit of choice, I used a FTU one called “her teenage rebellion” by Scrap Rebellion and you can find it here

++Template by Tami at Addictive pleasures. It’s the one that says “ I am more than just unique” and it’s the second one down in this post HERE

++Plug ins: Penta.com dot and cross

++Fonts of your choice. I used Americana and Teckton Pro

**NOTE ADD DROP SHADOWS OF YOUR CHOOSING AS YOU LIKE! AND SAVE AS YOU GO!

Open the template in PSP, using your shortcut keys on your keyboard (SHIFT+D) duplicate the template as a new image. Close the original.

Open several papers of choice, resizing as needed. For example, when I look at the blue bar where it tells me what I’ve opened (say like paper 2) it tells me what percentage I’m viewing it at. For me it’s usually 16%, so I resize to 16% bringing it to 100%. ( I hope that made sense!) Once you’ve done this, minimize for later use.

Next go to the bottom template layer and go to selections, select all, then float, selections defloat. Don’t forget to go to selections, none then delete the template layer. Repeat this process for the rest of the template. **NOTE I REMOVED THE WORD ART LAYERS, YOU CAN LEAVE THEM IF YOU LIKE!

Open the circle skulls frame. Resize it then copy and paste as a new layer. Move it to one layer above the bottom square layers. Move it to the upper left. Then duplicate it then go to image, mirror. Then Image flip. Adjust it as you may need to. I moved mine just a bit until I was happy with it.

Open up your tube of choice. I used one that had a close up as well. Copy and paste the close up as a new layer. Move it below the small square frame layers. I started with the left and moved it to where I liked it. Duplicate it and go to adjust, blur, guassian blur and blur it at level 3.00. The on your blend mode, change it to overlay. Merge down one layer. Now I used the plug in, penta.com, dot and cross. I just set it at any random setting. Click ok and then go to your rectangle layer that is below the close up layer. Go to selections, float, selections, defloat then click on the close up layer. Go to selections, invert. Back to the bottom rectangle layer go to selections, float, selections, defloat and then flood fill it with a gradient to match. What I did was change the foreground color to the teal looking color and the background to black. Then when I pulled up the gradient options, I set it to the foreground gradient option and set it to repeat I think on 4. Back to the close up layer, change the blend mode to lumincance legacy.

Next on the frame layers for the rectangle (above the close up layer) I changed the color and added noise. It’s up to you if you want to do that!

Open your regular tube of choice. Copy and paste as a new layer. Move it to the center, between the frame layers. Adjust as needed.

Now open the swirl with the stars on it. Resize it. Copy and paste as a new layer. Go to image, free rotate and rotate to 90 degrees to the right. Move this to just above the frame layers but below the tube layer. Move it and adjust. I moved mine so it looked like the tops ended right be tubes head and right behind the bum. Duplicate it and go to image, mirror. Adjust some more if you need to.

Next I opened two of the little flowers I liked. Copy and paste one onto the other, and layer them as you like. When you’ve got a layered flower, copy merged, and paste as a new layer. Place them where you like, or where you see I did. Up to you!

Then open up the star wave. Resize and copy and paste as a new layer so it rests at the end of the tube.
Open the ipod, resize then copy and paste as a new layer and move to the right of the star wave. Angle it to the left a bit. Duplicate it and go to image, mirror. Then move it to towards the top of the right frame. Add a skull to the upper right corner of the right frame and the bottom left of the left frame.

Add your copyrights, tagger markings, and licensing information. Add your words of choice also!

And that’s it! Thanks for trying my tutorial.


Friday, June 3, 2011

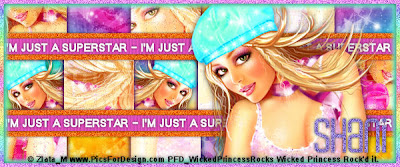
I'm just a Superstar-Forum Set FTU NO SCRAPS! NO PLUG INS!


This tutorial was written on June 3, 2011, Shani aka Wicked Princess. The concept of the tag is mine and mine alone. Any resemblance to any other tag/tut is pure coincidence. This was written for those with working knowledge of Paint Shop Pro.
Supplies Needed:

++Paint Shop Pro ( I used 10 but any version should work)

++Two tubes of choice or the ones I used. I used the work of Zlata_M and you can purchase her work from PicsForDesign Specifically I used “dancing” this comes in many layers. So I just changed the color hat and dress layers.

++Texture of your choice. I used one from Toxic Desirez which you can find on her
Blog


++The Checkerboard shape that I have included and you can download it here

++Fonts of your choice. I used vrinda which should be a default font for PSP. The other one I used for my name is Weltron and I can’t remember where I found it lol

No plug ins needed!!! This is a no scraps, no plug in tutorial for a banner and avatar! First the banner…I will try to keep it simple for you.

**NOTE ADD DROP SHADOWS OF YOUR CHOOSING AS YOU LIKE! AND SAVE AS YOU GO!

Open a new canvas 600x250 with a transparent background. Open your texture of choice, for this one I used texture 4. Minimize the texture. In your materials palette click on the foreground box. Change it to pattern then click on the drop down menu. Scroll down until you see your texture, and click on it. Set the scale to 50 and click ok. Now using your flood fill tool, flood the canvas. You now should see a brightly colored canvas!

Next you will want to open your checkerboard shape then copy and paste as a new layer in your canvas. You may need to adjust it a bit. Now the fun parts!

Open your first tube of choice. Resize it as you want it, I reduced mine about 40 percent I believe. Copy and paste it as a new layer above the checkerboard. Move it to the left edge to wear most of the black behind it is covered. Duplicate it then go to adjust, blur, gaussian blur and set it to 3.00. On that same layer, go to the layers mode and set it to overlay. Go to layers, merge down one layer. Duplicate it and go to image, mirror. Adjust it if you need to. Want more fun? Continue this process to cover the entire checkerboard! Move the tube up to show different parts, down, opposite, whatever you like. I just went with whatever I thought looked the best. The key though is to make sure that you do not see any black behind the tubes. Now close off the other layers EXCEPT your tubes. Go to layers, merge visible. Duplicate this layer, and on the bottom layer we’re going to add a bit of texture! Go to Effects, texture effects, mosaic antique. I kept my settings at 50 for number of columns and rows, then tile diffusion at 70%, grout width 5 and then grout diffusion at 50. You can always mess with the settings to make it as you want it! Click ok. On the top tube layer change the opacity to around 60 to 70%. This gives it a pretty cool “rough” look right? Merge this layer down one just like you merged before.

Go back down to the checkerboard, and go to selections, select all, selections float, selections defloat. What that does in case you didn’t know is makes sure that the edges aren’t rough when you fill or add something. Now go to the tube layer (yes while the checkerboard has the dancing ants) go to selections, invert. On your tubes layer, hit the delete key. Ta da! Look at that! Lol Go to selections none.

On the checkerboard layer again, the selections, select all, float, defloat again. Go to selections modify, expand by 3. Add a new layer and move it below the tubes layer. Flood fill it with your choice of color. I used a dark purple to match the texture and tube. Go to selections, none. On that layer go to adjust, blur, guassian blur again and at the same setting. See how it gives you a bit of a glow just like if you had used a gradient glow? Pretty cool huh?! You can now delete the original checkerboard layer.

Now open your other tube. Copy and paste as a new layer, resize it down. As you can see I just used the face portion of the girl. Move your tube to the open square on the center left. Use your magic wand tool and go to the checkerboard tube layer and click inside the square and go to selection, modify, expand by I think I did 10. Basically once you hit ok you want to see the dancing ants get bigger so that they are beyond your current square. Go back to the tube layer, go to selections, invert. Hit the delete key then selections none. Repeat this for the next open space over. Merge down one layer and then move this below the blurred checkerboard, the one we made into our “glow”.

We’re going to do our rectangles now. Using your preset shape tool, activate the rectangle tool. In the layers palette, choose the foreground and background colors to ones that will compliment your tube. Draw out a medium sized rectangle. I guess you could say the thickness of a common ribbon. I over drew mine just a little, to make sure I had it long enough. Don’t worry about placement; we’ll move it in a minute after another few steps. Convert this to a raster layer. To do this you would right click on it in the layers palette, and in the menu click on convert to raster layer. With this layer still activated go to selections, float, selections defloat then selections contract by 10. Add a new raster layer and flood fill this one with a another color that compliments the tube. Go to selections none. On the bottom rectangle, go to adjust, add noise. Play with the settings to what you like. On the top rectangle layer go to textures, texture effects, blinds and I used the settings Width 5, opacity 15, then the color to black, horizontal unchecked and light from left top checked. Click ok. Pretty cool effects huh? I added a drop shadow to the top rectangle to just give it a bit of depth. Merge down one layer. Now we’re going to move it! I moved it so the top edges of it was lined up with the edges of the middle squares. Look at mine to see what I mean. Duplicate it and go to image, flip. Adjust it a little bit if you need to. Activate your text tool, change the foreground and background colors to what you like, I chose white. You can type in whatever text you like, I used “I’m just a superstar” in all caps. I repeated it a few times to make sure I had enough room. Now move this to center it in the bottom rectangles. I added a drop shadow too. Adjust it to where you like it. Duplicate it and move it to the upper one too. It’s a pain in the bum, but take the time to really try to center it, it took me a few tries to get it to match.

Almost done! Add your tube, I moved mine to the left a bit, it’s just where I liked it. Add yours where ever you like it and have fun with it! Once you’ve got it where you like it, SAVE! But save it in layers so you can go back and change it anytime you want. Now that you’ve save and not scared you’ve done something you can’t change lol, merge visible. OMG scary huh? Now we’re going to add borders! Go to selections, select all then selections, float, selections defloat. Now go to selections, modify, select borders. Set it at 10, with anti-alias checked and inside checked. Click ok. Activate your flood fill tool, change the foreground and background to a color you like. I chose a lighter one. Add a new raster layer and then flood fill with that color. Go to selections none. Now go to adjust, blur, guassian blur again set at 3.00. Now back to your merged layer. Repeat the process again, but this time set to 5. Flood fill again with whatever color, I used a gradient. I added noise to it too.

Add your copyrights and license number and save as jpeg! Pretty swift huh?
Now on to the avatar…easy peasy I promise!

Open up your PSPimage of the banner we just did. Now open a new canvas of 250x250, yes I make my avatar’s larger than most. Back to your PSPimage banner, close off the tube layer and the rectangles and merge visible. Go to edit copy then over to your new canvas and do edit, paste. Move it around to where you kind of like it, I messed around with it for a few minutes until it looked good. Back to the banner, close off everything else then open up the rectangles and words, merge those down then copy. Back to the avatar, paste as a new layer and move it and adjust like you did before. Add your tube and place it where you want. Repeat the steps before for the border and add your copyright and license number! Save as a pspimage first then as a jpeg. Add your name and your done!

Pretty cool huh?

Sunday, June 27, 2010

Dare To Be FTU


This tutorial was written on May 25, 2010 Shani aka Wicked Princess. The concept of the tag is mine and mine alone. Any resemblance to any other tag/tut is pure coincidence. This was written for those with working knowledge of PSP.

Supplies Needed:

++Paint Shop Pro ( I used 10 but any version should work)

++Scrap kit by called Smitten can be found HERE

++Template 297 By Missy can be found HERE **Note you have to scroll down her page some and look on the left for template links. download templates 291-310 to get them!


++ Tube of choice or the one I used. I used the work of Lix which can be purchased from HERE

++Font and mask of choice

++Plug Ins:

-Eye candy 4000
-penta, dot and cross
-muera meister copies


**NOTES:
-Add Drop shadow of choice as you go
-You can merger layers as you want to make things easier for yourself.

Open the template in PSP, using your shortcut keys on your keyboard (SHIFT+D) duplicate the template as a new image. Close the original.

Open several papers of choice, resizing as needed. For example, when I look at the blue bar where it tells me what I’ve opened (say like paper 2) it tells me what percentage I’m viewing it at. For me it’s usually 16%, so I resize to 16% bringing it to 100%. ( I hope that made sense!) Once you’ve done this, minimize for later use.

Next go to the bottom template layer and go to selections, select all, then float, selections defloat. Don’t forget to go to selections, none then delete the template layer. Repeat this process for the rest of the template. NOTE: I only added a glow to the word art

Open up the flower you like, resize then copy and paste as a new layer. Use your plug in, muera meister copies on the encircle option. set at 80 for the x and y and any number for the flowers. Move this below the templates laterys.

Next open the beaded string. Resize then copy and paste as a new layer. Move above the rectangle layer in the middle of the circle. Move it to the top of the rectangle. Duplicate it and go to image, flip. Move it to the bottom part of the rectanble.

Now open your tube of choice, resize then copy and paste as a new layer just to the left of the different word art.

Next open the corset, emo bunny and heart brad you like. Resize then copy and paste as a new layer to the bottom left of the tag.

Open the vined bundle flower, resize then copy and paste as a new layer to the upper left of the tag. Add the bow of your choice to the top center of the circle. Also a butterfly to the tip of the word art on the side.

Finally add your copyrights, tagger markings and license information.

Save and your done!

Thanks for trying my tutorial.

Tuesday, May 25, 2010

Fan Club (FTU)


This tutorial was written on May 25, 2010 Shani aka Wicked Princess. The concept of the tag is mine and mine alone. Any resemblance to any other tag/tut is pure coincidence. This was written for those with working knowledge of PSP.

Supplies Needed:

++Paint Shop Pro ( I used 10 but any version should work)

++Scrap kit by called Friendship Collection: Missy can be found HERE

++Template 340 By Missy can be found HERE


++ 3 Tubes of choice or the one I used. I used the artwork of Elias Chatzoudis can be purchased from HERE

++Font and mask of choice

++Plug Ins:

-Eye candy 4000


**NOTES:
-Add Drop shadow of choice as you go
-You can merger layers as you want to make things easier for yourself.

Open the template in PSP, using your shortcut keys on your keyboard (SHIFT+D) duplicate the template as a new image. Close the original.

Open several papers of choice, resizing as needed. For example, when I look at the blue bar where it tells me what I’ve opened (say like paper 2) it tells me what percentage I’m viewing it at. For me it’s usually 16%, so I resize to 16% bringing it to 100%. ( I hope that made sense!) Once you’ve done this, minimize for later use.

Next go to the bottom template layer and go to selections, select all, then float, selections defloat. Don’t forget to go to selections, none then delete the template layer. Repeat this process for the rest of the template. NOTE: I only added a glow to the word art AND moved it down.

Go to the background layer at the bottom of the layers palette, and flood fill the background layer with your choice of paper. Add your mask of choice.

Open the glitter splatter of your choosing. Resize then copy and paste as a new layer. Move it down to just above the mask layer. Also move it to the bottom left. Duplicate it and go to image, mirror, then image, flip.

Then open your first tube. Note that I used close ups that I had. Crop if needed, resize then copy and paste as a new layer below the first square frame layer to the left. Adjust as needed. Do the same thing for the other frame and tube.

Next open the torn paper, resize then copy and paste as a new layer. Move it to below the frame layers, just at the top of the frames. Duplicate it and go to image, flip. You should now have one above and below.

Now open the wrap bow you like. Resize then copy and paste as a new layer. Move it to the left of the frame, make sure it is above the frame layer. Duplicate it and go to image, mirror. Adjust as needed.

Then open the heart scatter, resize then copy and paste as a new layer to the left of the frame. Duplicate it and go to image, mirror. Note this should be above the bow layers.

Open the checkered arrows, resize then copy and paste as a new layer. Move to the upper left of the canvas, just above the frames and paper layers. Duplicate and go to image, mirror.

Next open both guitars. Resize them then copy and paste as a new layer. Move to the center between the two frame layers. Angle it so that the base of the guitar is pointing to the upper right of the canvas. Duplicate it then go to image, mirror then image, flip. Do this for the other guitar too.

Then open the stapled ribbon, resize then copy and paste as new layers. Move them to the upper left and upper right of the coordinating frames.

Now open the puffy lips. Resize then copy and paste as a new layer. Move to the upper left of the frame on the left. Then duplicate it and move to the bottom right of the other frame. Add the skull heart, placing it in opposite corners of the frame too.

Open your final tube of choice, resize then copy and paste as a new layer. Paste in the center between the frames. Make sure it’s below the word art layer.

Finally add your text, copyrights and license info! Save and your done! Thank you for trying my tutorial!

Sunday, February 28, 2010

Superstar! FTU


This tutorial was written on February 28, 2010 Shani aka Wicked Princess. The concept of the tag is mine and mine alone. Any resemblance to any other tag/tut is pure coincidence. This was written for those with working knowledge of PSP.

Supplies Needed:

++Paint Shop Pro ( I used 10 but any version should work)

++Scrap kit By Tishia called Paradyce Lost can be found HERE

++Template 50 by Kristin can be found HERE

++Tube of choice or the one I used. I used the artwork of CEI Stickers. You can purchase it from MPT You must have a valid license in order to use their work.

++Font and mask of your choice

++Plug ins:
-Muera Meister copies

**NOTES:
-Add Drop shadow of choice as you go
-You can merger layers as you want to make things easier for yourself.

Open the template in PSP, using your shortcut keys on your keyboard (SHIFT+D) duplicate the template as a new image. Close the original.

Open several papers of choice, resizing as needed. For example, when I look at the blue bar where it tells me what I’ve opened (say like paper 2) it tells me what percentage I’m viewing it at. For me it’s usually 16%, so I resize to 16% bringing it to 100%. ( I hope that made sense!) Once you’ve done this, minimize for later use.

Next go to the bottom template layer and go to selections, select all, then float, selections defloat. Don’t forget to go to selections, none then delete the template layer. Repeat this process for the rest of the template. **Note I deleted the brush layer

Add a new raster layer, flood fill with your choice of paper and add your mask. Merge the group.

Then open the flower of your choosing. Resize it then copy and paste as a new layer into the center of the canvas. Use your plug in, muera meister copies on the encircle option. Set it at the shift x and y at 80 and any number of flowers you like. Move this layer below the circle template layer and adjust as you need to.

Open your tube of choice then copy and paste as a new layer. Move it to the right of the rectangle layer. Adjust where you like it alright. Duplicate it and go to adjust, blur, guassin blur set to 3.00. On the top layer, change blend mode to soft light and merge down. Now change the blend mode to luminance (legacy). Duplicate it and go to image, mirror.

On the big rectangle layer, go to selections, select all, selections float then defloat. Then go to selections, invert. On your tube layers, hit the delete key. Go to selections none.

Open one of the ribbon’s with the bow on the end. Resize it then rotate it to the right. Copy and paste as a new layer to the top of the rectangle on the right, so the bow is facing out. Duplicate it and go to image, mirror.

Now open the stitching and resize. Copy and paste as a new layer, move to the bottom of the rectangle layer. Adjust as needed.

Then open the star clip, resize it then copy and paste as a new layer. Move it at an angle towards the middle of the rectangle on the left side. Duplicate it and go to image, mirror.

Next go back to your tube then copy and paste as a new layer to the center. Resize and adjust where you want it. We need it in there now so we can make sure we’re centering everything right.

Open the safety pin bow, resize it then copy and paste as a new layer. Move it below the tube layer to the left of it slightly. Duplicate it and go to image, mirror. Adjust as needed.

Then open the label, resize it then copy and paste as a new layer. Move to the bottom right of the tag, angling as needed. Duplicate it and go to image, mirror.

Next open the star wand, resize it then copy and paste as a new layer. Move to the upper left of the tag, placing it where you like it. You will need to adjust it in a few minutes when we add another element. Duplicate it and go to image, mirror.

Now open the other ribbon with bow, resize then copy and paste as a new layer. Move it to the right of the tag. Duplicate it and go to image, mirror. Adjust as needed. Move the wands under the ribbons adjusting as needed.

Add your text, copyrights, license info and tagger markings. Save and your done.

Thanks for trying my tutorial.

Simple Sticker Tut (No Scraps)


*-*-NOTE! Mine has a gradient background only for the purpose of showing the dropshadow. Yours does not have to have it *-**-*

I was working on a tag earlier and decided to do something funky that I haven't done in a long time and made a sticker out of a name. A lot of people don't know how to do this, so I thought, what the heck? LOL In this tut you will learn how to make a sticker.

**This tutorial was created by me on 2/28/10 and the concept is my own. Any resmemblance to any other tutorial is by pure coincidence.

Let's get going!

No plug ins needed!

Open a new transparent canvas layer of 500x500, we can always crop when we're done.

Choose what ever font you like, personally I like script-fancy fonts lol. For this I used MeaCulpa with font size set at 24. Choose your color you want. I used a bright color to really show it off, but your welcome to use a gradient glow or even a pattern. Type out the name you want to use and click ok. Convert this layer to a raster layer then go to edit, cut then edit, paste as new layer. This centers it back in to the canvas evenly. It drives me nuts if it's not done this way lol.

Next we're going to add an inner bevel. Go to effects, 3d effects, inner bevel. I used these settings:


I chose to keep the color setting on a gray, only because if I change it to white, it distorts the color. You can change it to whatever color you like.

Now go to selections, select all, then float, selections defloat. You should see dancing ants around the font. Go to selections, modify, expand by 4. This should give you a bit of a room around it to make it look like a decent sticker.

Add a new raster layer and move this below the font layer. Using your flood fill tool, flood fill with your choice of color. I chose white just as a default example. When satisfied, go to selections, none.

On the sticker layer, go to adjust, add/remove noise, add noise. These are the settings I used:


Now go back to the font layer, add a drop shadow you like. Make any adjustments you need to. If your satisfied with what you have done, crop and save it as a .png!

Thanks for trying my tutorial!

♥ Shani

Tuesday, February 16, 2010

Feeling Lucky (FTU)


This tutorial was written on February 16, 2010 Shani aka Wicked Princess. The concept of the tag is mine and mine alone. Any resemblance to any other tag/tut is pure coincidence. This was written for those with working knowledge of PSP.

Supplies Needed:

++Paint Shop Pro ( I used 10 but any version should work)

++Scrap kit Gina of Kikeka kits called Feeling Lucky can be found HERE

++Template 154 by Ali can be found HERE

++Tube of choice or the one I used. I used the posers included in the kit. Please credit the poser maker, Dark Moon’s creation.

++Plug ins:
-Eye Candy 4000 Gradient Glow

++Font and Mask of choice

**NOTES:
-Add Drop shadow of choice as you go
-You can merger layers as you want to make things easier for yourself.

Open the template in PSP, using your shortcut keys on your keyboard (SHIFT+D) duplicate the template as a new image. Close the original.

Open several papers of choice, resizing as needed. For example, when I look at the blue bar where it tells me what I’ve opened (say like paper 2) it tells me what percentage I’m viewing it at. For me it’s usually 16%, so I resize to 16% bringing it to 100%. ( I hope that made sense!) Once you’ve done this, minimize for later use.

Next go to the bottom template layer and go to selections, select all, then float, selections defloat. Don’t forget to go to selections, none then delete the template layer. Add a gradient glow of your choice. Repeat this process for the rest of the template.

Add a new raster layer and flood fill with your choice of paper. Add your choice of mask and merge group. Move this layer below your template layers.

Now open the clover leaf frame, resize it then copy and paste as a new layer, moving it blow all layers but above the circle layer.

Open the bougainvillea flower, resize it then copy and paste as a new layer. Move it to the upper left portion of the tag. Duplicate it and go to image, mirror.

Then open the horseshoe, hat and mug. Resize then copy and paste as new layers. Arrange them in the left side template rectangle as you like.

Now open the tube of choice, resize it then copy and paste as a new layer. Move to the right side rectangle. Add the pot of gold to the center of the rectangles, above both the clip art layers and poser layer.

Next open the ivy branches, resize then copy and paste as new layer. Move to the left of the canvas. Duplicate it and go to image, mirror.

Open the feeling lucky word art, resize it then copy and paste as a new layer. Move to the bottom of the template layer.

Next open the flower bouquet of your choice. Resize then copy and paste as a new layer. Move to the left side of the tag then duplicate it. Go to image, mirror and adjust as needed.

Then open the butterfly of choice, resize then copy and paste as a new layer. Move to where ever you like in the tag. Duplicate it and do the same.

Now open the tag of choice, resize it then copy and paste as a new layer. Move it to the bottom lower corner of the tag as you like.

Finally add your text, copyrights, license number if needed and tagger markings.

Save and your done!

Red Rover, Red Rover (FTU)


This tutorial was written on February 20, 2010 Shani aka Wicked Princess. The concept of the tag is mine and mine alone. Any resemblance to any other tag/tut is pure coincidence. This was written for those with working knowledge of PSP.

Supplies Needed:

++Paint Shop Pro ( I used 10 but any version should work)

++Scrap kit Gina of Kikeka kits called Red Rover can be found on her blog as a freebie HERE

++Template 155 by Ali can be found HERE

++Tube of choice or the one I used. I used the clip out kiddo’s that come with the kit. If you don’t use any outside tubes, please credit back to the designers blog.

++Plug ins:
-Eye Candy 4000 Gradient Glow

++Font and Mask of choice

**NOTES:
-Add Drop shadow of choice as you go
-You can merger layers as you want to make things easier for yourself.

Open the template in PSP, using your shortcut keys on your keyboard (SHIFT+D) duplicate the template as a new image. Close the original.

Open several papers of choice, resizing as needed. For example, when I look at the blue bar where it tells me what I’ve opened (say like paper 2) it tells me what percentage I’m viewing it at. For me it’s usually 16%, so I resize to 16% bringing it to 100%. ( I hope that made sense!) Once you’ve done this, minimize for later use.

Next go to the bottom template layer and go to selections, select all, then float, selections defloat. Don’t forget to go to selections, none then delete the template layer. Add a gradient glow of your choice. Repeat this process for the rest of the template.

Add a new raster layer and flood fill with your choice of paper. Add your choice of mask and merge group. Move this layer below your template layers.

Open the blue glitter splat. Resize then copy and paste as a new layer. Move below the frame layer. Duplicate it and go to image, mirror. Adjust as needed. Using your magic wand tool click inside the frame layer. Go to selections modify, expand by 10. Then go to selections, invert. On the splat layers, hit the delete button.

We’re going to create a scene with in the frame.

Then open the tree, resize and copy and paste as a new layer to the right side, under the frame. Erase the parts seen outside of the frame.

Now open up the house, resize it then copy and paste as a new layer. Move to the center bottom of the frame layer. Add the grass to the bottom of the house. Duplicate the grass and move down at the bottom of the rectangle layer.

Copy and paste the fence after resizing below the house layer. Add a bee above the fence.

Next open the ivy, resize it then copy and paste as a new layer. Duplicate it and move one on the left side of the frame layer and the other on the other side.

Open the flower bouquet. Resize as needed then copy and paste as a new layer to the left and bottom of the frame layer. Duplicate it and go to image, mirror.

Then open the bows of choice, resize them then copy and paste as a new layer. Duplicate them and move them accordingly between the circle layers.

Now open the bush, resize it then copy and paste as a new layer to the left and right of the bottom grass layer. Adjust as needed.

Next add the children playing red rover to the bottom above the bush layer. Resize and adjust as needed.

Open the sun, resize it then copy and paste as a new layer. Move it to the upper right of the tag. Add the rainbow and cloud of your choice next to the sun layer. Move them below the layer.

Finally add your text, copyrights, license info and tagger markings. Save and your done!

Tooth Fairy Visit (FTU)


This tutorial was written on February 20, 2010 Shani aka Wicked Princess. The concept of the tag is mine and mine alone. Any resemblance to any other tag/tut is pure coincidence. This was written for those with working knowledge of PSP.

Supplies Needed:

++Paint Shop Pro ( I used 10 but any version should work)

++Scrap kit by Natasha of Sticky Kisses Designs can be found on her blog HERE

++Template 153 by Ali can be found HERE

++Tube of choice or the one I used. I used the work of Tori Beveridge and you can purchase it from HERE

++Plug ins:
-Eye Candy 4000 Gradient Glow

++Font and Mask of choice

**NOTES:
-Add Drop shadow of choice as you go
-You can merger layers as you want to make things easier for yourself.

Open the template in PSP, using your shortcut keys on your keyboard (SHIFT+D) duplicate the template as a new image. Close the original.

Open several papers of choice, resizing as needed. For example, when I look at the blue bar where it tells me what I’ve opened (say like paper 2) it tells me what percentage I’m viewing it at. For me it’s usually 16%, so I resize to 16% bringing it to 100%. ( I hope that made sense!) Once you’ve done this, minimize for later use.

Next go to the bottom template layer and go to selections, select all, then float, selections defloat. Don’t forget to go to selections, none then delete the template layer. Add a gradient glow of your choice. Repeat this process for the rest of the template.

Add a new raster layer and flood fill with your choice of paper. Add your choice of mask and merge group. Move this layer below your template layers.

Open up the star cluster, resize it then copy and paste as a new layer. Move it below the circle background layer and at the upper right of the canvas. Duplicate it and go to image, flip.

Then open up the flower, resize then copy and paste as a new layer. Move to the upper left of the canvas, below the circle background layer. Duplicate it and move a little bit further down of the other one. Duplicate it one more time and do the same thing.

Now open up the bed, resize it then copy and paste as a new layer. Move below the circle frame layer. Erase the parts of the bed you don’t want seen outside the frame.

Now open up the sheep, resize it then copy and paste as a new layer. Move it to the upper left of the frame layer. Add a moon to the opposite side.

Open the button of your choosing, resize then copy and paste as a new layer. Duplicate it several times and move around the circle layer as you like.

Then open the button with the tooth fairy on it. Resize it then move it to the upper right of the template, where the rectangles are.

Next open your tube of choice, resize it then copy and paste as a new layer. Move it to the center of the circle layer. Adjust as needed.

Add the tooth fairy pillow and move it to the bottom right of the canvas, angle as you like.

Finally add your text, copyright, tagger markings and license info. Save and your done!

Thursday, February 11, 2010

Sex Kitten SAC! (FTU)


This tutorial was written on February 11, 2010 Shani aka Wicked Princess. The concept of the tag is mine and mine alone. Any resemblance to any other tag/tut is pure coincidence. This was written for those with working knowledge of PSP.

Supplies Needed:

++Paint Shop Pro ( I used 10 but any version should work)

++Scrap kit by Dianna of Digicats and Dogs called Dark Cravings can be found HERE

++Template 54 By Kristin can be found HERE

++Two tubes of choice or the ones I used. I used the artwork of Elias Chatzoudis and you can purchase his work from MPT and you must have a license to use his work.

++Plug ins:
-Eye Candy 4000 Gradient Glow

++Font and Mask of choice

**NOTES:
-Add Drop shadow of choice as you go
-You can merger layers as you want to make things easier for yourself.

Open the template in PSP, using your shortcut keys on your keyboard (SHIFT+D) duplicate the template as a new image. Close the original.

Open several papers of choice, resizing as needed. For example, when I look at the blue bar where it tells me what I’ve opened (say like paper 2) it tells me what percentage I’m viewing it at. For me it’s usually 16%, so I resize to 16% bringing it to 100%. ( I hope that made sense!) Once you’ve done this, minimize for later use.

Next go to the bottom template layer and go to selections, select all, then float, selections defloat. Don’t forget to go to selections, none then delete the template layer. Add a gradient glow of your choice. Repeat this process for the rest of the template.

Add a new raster layer and flood fill with your choice of paper. Add your choice of mask and merge group. Move this layer below your template layers.

Open the mesh of your choosing, resize then copy and paste as a new layer. Move it below your mask layer. Duplicate it and go to image, flip. Add your same mask to the mesh layers.

Now add the barb wire of your choosing to the top and bottom of the rectangle layer.

Then open the candelabra of your choosing, resize then copy and paste as a new layer. Move it to the upper left hand corner of the canvas and below the circle layer. Duplicate it and go to image, mirror.

Open your first tube of choice, resize and crop as needed. Copy and paste as a new layer, into the circle layer above the background word art. Position it the way you like, then go to selections, select all the selections, float and then defloat. Go to selections, invert and on the tube layer hit the delete key. Go to selections, none.

Next open the flowers of your choosing, resize then copy and paste as a new layer in a trio form to the bottom right hand corner of the canvas. Make sure they are below the circle layer.

Then open the other tube you like, resize it then copy and paste as a new layer to the right of the tag. Position where you like it.

Now open the paddle, resize then copy and paste as a new layer . Move to middle of the canvas on the left hand side.

Next open the cage, resize then copy and paste as a new layer below the paddle. Add a bow of choice to the top of it.

Now open several elements you like, resize and copy and paste in clusters toward the bottom right hand corner of the tag.

Add the heart with horns you like to the top of the canvas.

Finally add your text, copyrights, license number and tagger markings.

Save and your done!

Thank you for trying my tutorial.

Wednesday, December 30, 2009

LOVE FTU


Love FTU

This tutorial was written on December 30, 2009 Shani aka Wicked Princess. The concept of the tag is mine and mine alone. Any resemblance to any other tag/tut is pure coincidence. This was written for those with working knowledge of PSP.
Supplies Needed:

++Paint Shop Pro ( I used 10 but any version should work)

++Scrap kit by Fantasy Moments called Be My Valentine can be found HERE

++Template Valetine 2 by Ali can be found HERE

++Tube of choice or the one I used. I used the artwork of Steve Bair and you can purchase it from HERE You must have a valid license in order to use his work!

++Font and Mask of choice

**NOTES:
-Add Drop shadow of choice as you go
-You can merger layers as you want to make things easier for yourself.

Open the template in PSP, using your shortcut keys on your keyboard (SHIFT+D) duplicate the template as a new image. Close the original.

Open several papers of choice, resizing as needed. For example, when I look at the blue bar where it tells me what I’ve opened (say like paper 2) it tells me what percentage I’m viewing it at. For me it’s usually 16%, so I resize to 16% bringing it to 100%. ( I hope that made sense!) Once you’ve done this, minimize for later use.

Next go to the bottom template layer and go to selections, select all, then float, selections defloat. Don’t forget to go to selections, none then delete the template layer. Repeat this process for the rest of the template.


Add a new raster layer and move it to the bottom of the layers palette. Flood fill with your choice of paper. Add the mask you like and merge visible.

Open the butterfly wreath you like. Resize it then copy and paste as a new layer. Adjust and move below the template layers, above the mask layers.

Then open your tube of choice, resize it then copy and paste as a new layer. Move it below the frame layer. Erase the parts you don’t want seen outside the frame.

Next open the ivy wrapped in ribbon you like. Resize it then copy and paste as a new layer to the top of the frame layer. Adjust as needed. Add a second one to the right side of the frame going in the opposite direction. Make sure its below the heart template layer.

Now open the rose of choice, resize it then copy and paste as a new layer. Move to the upper right hand corner of the frame layer.

Open the candle cluster with the roses and glasses. Resize it then copy and paste as a new layer. Move to the bottom left corner of the tag.

Then open the bow of your choice as well as the tiger lilly cluster. Resize then copy and paste one over the other. Move to the center of the heart template layer

Now open the heart hanger you like, resize and copy and paste as a new layer to the left of the tag.

Finally add your text, copyright, license info and tagger markings.

Save and your done!

Thank you for trying my tutorial!

Tuesday, October 27, 2009

Have you hugged your nurse today?


Have you hugged your nurse today? FTU

This tutorial was written on October 27, 2009 by Shani aka Wicked Princess. The concept of the tag is mine and mine alone. Any resemblance to any other tag/tut is pure coincidence. This was written for those with working knowledge of PSP.
Supplies Needed:

++Paint Shop Pro ( I used 10 but any version should work)


++Nurse Naughty ADD ON Scrap kit by me can be found on my blog HERE

++Template31 by Tracy at Freebie Friends can be found HERE


++Tube of choice or the one I used. I used the artwork of NoFlutter you can see her artwork HERE

++Plug ins: Eye Candy 4000 Gradient Glow

++Font and Mask of choice

Let’s get Started!

**NOTES:
-Add Drop shadow of choice as you go
-You can merger layers as you want to make things easier for yourself.

Open the template in PSP, using your shortcut keys on your keyboard (SHIFT+D) duplicate the template as a new image. Close the original. **Increase the canvas size by going to image, canvas size then increase it to 600x600.


Open several papers of choice, resizing as needed. For example, when I look at the blue bar where it tells me what I’ve opened (say like paper 2) it tells me what percentage I’m viewing it at. For me it’s usually 16%, so I resize to 16% bringing it to 100%. ( I hope that made sense!) Once you’ve done this, minimize for later use.


Next go to the bottom template layer and go to selections, select all, then float, selections defloat. Add your gradient glow of choice. Don’t forget to go to selections, none then delete the template layer. Repeat this process for the rest of the template.


Add a new raster layer, flood fill with your choice of paper. Add your mask, and merge group. Move this layer to the bottom.

Open the glitter splatter of your choice. Copy and paste as a new layer, moving it below the template layers, just above the mask layer.

Next open the bandaid, post it, pencil, tweezers, first aid kit and pill. Resize them then copy and paste and arrange in the lower right hand corner by the hearts layer. Move the hearts layer above all of these. Arrange them as you like.

Now open the flower bouquet of your choice. Resize it then copy and paste as a new layer to the upper left hadn corner of the tag, below the frame and squares layer. Duplicate it and go to image, flip.

Open your tube of choice, copy and paste as a new layer to the left of your tag. Resize as needed and adjust. Duplicate it then move below the frame layer. Move where you would like the tube to be seen in the frame. Use your magic wand tool, click inside one of the frames. Go to selections, modify, expand by 6. Go to selections, invert and on the tube layer hit the delete key. Go to selections, none. Repeat this for the rest of the frames.

Add your text, copyrights and tagger markings.

Save and your done! Thank you for trying my tutorial!

Saturday, October 10, 2009

You are not alone (FTU)


You are not alone

This tutorial was written on October 10, 2009 by Shani aka Wicked Princess. The concept of the tag is mine and mine alone. Any resemblance to any other tag/tut is pure coincidence. This was written for those with working knowledge of PSP.
Supplies Needed:

++Paint Shop Pro ( I used 10 but any version should work)

++Scrap kit by me called Coming Out of the Dark which is FTU can be found on my blog HERE

++Template 14 by Alyssa can be found HERE

++ 3 tubes of choice or the ones I used. I used the work of Suzanne Wolcott which you can be found HERE Note you must have a valid license in order to use her work.

++Font and Mask of choice

Let’s get Started!

**NOTES:
-Add Drop shadow of choice as you go
-You can merger layers as you want to make things easier for yourself.

Open the template in PSP, using your shortcut keys on your keyboard (SHIFT+D) duplicate the template as a new image. Close the original.


Open several papers of choice, resizing as needed. For example, when I look at the blue bar where it tells me what I’ve opened (say like paper 2) it tells me what percentage I’m viewing it at. For me it’s usually 16%, so I resize to 16% bringing it to 100%. ( I hope that made sense!) Once you’ve done this, minimize for later use.


Next go to the bottom template layer and go to selections, select all, then float, selections defloat. Add your gradient glow of choice. Don’t forget to go to selections, none then delete the template layer. Repeat this process for the rest of the template.


Add a new raster layer, flood fill with your choice of paper. Add your mask, and merge group. Move this layer to the bottom.

Then open the paper flower of choice, resize if needed. Copy and paste as a new layer and move below the rectangle layer. Adjust it so that its showing half way above the rectangle at the top of it.

Now open the green beading. Copy and paste as a new layer, move it to just above the rectangle layer. Adjust and resize as needed.

Open the pin of choice. Resize then copy and paste above the green beading layer. Move it so its sitting behind the framed square to the left. Duplicate it and go to image, mirror.

Next open your tubes of choice. Crop them as needed, then copy and paste your first one as a new layer. Move it below the framed layer on the left. Adjust as needed. Using your magic wand tool click inside the frame and go to selections, modify, expand by 3. Go to selections, invert. On the tube layer hit the delete key. Repeat this process for the other two frames and tubes.

Then open the tiger lily of your choice. Resize then copy and paste as a new layer. Angle it as you like and move it to the top of the frame layer on the left. Duplicate it and go to image, mirror.

Next open the awareness ribbon of your choice, resize then copy and paste as a new layer. Move it to the bottom, under the middle frame. Add a wax button of choice.

Add the word art of your choosing to the bottom of the tag.

Now add any other text, copyright info, license number and tagger markings.

Save and your done!

Thanks for trying my tutorial.

Sunday, August 23, 2009

Modern Girl FTU


Modern Girl FTU

This tutorial was written on August 22, 2009 by Shani aka Wicked Princess. The concept of the tag is mine and mine alone. Any resemblance to any other tag/tut is pure coincidence. This was written for those with working knowledge of PSP.
Supplies Needed:

++Paint Shop Pro ( I used 10 but any version should work)


++Scrap kit by Blue Dream Designs called I Am A Modern Girl can be found HERE

++Template 13 by Horseplays Pasture can be found HERE

++Tube of choice or the one I used. I used the artwork of Popeye Wong, which is a FTU artist. Please make sure you credit him in your tag. You can find his work HERE

++Mask and Font of choice

Let’s get Started!

**NOTES:
-Add Drop shadow of choice as you go
-You can merger layers as you want to make things easier for yourself.

Open the template in PSP, using your shortcut keys on your keyboard (SHIFT+D) duplicate the template as a new image. Close the original.

Open several papers of choice, resizing as needed. For example, when I look at the blue bar where it tells me what I’ve opened (say like paper 2) it tells me what percentage I’m viewing it at. For me it’s usually 16%, so I resize to 16% bringing it to 100%. ( I hope that made sense!) Once you’ve done this, minimize for later use.


Next go to the bottom template layer and go to selections, select all, then float, selections defloat. Don’t forget to go to selections, none then delete the template layer. Repeat this process for the rest of the template.


Add a new raster layer and flood fill with your choice of paper. Add your mask and merge the group. Move this layer to the bottom of your layer palette.


Open the phone and laptop elements. Copy and paste after resizing them into the center of the frame layer, and arrange and angle the way you like them.

Then open the notecard of your choice, copy and paste it into the canvas angle it slightly and move to the upper left of the tag. Add two pencils you like and arrange them the way you like.

Open your tube of choice and resize if needed. Copy and paste as a new layer, moving it to the right of the tag.

Add a bow to them. You’ll note I chose to add a bow to the behind of the tube lol

Open the monitor and CPU elements, copy and paste after resizing to the bottom left of the tag. I added word art to the screen.

Next open the chain charm of your choice, resize then copy and paste as a new layer. Move below the butterfly template layer.

Add the word art you like and several flowers through the tag.


Add any text, copyrights and tagger markings.

Save and your done

Thank you for trying my tutorial.