Wednesday, January 26, 2011

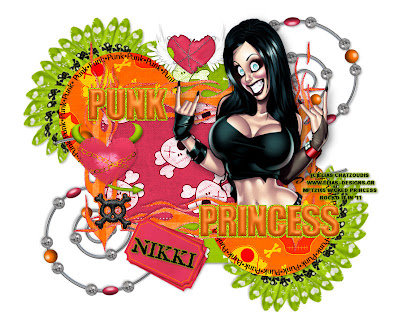
Punk Princess PTU


**NOTE LOOK BELOW THE TUT FOR MORE EXAMPLES OF WHAT YOU CAN DO WITH THIS KIT!**

This tutorial was written on January 26, 2011 Shani aka Wicked Princess. The concept of the tag is mine and mine alone. Any resemblance to any other tag/tut is pure coincidence. This was written for those with working knowledge of PSP.
Supplies Needed:

++Paint Shop Pro ( I used 10 but any version should work)
++Scrap kit Called Retro Punk by Nikki of Creative Intentionz can be found HERE

++ 1 tube of choice. I used the artwork of Elias Chatzoudis you can purchase his work from HERE

++Template by Sarah called Punk Princess can be found HERE

++Font of choice
**NOTES:
-Add Drop shadow of choice as you go
-You can merger layers as you want to make things easier for yourself.
Open several papers of choice, resizing as needed. For example, when I look at the blue bar where it tells me what I’ve opened (say like paper 2) it tells me what percentage I’m viewing it at. For me it’s usually 16%, so I resize to 16% bringing it to 100%. ( I hope that made sense!) Once you’ve done this, minimize for later use.

Open a new canvas of 800x800 (yes this is large, you can resize it later!) Open the paper of your choice and flood fill your new canvas with it.
Next go to the bottom template layer and go to selections, select all, then float, selections defloat. Don’t forget to go to selections; none then delete the template layer. Repeat this process for the rest of the template. Note I removed the work art.

First open the beaded circle decoration you like. Resize then copy and paste as a new layer. Move it down below the template layers. Also to the upper right. Duplicate it then go to image, mirror then image, flip. Adjust as needed.
Now open the flower clip you like. Resize then copy and paste as a new layer. Angle it as you like. Move it to the upper left circle. Duplicate it and go to image mirror, then image, flip.

Open the winged heart, resize then copy and paste as a new layer. Move it to the upper center of the template.

Next open the flames, resize it then copy and paste as a new layer. Move it to the upper top of the rectangle. Make sure it’s above the dotted layer. Duplicate it and go to image, mirror then image, flip. Then move it to the right and angle it up so it frames the rectangle.

Now open the heart with the chain and horns. Resize then copy and paste as a new layer to the left of the rectangle.

Open your tube of choice, resize then copy and resize as a new layer. Move it below the word art. Adjust as needed.

Re color the glitter behind the word art and skulls as you like. Also the word art itself.

Add your copyrights, text, tagger markings and license numbers. Save and your done!

Thank you for trying my tutorial.


Tuesday, January 25, 2011

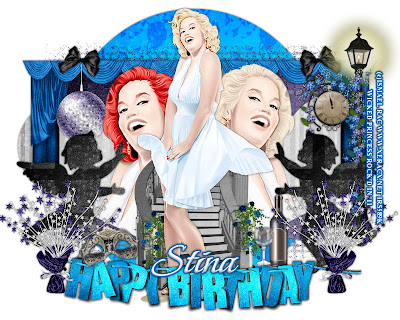
Happy Birthday-PTU


This tutorial was written on January 25, 2011 Shani aka Wicked Princess. The concept of the tag is mine and mine alone. Any resemblance to any other tag/tut is pure coincidence. This was written for those with working knowledge of PSP.

Supplies Needed:

++Paint Shop Pro ( I used 10 but any version should work)

++Scrap kit Called it’s my Party by Stina can be found HERE

++ Two tubes of choice. I used the artwork of Ismael Rac. You can find his artwork HERE

++Template by Sarah called Sweet love can be found HERE

++Font of choice

**NOTES:

-Add Drop shadow of choice as you go
-You can merger layers as you want to make things easier for yourself.
Open several papers of choice, resizing as needed. For example, when I look at the blue bar where it tells me what I’ve opened (say like paper 2) it tells me what percentage I’m viewing it at. For me it’s usually 16%, so I resize to 16% bringing it to 100%. ( I hope that made sense!) Once you’ve done this, minimize for later use.


Next go to the bottom template layer and go to selections, select all, then float, selections defloat. Don’t forget to go to selections; none then delete the template layer. Repeat this process for the rest of the template. Note I removed the work art.

Duplicate the rectangle layer. Go to Effects, texture effects then antique mosaic. I just went at the default settings I had on there.
Open the curtain, resize then copy and paste as a new layer. Move it just above the heart layers. Duplicate it and go to image, mirror. Adjust as needed.
Now open the disco ball you like, resize then copy and paste as a new layer to the left of the hearts. Erase the part of the string at the top. Add the bow you like. Duplicate it and go to image, mirror.

Then open the street lamp, resize it then copy and paste as a new layer to the left of the tag. Remember we are still just above the heart layer.
Open the first tube you like, resize it then copy and paste as a new layer. Move to the left heart, adjust it. On the heart layer go to selections, select all, then float, selections defloat. Then go to selections, invert. On the tube layer, hit the delete key. Repeat this for the opposite heart.

Next open the stair case, resize it then copy and paste as a new layer right in between the tubes on the heart layers.

Then open your second tube, resize if needed then copy and paste as a new layer right in the center of the tag. Adjust if needed.

Add the champagne bottle and glass you like to the right of the tube.
Open your word art of choice, resize then copy and paste as a new layer. Move to the top of the canvas Add the star spray bundle you like to each side of it.
Finally add your text, copyrights and license number. Save and you’re done! Thank you for trying my tutorial.
Friday, January 14, 2011

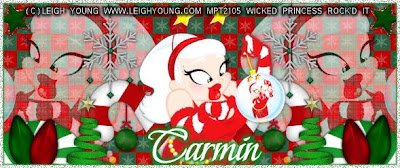
Christmas Fun Forum Set PTU


This tutorial was written January 14, 2011 Shani aka Wicked Princess. The concept of the tag is mine and mine alone. Any resemblance to any other tag/tut is pure coincidence. This was written for those with working knowledge of PSP.

Supplies Needed:

++Paint Shop Pro ( I used 10 but any version should work)

++Scrap kit By Carmin’s Creative Chaos called Santa’s Goodies and it can be found http://www.carminschaoticcreations.blogspot.com

++3 Tube of choice, I used the artwork of Leigh Young. You can visit her site for more info on where to purchase. www.leighyoung.com
++Eye Candy 4000 Gradient glow
++Font of choice

**NOTES:
-Add Drop shadow of choice as you go
-You can merger layers as you want to make things easier for yourself.

First we’re going to start with the forum Banner. Open a new canvas with a transparent backround with the size of 589 x 248.

Open the paper of choice you like. Flood fill the background with this paper.
Next open your tube of choice. Resize and crop as you like it. Copy and paste as a new layer. Move the one to the right side and set where you like it. Duplicate it and go to image, mirror. Merge down one layer and set the opacity on the layer to 60. Copy and paste your tube again, centering it. Adjust as needed.

Now open the star you like, resize and then copy and paste as a new layer to the upper left of the canvas. Duplicate it then go to image, mirror.

Then click on the layer below the tube in the center. Copy and paste your choice of candy cane, angle as you like. On the layer below that, resize and copy and paste the ornament you like.

Open the circle candy of your choosing. Resize then copy and paste as a new layer. Move to the bottom left corner of the banner. Duplicate it and go to image, mirror.
Next open the Christmas tree you like. Resize then copy and paste as a new layer. Move closer to the candy cane. Duplicate it then go to image, mirror.

Now open the two lights you like, resize then copy and paste as new layers. Arrange and move to the bottom left. Angle them slightly in opposite directions. Merge down one layer. Duplicate then go to image, mirror.

Then open the snowflake ornament you like. Resize then copy and paste as a new layer. Move to the upper left of the canvas. Duplicate then go to image mirror.
Add your copyrights, and text. Merge down. Go to selections, select all then selections defloat. Now go to selections, modify, select selection borders. Set it at 5. Add another layer and flood fill with your choice of color or paper. Go to selections, none.

Now go to adjust add noise. Set it at the setting you like and click ok. Add a thin gradient glow that you like and merge down.
Your banner is done! Great job!

The Avatar:
Open a new transparent canvas. Make it 200x200.

Flood fill with your choice of paper. Then open your tube, copy and paste as a new layer. Adjust and resize as you need to! I mirrored mine to the left side.
Open the tree you like, resize then copy and paste as a new layer to the right of the canvas.

Next open several of the circle candies, resize then copy and paste as a new layer. Group them below the tube layer to the right of the canvas on the bottom.
Then open one of the ornaments. Resize then copy and paste as a new layer. Move it to the upper center of the canvas.

Add a candy cane to the left of the tree and angle as you like it. Duplicate it and mirror it. Move to the left some and place where you like it.
Add your copyrights and initial.

Go to selections, select all then selections defloat. Now go to selections, modify, select selection borders. Set it at 5. Add another layer and flood fill with your choice of color or paper. Go to selections, none.

Now go to adjust add noise. Set it at the setting you like and click ok. Add a thin gradient glow that you like and merge down.

Now your avatar is done! Thank you for trying my tutorial and I hope you enjoyed it!