Sunday, May 31, 2009

Beautiful Tags made for me!

Aren't these awesome? These were all made for me by my beautiful and loving friends, Mamacita and Sisterduck! They never fail to amaze me :) They've used almost every one of my templates :) Thank my friends for these treasures!

If you would like to check out their site on myspace, please check out the link on the sidebar!


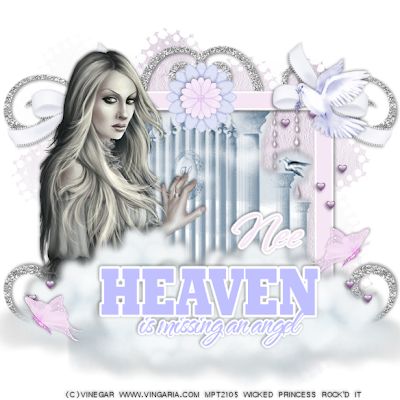
Missing An Angel -PTU


Missing an Angel-PTU

This tutorial was written on May 31, 2009 by Shani aka Wicked Princess. The concept of the tag is mine and mine alone. Any resemblance to any other tag/tut is pure coincidence. This was written for those with working knowledge of PSP.


Supplies Needed:

++Paint Shop Pro ( I used 10 but any version should work)

++Scrap kit called Heaven Sent by Nee at Envied and Admired can be purchased HERE

++Tube of choice. I used the artwork of Vinegar you can purchase it HERE You must have a license in order to use their work.

++Plug Ins
-Eye Candy 4000 Gradient Glow

Let’s get started!

**NOTES:
-Add Drop shadow of choice as you go
-You can merger layers as you want to make things easier for yourself.


Open several papers of choice, resizing as needed. For example, when I look at the blue bar where it tells me what I’ve opened (say like paper 2) it tells me what percentage I’m viewing it at. For me it’s usually 16%, so I resize to 16% bringing it to 100%. ( I hope that made sense!) Once you’ve done this, minimize for later use.

Open a new canvas (raster layer) of 600x600. This may seem large at first but you can resize and crop at the end if you like.

Flood fill the raster layer with your choice of paper. Add your mask and merge group.

Open frame 12 and rotate it to the right. Now it will have the landscape view instead of the portrait view. Copy and paste it as a new layer onto the new canvas. Add a fat gradient glow of white.

Next open the glitter doodle of your choice. Copy and paste as a new layer below the frame layer. Move it to the top right side of the frame and angle it slightly. Duplicate it then mirror it. Close off all other layers. Merge these two layers and duplicate again, and flip. Merge again then open all layers back up.

With your frame layer activated, use your magic wand tool and click inside the frame. Expand by 4 and flood fill with your choice of paper. Go to selections, none.

Open your choice of glitter drops. Copy and paste as a new layer, resizing as needed and move the layer below the frame layer.

Next add the gate element, also below the frame layer, adjusting and moving as needed.

Add your tube of choice to the left of the frame. Place the cloud of your choice to the right of the frame and duplicate it. Image, mirror it and move it so its just over the tube.

Add a bow to either of the top hand corners. On the right hand corner add your dove of choice and heart doodle. Also place your choice of butterfly where you like on the tag.

Choose two flowers you like and copy and paste, resizing if needed as a new layer at the top of the frame. Make one bigger than the other, overlapping.

Use the word art of your choice adding a gradient glow to it.

Add your text, license info, copyright info and tagger marking. Your done!

Thank you for trying my tutorial!

New Moon Tag from Nee


How cool is this? NEE at Envied & Admired made this for me with my FTU Wickedly Dark kit! I love it :) She's such a sweetheart and did an awesome job. Thank you so much my friend for working with my kit and making this beautiful creation! Make sure you stop by her blog and check her out!

Saturday, May 30, 2009

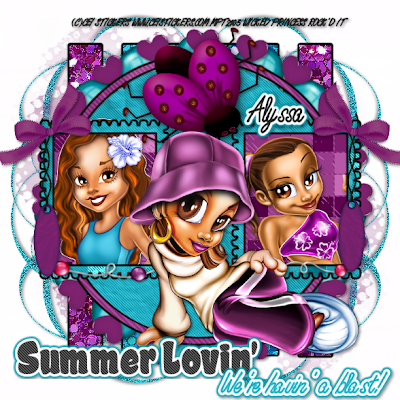
Summer Lovin' -FTU


Summer Lovin’ –FTU

This tutorial was written on May 30, 2009 by Shani aka Wicked Princess. The concept of the tag is mine and mine alone. Any resemblance to any other tag/tut is pure coincidence. This was written for those with working knowledge of PSP.
Supplies Needed:

++Paint Shop Pro ( I used 10 but any version should work)

++Scrap Kit Summer Bright by Alyssa at Alyssa’s Scraps and Such can be found HERE

++Template 11 by Alyssa at Alyssa’s Scraps and such can be found HERE

++3 tubes of choice. I used the artwork of CEI Stickers you can purchase it from HERE You must have a license in order to use their work.

++Mask and Font of choice

++Plug ins:
-Xero Fritallary
-Eye Candy 4000 Gradient glow
-Muera Meister Copies

**NOTES:
-Add Drop shadow of choice as you go
-You can merger layers as you want to make things easier for yourself.

Open the template in PSP, using your shortcut keys on your keyboard (SHIFT+D) duplicate the template as a new image. Close the original.

Open several papers of choice, resizing as needed. For example, when I look at the blue bar where it tells me what I’ve opened (say like paper 2) it tells me what percentage I’m viewing it at. For me it’s usually 16%, so I resize to 16% bringing it to 100%. ( I hope that made sense!) Once you’ve done this, minimize for later use.

Next go to the bottom template layer and go to selections, select all, then float, selections defloat. Don’t forget to go to selections, none then delete the template layer. Add a gradient glow on the fat setting with the color black. Repeat this process for the rest of the template.

Add a new raster layer and send it to the bottom. Flood fill with your choice of paper and add your mask. *Note for the mask I used, I duplicated it then mirrored and flipped it to get the look I wanted. This is optional.

Open your choice of doodle swirl from the kit and copy and paste as a new layer to the left of the tag. Move this to layer above the mask one. Duplicate it, mirror it. I then closed off all layers, merged these two together then duplicated again and flipped it. Open all layers back up.

Next open your choice of pearl, resizing and copy and paste as a new layer. Using your plug in Muera Meister Copies, set it to the encircle setting. I believe I used 70 for the x and y shift. Set with as many as you like for the number of pearls and click ok. Adjust and move as needed. Move this layer below the circle frame layer of the template.

Open your heart flower of choice resizing and do the same thing with the encircle part of muera meister copies. Move this one just above the previous one.

Open two of your tubes of choice, cropping as needed. Copy and paste as a new layer and move below the postage stamp frame layer. Activate your magic wand and click inside the frame layer. Go to selections, invert then modify it by 4. With the tube layer active, hit delete on your keyboard. Go to selections none. Repeat this process for the other frame.

Add the third tube , resizing and move to the center of the other two frames.

Open the beaded wire of your choice, resize and add to the bottom of the postage frames. Add your tag of choice along with the bows of your choosing to either side of the postage frames and resize as needed.

Choose one of the lady bugs and copy and paste as a new layer, centering it between the two frames.

Add your text of choice

Don’t forget your copyright info, license info and tagger markings

Save and your done!

Thank you for trying my tutorial!

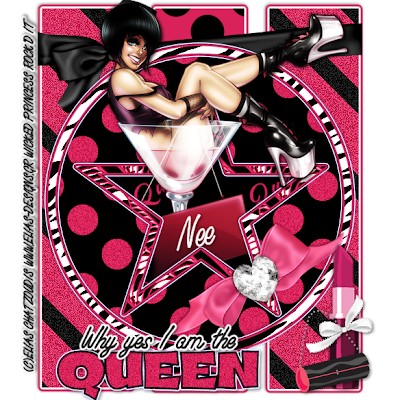
I'm the Queen-FTU


I’m the Queen –FTU


This tutorial was written on May 30, 2009 by Shani aka Wicked Princess. The concept of the tag is mine and mine alone. Any resemblance to any other tag/tut is pure coincidence. This was written for those with working knowledge of PSP.
Supplies Needed:

++Paint Shop Pro ( I used 10 but any version should work)

++Scrap kit by Nee at Envied and Admired called “Royalty Kit” your can find it HERE

++Template # 2 by Nee at Envied and Admired can be found HERE

++Tube of choice. I used the artwork of Elias Chatzoudis. You can purchase his work HERE

++Plug Ins:
-Eye Candy 4000 Gradient Glow
-Xero Radiance

Let’s get going!

**NOTES:
-Add Drop shadow of choice as you go
-You can merger layers as you want to make things easier for yourself.

Open the template in PSP, using your shortcut keys on your keyboard (SHIFT+D) duplicate the template as a new image. Close the original.

Open several papers of choice, resizing as needed. For example, when I look at the blue bar where it tells me what I’ve opened (say like paper 2) it tells me what percentage I’m viewing it at. For me it’s usually 16%, so I resize to 16% bringing it to 100%. ( I hope that made sense!) Once you’ve done this, minimize for later use.

Next go to the bottom template layer and go to selections, select all, then float, selections defloat. Don’t forget to go to selections, none then delete the template layer. Add a gradient glow on the fat setting with the color black. Repeat this process for the rest of the template.**Also add gradient glow to the word art also. Note I changed the color of the gradient glow to coordinate better to each layer.

Open ribbon 5 and resize as needed. Copy and paste as a new layer and move to the bottom, just one layer above the rectangles. Move and adjust so it looks like its just hugging the rectangles.

Open your tube of your choice and use the plug in Xero, Radiance. I used a random setting, choose one you like. Copy and paste the tube as a new layer into your working canvas. Duplicate it and move one below the star frame layer. Go back to the top tube layer and activate your eraser brush. Erase the portion you want to be hidden behind the star frame. On the second tube layer, erase the parts you want to be also hidden inside of the frame.

Next open ribbon 4 and resize as needed. Copy and paste as a new layer and place on the lower right hand side of the star point. Angle it slightly as you like it. Add the heart bling, resizing as needed. Place in the middle of the ribbon.

Open the lipstick and purse, resizing as needed. Place to the left of the tag, towards the bottom. Add a small ribbon of choice.

Add word art and text of your choice

Add artist info, license info, tagger markings and save!

Thank you for trying my tutorial.

New Look!

I'm so excited! I'm a ding dong when it comes to making layouts and such lol. So I asked the ever talented Nee from ..::Envied & Admired::.. to please help me out :) And she so did! She made the banner and the impressive background :) We both have similar tastes and now she's wanting to redo hers lol!

I wanted to stay true to myself and stick with my rocker personality :) So when I asked Nee for help she blew me away :) I so love it and I hope you all enjoy it too :) I'm still tweaking some things and going to change a few things up :)

A HUGE Thank you to Nee :) You are very talented and I so appreciate you :) Ty for your hard work and friendship.

Make sure you stop by Nee's Blog! Leave her some love :)

Friday, May 29, 2009

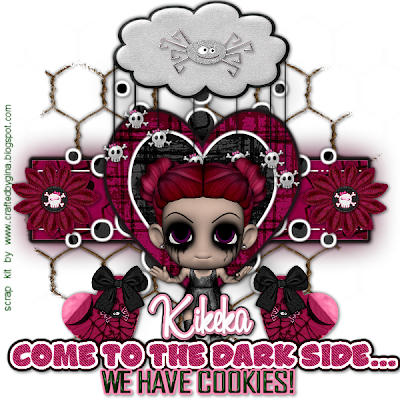
Dark Side & Cookies-PTU


Dark Side and Cookies –PTU

This tutorial was written on May 29, 2009 by Shani aka Wicked Princess. The concept of the tag is mine and mine alone. Any resemblance to any other tag/tut is pure coincidence. This was written for those with working knowledge of PSP.

Supplies Needed:

++Paint Shop Pro ( I used 10 but any version should work)

++Scrap kit by KikeKa Kits can be purchased HERE

++Wicked Template 8 by me can be found HERE

++Mask and Font of choice

++Plug Ins:
Eye Candy 4000 Gradient Glow

++Effects
-Blur

Let’s get started!

**NOTES:
-Add Drop shadow of choice as you go
-You can merger layers as you want to make things easier for yourself.

Open the template in PSP, using your shortcut keys on your keyboard (SHIFT+D) duplicate the template as a new image. Close the original.

Open several papers of choice, resizing as needed. For example, when I look at the blue bar where it tells me what I’ve opened (say like paper 2) it tells me what percentage I’m viewing it at. For me it’s usually 16%, so I resize to 16% bringing it to 100%. ( I hope that made sense!) Once you’ve done this, minimize for later use.

Next go to the bottom template layer and go to selections, select all, then float, selections defloat. Don’t forget to go to selections, none then delete the template layer. Add a gradient glow on the fat setting with the color black. Repeat this process for the rest of the template. **you can change the gradient glow to white for the splat if you like.

Duplicate the splat template layer and send to the bottom. Go to adjust, blur, gauassian blur and add your choice of settings. Duplicate rectangle 1 and do the same thing. Move the duplicated layer to above the blurred splat layer.

Open the rusty wire element. Copy and paste as a new layer and move below the rectangle 1 layer. Add your mask of choice.

Next open the cloud element, copy and paste as a new layer. Center it to just above the heart layer, so the skulls hang over slightly. Add your spider of choice to the center of the cloud.

Add your flower of choice to either side of the rectangles. Also add your heart and bow of choice to either side, towards the bottom.

Pick out the Emo girl tube of your choice from the kit and copy and paste, centering in the middle of the tag,

Add your text of choice. If you don’t use a PTU tube or one that requires copyright credit, please credit the kit designer such as I have on the tag.

Don’t forget to save and your done!

Thank you for trying my tutorial.

Around and Around...

I swear that's what I do! I go around and around until my head feels like its going to spin off lol. I'm still battling the never ending cold my kids gave me. My chest hurts, my whole body hurts! On top of that we found out today that my brother tore a tendon in his knee not cartilage. He's in a massive amount of pain and we won't know more about the surgery until next week. Between Mae getting better, me being sick, the other two kids and hubby coming down sick again and Bubba being hurt.. I'm drained completely. I'm hoping to get some better rest tonight and will have the rest of the tuts up I have done sometime this weekend. Even possibly tonight if I can't seem to rest.

I am also finishing up my first scrap kit which will be a freebie :) I will have it done in the next week or so. I keep adding to it :)

I hope everyone has a safe and blessed weekend!

Much love,
Shani

Tuesday, May 26, 2009

Gorjuss Garden-PTU


Gorjuss Garden-PTU


This tutorial was written on May 26, 2009 by Shani aka Wicked Princess. The concept of the tag is mine and mine alone. Any resemblance to any other tag/tut is pure coincidence. This was written for those with working knowledge of PSP.

Supplies Needed:

++Paint Shop Pro ( I used 10 but any version should work)

++Scrap kit by Tishia called Little Stinker can be purchased from HERE

++Tube of choice. I used the artwork of Suzanne Wolcott. You must have a license in order to use her work. You can find her work HERE

++Mask and font of choice

++Plug ins:
-Eye Candy 4000 Gradient Glow
-Muera Meister Copies

**NOTES:
-Add Drop shadow of choice as you go
-You can merger layers as you want to make things easier for yourself.


Open several papers of choice, resizing as needed. For example, when I look at the blue bar where it tells me what I’ve opened (say like paper 2) it tells me what percentage I’m viewing it at. For me it’s usually 16%, so I resize to 16% bringing it to 100%. ( I hope that made sense!) Remember to check what percentage its at first! Once you’ve done this, minimize for later use.

Start with a 600x600 blank canvas. Remember you can always resize and crop later. Flood fill this with your choice of paper. Add your mask and remember to merge group.


Open your frame of choice, resizing as needed and copy and paste as a new layer onto the new canvas. Use the eye candy 4000 gradient glow plug in to add a fat gradient glow to the frame.

Next use your magic wand tool and click inside the frame. Go to selections, modify and expand by 10. Add a new raster layer and flood fill with you choice of paper. Go to selections, none.

Open your choice of rose, resize and adjust as you need to. Copy and paste as a new layer. Use your plug in Muera Meister Copies and use the encircle setting. I used 65 for both the shift x and y settings. Click ok and move this layer below your frame layer.

Open two glitter frames of choice, resizing and copy and paste as new layers on top of the original frame layer. Move and adjust as needed.

Next open the flower pot, resizing as needed. Copy and paste as a new layer on the left side of the frame. Duplicate this layer and go to image, mirror. Adjust as needed. Add a small bow of choice to the pot.


Add the roses of your choice to the top of the frame and also the bottom. Add a placard tag.

Open your tube and adjust as needed. Copy and paste as a new layer. Duplicate it, and move the one layer below the encircled rose layer. On the top tube layer, use your eraser brush and erase the parts of the tube you don’t’ want to be seen outside the frame.

Add your artist info, license info, tagger marking and text of choice.

Save and your done!

Thank you for trying my tutorial.

I'm not like other girls-PTU


I’m not like other girls-PTU

This tutorial was written on May 26, 2009 by Shani aka Wicked Princess. The concept of the tag is mine and mine alone. Any resemblance to any other tag/tut is pure coincidence. This was written for those with working knowledge of PSP.

Supplies Needed:

++Paint Shop Pro ( I used 10 but any version should work)

++Scrap Kit Rockin’ Attitude Collab ( I used the kit specifically by TammyScraps) which can be purchased HERE

++Template64 by Beth at Blissfully Beth which can be found HERE

++Three tubes of choice. I used the artwork of Kenny Kiernan. You must have the proper license in order to use his work. You may purchase it from HERE

++Plug ins needed:

-Eye Candy 4000, gradient glow
-Xero Radiance


++Effects:
-Curliques

++Mask and font of choice

Let’s get going!

**NOTES: This is a FULL size kit! You will need to resize as you go.
-Add Drop shadow of choice as you go
-You can merger layers as you want to make things easier for yourself.

Open the template in PSP, using your shortcut keys on your keyboard (SHIFT+D) duplicate the template as a new image. Close the original.

Open several papers of choice, resizing as needed. For example, when I look at the blue bar where it tells me what I’ve opened (say like paper 2) it tells me what percentage I’m viewing it at. For me it’s usually 16%, so I resize to 16% bringing it to 100%. ( I hope that made sense!) Once you’ve done this, minimize for later use.

Next go to the bottom template layer and go to selections, select all, then float, selections defloat. Don’t forget to go to selections, none then delete the template layer. Add a gradient glow on the fat setting with the color black. Repeat this process for the rest of the template.**Also add gradient glow to the word art also.

Once you have all the template done, your going to turn it! Use the rotation button on the tool bar. Rotate right. You should now see the word art to the left.


Add a new raster layer and move to the bottom. Flood fill with your choice of paper and add the mask. Don’t forget to merge the group

Activate the frame background layer. Go to Effects, 3d effects and add the curlicue setting of your choice. Duplicate this layer. Open the tube of your choice, resizing as needed. Copy and paste as a new layer, below the frame layer, but in between the two background layer. On the top background layer, change the opacity to 30%. Go back to the tube layer and add the plug in Xero, Radiance. Use the random setting of your choice.

Next choose one of the branch elements you like, resizing and copy and paste as a new layer to the left of the frame.. Drop it behind the stars layers. Duplicate this layer and move it above the first one, so it looks like one long one.

Add a music note of your choice to any part of the branches making it look like its hanging off.

Next add a star embellishment of your choice to the right side of the template frame, adjust and resizing as needed. Choose one of the skulls you like and copy and paste below the star on the string as you like. Slant it slightly to the left. Pick a bow and resize as needed. Place to the top left of the frame.

Open the remaining two tubes of choice, adding the Xero Radiance plug in and copy and paste as new layers where you want them on the tag.

Add your copyright info, license info, tagger markings and any text you like.

Don’t Forget to save!

Thanks for trying my tutorial!

Long Day...

Photobucket


Hey all. Just wanted to let everyone know I'm not sure how much I'll be on today. We had to call an ambulance for my brother last night. He has been having knee issues for over a month. He saw the orthopedist surgeon about 2 weeks ago. The guy is a donkey's butt! I don't like the doc, I had him for my carpal tunnel surgeries and he's a real jerk. The guy messed with my brothers knee, set up an MRI and another appt. and didn't give him a brace. Last night he fell trying to go to the bathroom. So we called the ambulance, they took him and checked him out. Sent him home with meds and a brace. So far the brace is helping a lot. He's resting thank heavens. We'll know more next week if and when they are doing surgery. We're pretty sure they are going to. I've got Mae home today too, she's not quite ready to return to school, another day or so. So needless to say I'm exhausted, running on only about 4 hours sleep. I have to get some stuff done around the house and try to lay down for a nap too soon. I'm ready to fall asleep on my keyboard.

I will get on when I can, but only long enough to check emails and such. I'll be back tomorrow, granted everything goes ok today.

Have a blessed week my friendS!

Shani

**I had to throw this in to make ya'll smile.. this was made for me a while back :) **


Photobucket

Sunday, May 24, 2009

It's All About Me!-PTU


It’s All About Me!-PTU


This tutorial was written on May 24, 2009 by Shani aka Wicked Princess. The concept of the tag is mine and mine alone. Any resemblance to any other tag/tut is pure coincidence. This was written for those with working knowledge of PSP.

Supplies Needed:

++Paint Shop Pro ( I used 10 but any version will work)

++Scrap Kit Girl Talk (tagger size) by Katelynn’s Designs can be purchased HERE


++Wicked Template 18 by me can be found HERE


++Tube of Choice. I used the artwork of Amanda Fontaine. You must have a license in order to use her work and it can be purchased HERE

++Plug Ins Needed:
-Xero Fritallary
-Eye Candy 4000 Gradient Glow
-Muera Meister Copies

++Mask of Choice
++Font of Choice

**NOTES: This is a FULL size kit! You will need to resize as you go.
-Add Drop shadow of choice as you go
-You can merger layers as you want to make things easier for yourself.

Open the template in PSP, using your shortcut keys on your keyboard (SHIFT+D) duplicate the template as a new image. Close the original.

Open several papers of choice, resizing as needed. For example, when I look at the blue bar where it tells me what I’ve opened (say like paper 2) it tells me what percentage I’m viewing it at. For me it’s usually 16%, so I resize to 16% bringing it to 100%. ( I hope that made sense!) Once you’ve done this, minimize for later use.

Add a new raster layer and move to the bottom. Flood fill with your choice of paper and add the mask. Don’t forget to merge the group. Go to your plug ins and choose Xero Fritillary and use the random setting of your choosing.

Next go to the bottom template layer and go to selections, select all, then float, selections defloat. Don’t forget to go to selections, none then delete the template layer. Add a gradient glow on the fat setting with the color black. Repeat this process for the rest of the template.

Open your choice of doodle, and resize as needed. Copy and paste as a new layer, moving it to the layer just above the mask one. Move the doodle to the left, top side. Duplicate this layer then go to image, mirror. Close off all layers but the two doodle layers. Merge visible, and duplicate that new layer. Merge visible again. Open all layers back up.

Next open the bow of choice, resizing and copy and paste in the middle of the canvas. Using your Muera Meister Plug ins, choose the encircle setting. I believed I set the x and y to 70. Change to the amount of bows you want. Whatever will look ok to you. Once happy, move this layer to the one just above the large circle layer.

Open the flower of choice, and resize as needed. Copy and paste as a new layer, and use the Copies plug in again. Repeat what you did before, but changing the x and y to 50. Adjust the number of flowers to your liking. Adjust and move as needed. Move this layer to just below the top circle layer.

Choose one of the heart elements you like, resize and adjust as you like. Copy and paste as a new layer, placing to the top left of the circles. Add the bow of choice, and the tag of choice.

Open your tube, resize if needed and copy and paste as a new layer to the right of the canvas on the top layer. Add the It’s all about me word art, and add a gradient glow.

Add your artist info, license info, tagger markings.

Save and your done!

Thank you for trying my tutorial

Friday, May 22, 2009

The weekend is here!

YAY! lol. This means my kids are out for FOUR whole days :) We don't have much plans considering we just came back from being away for 5 days. So we're going to finish our spring cleaning and most likely just hang out. During my down time (when kids are napping or playing outside) I'll be working on and off on tags and tuts. I also have two templates I made a few weeks ago that I made but never got around to posting. So I'll have lots ready to go for everyone :)

Have a safe and blessed weekend my friends!

Shani

Thursday, May 21, 2009

Catching up...

I promise I'm still here lol! I'm catching up guys and fast! In fact I'll have two templates to post this weekend, and so far have 4 tags done. I just need to write the tuts for them. I have several more tags I need to get done before I will feel "caught up" so bear with me :) I shall have some stuff up tomorrow!

Working on some exciting projects hitting the blog with news soon!

Have a blessed weekend!

Hugs

Shani

Wednesday, May 20, 2009

Home again...

Awwww... it feels so good to be home! Hopefully we all can rest better now we're home. Mae seems to be doing ok today. She was kind of cranky earlier but seems to be ok now. Older two have school tomorrow (yay peace lol) and then they're off for the holiday weekend.

We're all well, just really tired. Being away from home and our own beds makes a big difference. Bless my in laws though, they were kind enough to put up with us for so many days! But in return we all gave them colds lol. We all seemed to develop a cold the night Mae had her surgery. Prayerfully we'll all get over it pretty fast.

I'm trying to catch up on emails tonight and play around in PSP once everyone is down for the night. Ok so you all know I HAVE to get in PSP! LOL! I haven't been able to mess around in PSP in let's see... 5 whole days! AHHHHHHHH! LOL!

With that said, I'm off to feed the family, give baths and get them ready for bed. I shall return!

I may be hit and miss for a few days depending on how Mae is feeling. But I will be back!

Thank you to everyone for the love, prayers and kind words! You all are very much appreciated!

Hugs
SHani

Monday, May 18, 2009

Quick Update....

Hey all. My baby Maelynne is out of surgery and resting. We were there for the better part of the day. She is now tonsil and adenoid free! LOL She's such a trooper. She's resting now and hanging out with Grandma. Bless my mother in law, I swore she was just going to jump right in the bed with her! She's doing really good and just resting now.

I won't be home until wedensday sometime. My oldest is having some testing tomorrow. So once we're done there, we're coming back to the inlaws to rest up and will go home the next day. I will be back to PSP sometime over the weekend. I'll need to by then just to destress myself! lol

I hope everyone is well! Sending lots of love to everyone :)

Shani

Saturday, May 16, 2009

I got an Award!~

YAY ME! lol I was so excited when I saw this!

The lovely Sue over at Tutorials By Sue gave me this wonderful award :) Ty hon for making my day!


The rules are - Put the name and link of who gave you this award on your blog.
Then pass it on to 10 blogs which you think deserve it.

My Ten are:

Alyssa from Alyssa's Tutorials

Nee from Envied and Admired

Vicki from Pink Princess Designs

MPZ from So Tempting Scraps

Susan From Hippiedaze tutorials

Tishia from Designs by Tishia

Kristin from Wicked Scrapz

Bluey from Bluedream Designs

Caitlin from Cupcake Sprinkles

Lacarolita from Lacarolita's Designz

Enjoy ladies!

Friday, May 15, 2009

MIA this next week...


Good Morning Friends!

I will be gone from Saturday until Tuesday. My youngest, Maelynne is having her tonsils and adenoids out on Monday and my oldest, Otelia is having some testing done on Tuesday. We have to travel 2 hours up north to the childrens hospital to have this stuff done, so we're leaving Saturday evening and staying with the in laws. I will have internet access and will be able to check the blog and emails.. but no PSP :(

Depending on how everyone is feeling by wedensday, I should be able to get on and dabble a bit in PSP. It may take me to next weekend to be able to do much. As soon as I can I'll be posting more tuts, both FTU AND PTU. I also have a few templates I need to put up.

Also if you have any suggestions on what you would like to see, please email me! My email addy is in the sidebar :)

I hope you all have a wonderful and blessed weekend.

Much Love,
Shani

Thursday, May 14, 2009

Sparkly Sassitude-FTU


Sparkly Sassitude-FTU

This tutorial was written on May 14, 2009 by Shani aka Wicked Princess. The concept of the tag is mine and mine alone. Any resemblance to any other tag/tut is pure coincidence. This was written for those with working knowledge of PSP.

Supplies Needed:

++Glitter My Fancy Kit by Missy (this is FTU) can be found HERE

++ Template #9 by Alyssa and you can find it HERE

++Tube of choice. I used the artwork of Leigh Young. You can find her work HERE You must have a proper license in order to use her artwork or any artist from that site.

++Mask and Font of Choice

Let’s get started!

NOTES: Add drop shadow of choice as you go through. Also you can merge layers as you need to.

Open the template and delete the background and info layers. Resize it by 84% with all layers checked.

Open several papers of your choice and minimize them for later use.

Add a new raster layer and move it to the bottom of the layers palette. Flood fill with the paper of your choice. Load the mask of your choice, and remember to merge group.

Next click on the bottom template layer and go to selections, all then selections float and then selections defloat. Add a new raster layer and flood fill with your choice of paper. Go to selections, select none. Delete the template layer. Repeat this process for all of the template layers.

Open glitterdoodle 3 and resize as needed. Copy and paste as new layer, to the left side of the top frame. Duplicate and go to image, mirror. Close off all other layers except for these two. Merge the two layers by right clicking on the open layers and click merge visible. Duplicate this layer and go to image flip. Merge again. Open all layers again.

Next Open the doodle, resize by 50% and rotate to the left. Copy and paste as a new layer to the left of the top frame.

Choose a bracket from the elements, resizing as needed. Copy and paste as new layer, and angle it, placing it the upper left hand corner of the top frame. Duplicate this layer and go to image, mirror. Then go to image, flip.

Open a key chain of choice from the elements and resize as necessary. Copy and paste on the right hand side towards the top of the frame.

Then open flower of choice, resizing and copy and paste it to the top of the keychain where the loop is. Duplicate this flower layer and place in the opposite corner on the bottom left hand side of the frame.

Next open the frame of choice, resizing then copy and paste as new layer and place it in the center of the top square frame. Using your magic wand too, click on the inside of the frame and go to selections, modify, expand. Expand by 5. Add a new raster layer and flood fill with your choice of paper. Selections, none. Move the new paper layer below the frame.

Open the bow and flower of choice. Resize, and copy then paste as new layers and place in the center connection of the wire doodle from before. Add the flower of choice on top of the bow.

Take your tube of choice, resize and copy and paste as new layer. You can place where ever you like or you can do as I did. What I did was duplicate the tube layer once I had it where I wanted it, then moved the duplicated layer below the circle frame layer. Going back to the top tube layer I used my eraser brush and deleted the parts of the tube I wanted hidden behind the frame. Also I cleaned up the bottom tube layer so that any parts having out of the frame were gone.

Add your text of choice and your copyright info, license info and tagger stuff.

Remember to save!

Thanks for trying my tutorial.

MORE TAGS!

Oye I'm catching up on my posting! I tend to forget I put these in folders to add.. and I'm getting old and scatterbrained! LMAO


Alyssa and Regina I'm so sorry loves I didn't get this up sooner!

This one was made by the Awesome ALyssa! She totally made my day with this one. It's beautiful! Ty my friend for making this for me! She used one of my templates in the tag. You can check her blog out by clicking on the blinkie on the sidebar!


ANd the next one up is from Regina @ Sinister Scraps! She always thrills me with her beautiful tags! Thank you hon I love it! YOu can find her myspace group under the sites I love over on the sidebar :)

New Tags for me! WOOT WOOT!

I have a bunch of tag show off's!!!! These were all made by MamaCita and SisterDuck over at BFF Kreationz on myspace :) I have to tell you all, I love these ladies! When I first met them quite awhile ago, they both were requesting tags from my site. Then they decided to try their hand at it, and caught on so fast you could see the smoke coming off their keyboards! LOL! I'm incredibly proud of them, and honored to have them work my templates and be apart of this roller coaster. They've learned so much and come so far, it makes Mama Bear very proud lol! Please stop by and check out their site! You can find their link on the side bar under sites I love :) If you request them as a friend, make sure you tell them I sent ya! Oh and I also guest design on their site.. so you could get tags from me :) I don't do it as often as I should, but you will LOVE the tags these ladies do. and Miss MamaCita is a Twilight addict now and has layouts and tons of tags for it :) Go check them out!!!!!!

Thank you my beautiful friends for the awesome tags!


Sunday, May 10, 2009

On this Mother's Day....


On this mothers day, I will remember my own Mama. I'm so thankful for the time I did have with her in this life, and know in my heart that someday we will be together again. Even after 6 and a half years my heart is heavy, but not as heavy as it used to be.

I have three awesomely beautiful, creative, compassionate, crazy funny, creative, healthy kids to remind me every day what a gift being a Mom really is. Yes even on those "hard" days lol.

Everyday should be a reminder to all of us to hold our loved ones close, and never let go.

Enjoy your day my friends and may it be a peaceful and blessed one!

~Shani aka Wicked Princess

Monday, May 4, 2009

Whew! I'm back!

Anyone miss me? :D I'm feeling a great deal better! I had soooo much I had to do last week and so much worry and stress. But I'm better and ready to PSP some more! I have a few things to do this week, but not much. So I'll be working as I can in PSP tonight and tomorrow! I'm going to try to get as much as I can done in the next two weeks.

In two weeks my youngest daughter (she's 5) is having her tonsils and adenoids removed. So I'll be pretty much MIA then. But I'll have more stuff up to keep ya'll busy I promise :)

Hope you all have a wonderful night!

Hugs
Shani