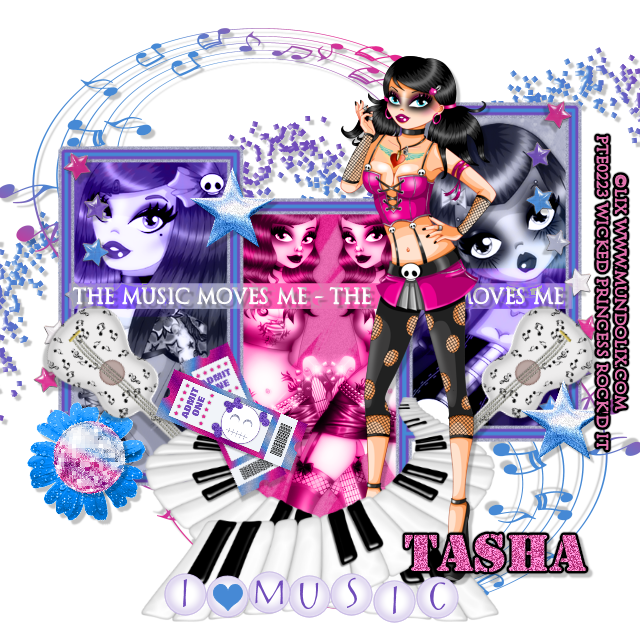
This tutorial was written on October 17, 2011, Shani aka Wicked Princess. The concept of the tag is mine and mine alone. Any resemblance to any other tag/tut is pure coincidence. This was written for those with working knowledge of Paint Shop Pro.
Supplies Needed:
++Paint Shop Pro ( I used 10 but any version should work)
++ 4 tubes of choice. I used the artwork of Lix You can purchase herwork currently at PSP Tubes Emporium
++Scrap kit of choice, I used the cute kit Music Moves Me Tasha of Tasha’s Playground
++Fonts of your choice. I can’t remember what I used! LOL
**NOTE ADD DROP SHADOWS OF YOUR CHOOSING AS YOU LIKE! AND SAVE AS YOU GO!
Open a canvas of 800x800 and make sure it has a transparent background. Remember we can resize this later.
Start out by opening the triple rectangle frame. copy and paste as a new layer. Using your magic wand tool click inside the first frame and go to selections, modify, expand to 6. Add a new raster layer and flood fill with the paper of your choosing. Go to selections none, and move this layer to the bottom. Do this for the other two frames. I used the same paper for both sides and a different one for the center.
Next you are going to use your rectangle tool. In the materials palette change it to the paper you want. Now using your rectangle tool, activate a new layer below the rectangle frame and in the left hand frame draw out a small square. About half way down from the top to the middle. convert it to a raster layer and then duplicate it and move it to the right frame to the bottom right. The reason for this is we're going to give a new effect to your tubes!
Open your first tube, copy and paste as a new layer into the left frame. Move below the frame layer and then crop as needed. on your frame layer click inside the frame with the magic wand tool, go to selections float, selections defloat then click on the tube layer and go to selections, invert then hit the delete key. Go to selections, none.
Repeat this process for the right side rectangle. Now on the left one, change the blend mode to luminance legacy. See how it gives a cool effect to the tube? now do the same thing for the one on the right.
Using the next tube you like, follow the process for the last tubes, but in the center one. I chose to duplicate mine and mirror so they were looking at each other. You can do what you like!
Now use your rectangle tool and draw out a thin rectangle in the color white. Convert it to a raster layer and move it over the center of the frames. Change the blend mode to luminance legacy. Add the text you like! I used an inner bevel on mine and a slight drop shadow.
Next open your glitter platter and music notes. Resize as needed then copy and paste as new layers and move them to the bottom of the materials palette. Move them towards the top of the frames though. Duplicate then for each go to image, mirror, then image flip.
Open the stars wave, resize then copy and paste as a new layer. Go to edit, free rotate and rotate 90 degrees. Move to the right side of the frame and then duplicate it and move to the left hand side.
Then open up your guitar of choice, resize then copy and paste as a new layer. Rotate it so that it looks like it's upside down and angled towards the left Move it to the left of the center rectangle frame. Duplicate it and go to image, mirror. Now open the keyboards, resize then copy and paste as a new layer. Move it to on the side of the center frame. Adjust it so they overlap and look like they are coming out of the frame.
Next open the ticket, resize then copy and paste as a new layer to the left of the center frame. Duplicate it and angle them.
Add a flower to the bottom left hand corner of the rectangle frame and the disco ball on top of it.
Add your last tube where you like it. I moved it to h right of the center frame. add the word art you like.
Don't forget your copyrights, license number and tagger markings!
Save and your done.