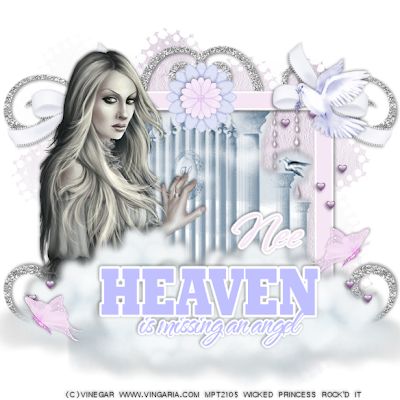
Missing an Angel-PTU
This tutorial was written on May 31, 2009 by Shani aka Wicked Princess. The concept of the tag is mine and mine alone. Any resemblance to any other tag/tut is pure coincidence. This was written for those with working knowledge of PSP.
Supplies Needed:
++Paint Shop Pro ( I used 10 but any version should work)
++Scrap kit called Heaven Sent by Nee at Envied and Admired can be purchased HERE
++Tube of choice. I used the artwork of Vinegar you can purchase it HERE You must have a license in order to use their work.
++Plug Ins
-Eye Candy 4000 Gradient Glow
Let’s get started!
**NOTES:
-Add Drop shadow of choice as you go
-You can merger layers as you want to make things easier for yourself.
Open several papers of choice, resizing as needed. For example, when I look at the blue bar where it tells me what I’ve opened (say like paper 2) it tells me what percentage I’m viewing it at. For me it’s usually 16%, so I resize to 16% bringing it to 100%. ( I hope that made sense!) Once you’ve done this, minimize for later use.
Open a new canvas (raster layer) of 600x600. This may seem large at first but you can resize and crop at the end if you like.
Flood fill the raster layer with your choice of paper. Add your mask and merge group.
Open frame 12 and rotate it to the right. Now it will have the landscape view instead of the portrait view. Copy and paste it as a new layer onto the new canvas. Add a fat gradient glow of white.
Next open the glitter doodle of your choice. Copy and paste as a new layer below the frame layer. Move it to the top right side of the frame and angle it slightly. Duplicate it then mirror it. Close off all other layers. Merge these two layers and duplicate again, and flip. Merge again then open all layers back up.
With your frame layer activated, use your magic wand tool and click inside the frame. Expand by 4 and flood fill with your choice of paper. Go to selections, none.
Open your choice of glitter drops. Copy and paste as a new layer, resizing as needed and move the layer below the frame layer.
Next add the gate element, also below the frame layer, adjusting and moving as needed.
Add your tube of choice to the left of the frame. Place the cloud of your choice to the right of the frame and duplicate it. Image, mirror it and move it so its just over the tube.
Add a bow to either of the top hand corners. On the right hand corner add your dove of choice and heart doodle. Also place your choice of butterfly where you like on the tag.
Choose two flowers you like and copy and paste, resizing if needed as a new layer at the top of the frame. Make one bigger than the other, overlapping.
Use the word art of your choice adding a gradient glow to it.
Add your text, license info, copyright info and tagger marking. Your done!
Thank you for trying my tutorial!

No comments:
Post a Comment