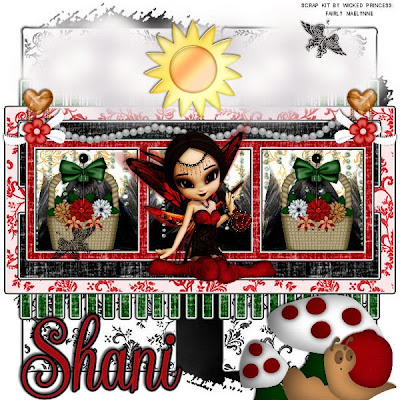
Fairy in my garden-PTU
This tutorial was written on July 3rd , 2009 by Shani aka Wicked Princess. The concept of the tag is mine and mine alone. Any resemblance to any other tag/tut is pure coincidence. This was written for those with working knowledge of PSP.
Supplies Needed:
++Paint Shop Pro ( I used 10 but any version should work)
++Scrap kit by me called Fairly Maelynne can be purchased from HERE OR HERE
++Wicked Template 16 by me can be found HERE
++PLUG IN:
Eye Candy 4000 Gradient Glow
++Mask and Font of choice
Let’s get started!
**NOTES:
-Add Drop shadow of choice as you go
-You can merger layers as you want to make things easier for yourself.
Open the template in PSP, using your shortcut keys on your keyboard (SHIFT+D) duplicate the template as a new image. Close the original.
Open several papers of choice, resizing as needed. For example, when I look at the blue bar where it tells me what I’ve opened (say like paper 2) it tells me what percentage I’m viewing it at. For me it’s usually 16%, so I resize to 16% bringing it to 100%. ( I hope that made sense!) Once you’ve done this, minimize for later use.
Next go to the bottom template layer and go to selections, select all, then float, selections defloat. Don’t forget to go to selections, none then delete the template layer. Repeat this for the remainder of the template. Add the gradient glow of your choice to each layer also.
Add a new raster layer, and send to the bottom Flood fill with your choice of paper and add your mask and remember to merge group. Minimize the canvas.
Next were going to create the basket and arrangement. Open the basket element along with several papers of your choosing. Add the flowers as new layers and move along the basket and arrange as you like. Add a bow and pin of choice at the handle of the basket. Merge all the layers and minimize it for later use.
Go back to your original canvas and maximize it. Open the fairy wings you like. Resize as needed. Copy and paste as a new layer below the frame layer. Move the wing to the first frame on the left. Place into the corner and duplicate. Go to image, mirror and move to the opposite side of that particular square. Repeat this for the other frame squares. Look at my finished tag for guidance if needed. I hope all that made sense!
Open the glitter rain of choice. Resize and adjust as needed then copy and paste as a new layer. Move this layer to below the frame layer.
Maximize the basket we made before, resize as needed then copy and paste as a new layer. Move it below the frame layer but above the glitter rain. Move to the first open frame on the left. Duplicate it and move the other one to the opposite frame.
Open the tube from the kit and resize. Copy and paste as a new layer above the frame layer. Move to the center of the center frame. Adjust as needed.
Next open the pearl string of your choice, copy and paste as a new layer . Move it to the top of the frame.
Choose a paper clip, bow and flower you like. Copy and paste as new layers, arranging as the clip first, then bow, then flower to the left of the frame layer at the top. Also make sure these are below the frame layer. Duplicate them and go to image, mirror. Adjust as needed so that its in the same opposite corner.
Next open the cloud element. Copy and paste as a new layer, placeing to the left of the top of the frame. Duplicate it and go to image, mirror. Open the sun and copy then paste as a new layer and place in the center of the two clouds. Add a butterfly of your choosing at random.
Add the toadstool and snail of your choosing at the bottom of the canvas. I chose to put mine in the right hand corner.
Finally add any text you like. If you choose to not use any artist tubes, just the one from the kit, please do credit me on the tag
Save and your done!
Thank you for trying my tutorial

No comments:
Post a Comment