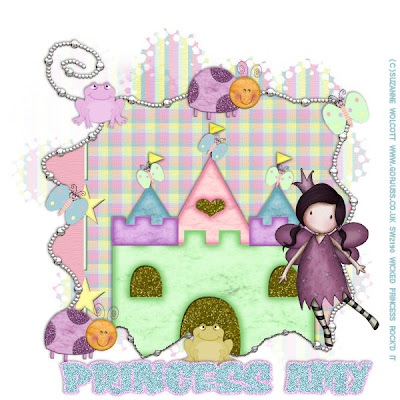
Princess PTU
This tutorial was written on August 28, 2009 by Shani aka Wicked Princess. The concept of the tag is mine and mine alone. Any resemblance to any other tag/tut is pure coincidence. This was written for those with working knowledge of PSP.
Supplies Needed:
++Paint Shop Pro ( I used 10 but any version should work)
++Scrap kit called Fairy Tale by Amy’s Scrap designs can be purchased HERE
++Tube of choice or the one I used. I used the artwork of Suzanne Wolcott which can be purchased HERE
++Font and mask of choice
Open a new canvas of 600 x 600. Flood fill with your choice of paper and add your mask. Merge the group.
Open the chain frame, resize it. Then copy and paste as a new layer into the center of your canvas. Using your magic wand tool, click inside the frame and go to selections, modify, expand by 5. Add a new raster layer and flood fill with your choice of paper. Go to selections, none.
Next open the castle, resize it. Then copy and paste as a new layer, centering into the frame. Use your magic wand tool again and click inside your frame. Go to selections, modify, expand by 5. Go to selections, invert. On the castle layer, hit the delete key. Remember to go to selections, none.
Then add your tube of choice, to the right of the tag. Resize it and adjust as needed.
Now add the butterflies of choice to the castle flags. Resize and angle the way you like them.
Add a butterfly to the upper right hand side of the frame, above the tube. Then add a lady bug to the left of it in the center of the frame on top.
Then to the left of the lady bug, add a frog.
Move down the left hand side of the frame, and add a butterfly again. Below that one add a lady bug. Then the center bottom, a frog.
Add your text, copyrights, license info and tagger markings.
Save and your done.
Thanks for trying out my tutorial.

No comments:
Post a Comment