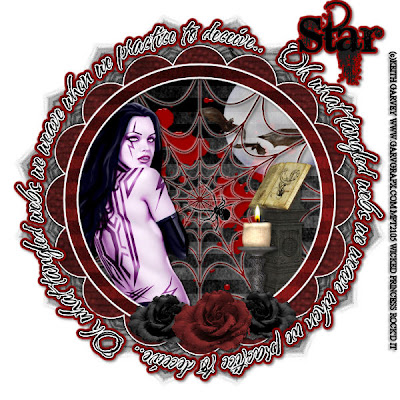
Tangled Web PTU
This tutorial was written on August 22, 2009 by Shani aka Wicked Princess. The concept of the tag is mine and mine alone. Any resemblance to any other tag/tut is pure coincidence. This was written for those with working knowledge of PSP.
Supplies Needed:
++Paint Shop Pro ( I used 10 but any version should work)
++Scrap kit called Vampire Kiss by Stargazer Muzings can be purchased HERE
+Template 64 by Kristin @ Toxic Desirez can be found HERE
++Tube of choice or the one I used. I used the artwork of Keith Garvey which can be purchased HERE
++Plug ins:
-Eye candy 4000 Gradient glow
-Xero, Radiance
++Font and Mask of choice
++Font and Mask of choice
Let’s get Started!
**NOTES:
-Add Drop shadow of choice as you go
-You can merger layers as you want to make things easier for yourself.
Open the template in PSP, using your shortcut keys on your keyboard (SHIFT+D) duplicate the template as a new image. Close the original.
Open several papers of choice, resizing as needed. For example, when I look at the blue bar where it tells me what I’ve opened (say like paper 2) it tells me what percentage I’m viewing it at. For me it’s usually 16%, so I resize to 16% bringing it to 100%. ( I hope that made sense!) Once you’ve done this, minimize for later use.
Next go to the bottom template layer and go to selections, select all, then float, selections defloat. Add a gradient glow of your choice. Don’t forget to go to selections, none then delete the template layer. Repeat this process for the rest of the template.
Add a new raster layer and flood fill with your choice of paper. Add your mask and merge the group. Move this layer to the bottom of your layer palette.
Open the blood splatter element, resize it then copy and paste as a new layer into the center of the canvas. Move it below the web layer.
Next open the moon and bats, resize it then copy and paste as a new layer. Move below the web layer and move it to the upper left part of the circle frame. Using your magic wand tool click inside the frame, go to selections, modify expand by 8. Go to selections, invert. On your moon layer, tap delete on your keyboard and then go to selections, none.
Open the pedestal with the book, resize then copy and paste as a new layer, moving below the circle frame layer. Move and adjust it to the right side of the frame. Using your eraser brush tool, erase the part of the pedastal that is sticking out below the frame on the right, bottom.
Add your tube of choice to the right side, below the frame layer. Add your plug in Xero, radiance on the random setting of your choice. Using your magic wand tool, click inside the circle frame. Go to selections, modify expand by 8. Go to selections, invert and then on your tube layer, tap the delete key. Go to selections, none.
Open the candle you like and resize it. Copy and paste as a new layer and move to the right slightly by the pedestal.
Add the first rose you like to the bottom center of the frame. Then add a second one to the right and left of that one.
Add any other text you like, copyrights, license numbers and tagger markings.
Save and your done!
Thank you for trying my tutorial.

No comments:
Post a Comment