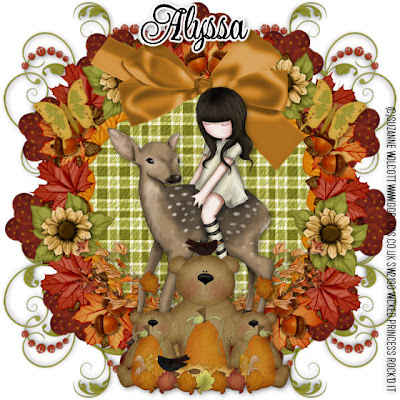
Bearly Autumn
This tutorial was written on November 212009 by Shani aka Wicked Princess. The concept of the tag is mine and mine alone. Any resemblance to any other tag/tut is pure coincidence. This was written for those with working knowledge of PSP.
Supplies Needed:
++Paint Shop Pro ( I used 10 but any version should work)
++Scrap kit called Bearly Autumn by Alyssa can be purchased HERE
++Tube of choice or the one I used. I used the artwork of Suzanne Wolcott which can be purchased HERE
++Plug ins:
-Muera Meister Copies
Let’s get Started!
**NOTES:
-Add Drop shadow of choice as you go
-You can merger layers as you want to make things easier for yourself
Open several papers of choice, resizing as needed. For example, when I look at the blue bar where it tells me what I’ve opened (say like paper 2) it tells me what percentage I’m viewing it at. For me it’s usually 16%, so I resize to 16% bringing it to 100%. ( I hope that made sense!) Once you’ve done this, minimize for later use.
Open a canvas of 600x600.
Open up one of the circle frames you like. Resize as needed then copy and paste as a new layer. Using your magic wand tool, click inside the frame. Go to selections, modify, expand by 10. Add a new raster layer, and flood fill with your choice of paper. Go to selections, none.
Next open a flourish of choice, resize it. Copy and paste as a new layer, moving it to the upper left hand corner of the tag. Duplicate it then go to image, mirror. Close off the other layers except for these and merge visible. Duplicate it and go to image, flip. Merge again. Then open up the other layers.
Then open the flower of choice, resize it then copy and paste as a new layer into the center of the canvas. Use your plug in muera meister copies plug in on the encircle option. Set your shift x and y to 70 and the number of flowers you like. Move this layer to below the frame flood fill layer.
Next open the leaves branches you like, resize then copy and paste as a new layer at the bottom of the frame to the left. Duplicate it and go to image, mirror.
Open your tube of choice, resize. Then copy and paste as a new layer into the center of the frame. Adjust it as needed. Add the clip art of choice to the bottom center of the tag. And then add a butterfly to either side of the bow at the top.
Finally add your text, copyrights, license number and tagger markings.
Save and your done! Thank you for trying my tutorial.

No comments:
Post a Comment