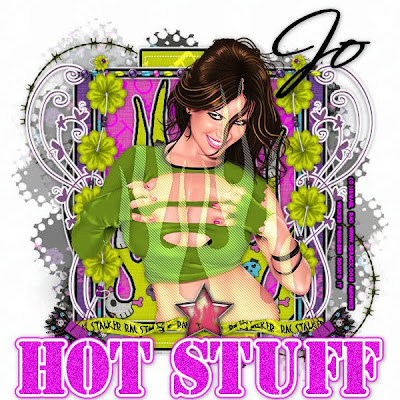
Hot Stuff –PTU
This tutorial was written on November 9, 2009 by Shani aka Wicked Princess. The concept of the tag is mine and mine alone. Any resemblance to any other tag/tut is pure coincidence. This was written for those with working knowledge of PSP.
Supplies Needed:
++Paint Shop Pro ( I used 10 but any version should work)
++Scrap kit by Creations by Jo called Obessive Rac Disorder (ORD) can be purchased HERE
++Template 51 by Kristen can be found HERE
++Tube of choice or the one I used. I used the work of Ismael Rac which can be purchased HERE You must have a valid license in order to use his work.
++Plug ins:
-Eye Candy 4000 Gradient Glow
-Penta, Jeans
-Xero, Soft Mood
++Font and Mask of choice
Let’s get Started!
**NOTES:
-Add Drop shadow of choice as you go
-You can merger layers as you want to make things easier for yourself.
Open the template in PSP, using your shortcut keys on your keyboard (SHIFT+D) duplicate the template as a new image. Close the original. **Increase the canvas size by going to image, canvas size then increase it to 600x600. Also I deleted the word art layer.
Open several papers of choice, resizing as needed. For example, when I look at the blue bar where it tells me what I’ve opened (say like paper 2) it tells me what percentage I’m viewing it at. For me it’s usually 16%, so I resize to 16% bringing it to 100%. ( I hope that made sense!) Once you’ve done this, minimize for later use.
Open the tube of choice. Resize and copy and paste as a new layer. Center it into your flame layer. Duplicate it and on the top tube layer, use Xero, Soft Mood plug in. Set it at the random setting you like. Then use the Penta Jeans plug in on whatever setting you like. Go to the flame layer, go to selections, select all, selections float then defloat. Then go to selections, invert. Go to the top tube layer that you did all the plug ins to and hit the delete key. Add a very slight drop shadow to this layer. On the bottom tube layer, erase the bottom part of her. You want her to look like she’s right at the edge of the rectangle frame layer.
Next go to the bottom template layer and go to selections, select all, then float, selections defloat. Add a gradient glow of choice. Don’t forget to go to selections, none then delete the template layer. Repeat this process for the rest of the template.
Add a new raster layer, flood fill with your choice of paper. Add your mask, and merge group. Move this layer to the bottom.
Open one of the barbed wire circles you like. Copy and paste as a new layer and move it to the upper left hand corner of the tag, just above the circle template layer. Duplicate it and go to image, mirror then image, flip.
Next open the doodle of your choosing. Resize it then add a fat gradient glow in white. Change it so that it is standing up right, then copy and paste as a new layer. Move to the left of the tag, on top of the skinny rectangle layers. Then add the bead string of choice to the top of the rectangle frame layer.
Then open the flower string, resize then copy and paste as a new layer to the left of the tube on the rectangle frame layer. Duplicate it and go to image, mirror.
Now open the ribbon with word art you like, resize it then copy and paste as a new layer. Move to the bottom of the tube layers. Adjust as needed. Add a clip flower you like to either end and a star to the center.
Add any text you like, license info, copyrights and tagger markings.
Save and your done! Thank you for trying my tutorial!

No comments:
Post a Comment