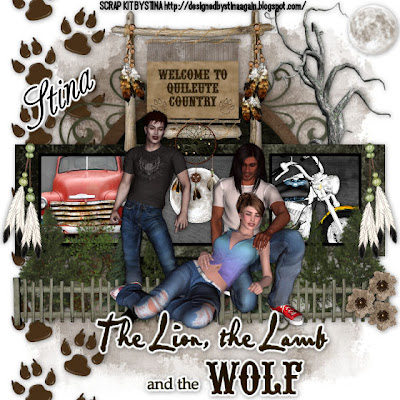
The Lion, The Lamb and The WOlf
This tutorial was written on November 17, 2009 by Shani aka Wicked Princess. The concept of the tag is mine and mine alone. Any resemblance to any other tag/tut is pure coincidence. This was written for those with working knowledge of PSP.
Supplies Needed:
++Paint Shop Pro ( I used 10 but any version should work)
++Scrap kit by Stina called Prelude to New Moon can be purchased HERE
++Template 14 by Alyssa can be found HERE
++Tubes of choice or the ones I used from the kit.
++Font and Mask of choice
Let’s get Started!
**NOTES:
-Add Drop shadow of choice as you go
-You can merger layers as you want to make things easier for yourself.
Open the template in PSP, using your shortcut keys on your keyboard (SHIFT+D) duplicate the template as a new image. Close the original.
Next go to the bottom template layer and go to selections, select all, then float, selections defloat. Don’t forget to go to selections, none then delete the template layer. Repeat this process for the rest of the template.
Open several papers of choice, resizing as needed. For example, when I look at the blue bar where it tells me what I’ve opened (say like paper 2) it tells me what percentage I’m viewing it at. For me it’s usually 16%, so I resize to 16% bringing it to 100%. ( I hope that made sense!) Once you’ve done this, minimize for later use.
Add a new raster layer, flood fill with your choice of paper. Add your mask, and merge group. Move this layer to the bottom.
Open the wolf tracks element, resize if you like then copy and paste as a new layer to the left of the tag. Move this layer to just above the mask layer.
Choose the tree with moon you like the best. Resize it then copy and paste as a new layer towards the upper right hand corner of the tag. Make sure this is below the frame layers though.
Next open the sign you like, resize then copy and paste as a new layer. Centering it behind the frames background layers. Adjust as needed.
Now open the bella’s truck tube, her motorcylcle and on of the moons. Resize them, crop and copy and paste as new layers into each of the frames. Move these layers below the frame layers.
Then open the tree line with fencing, resize then copy and paste as a new layer towards the bottom of the template layers. Adjust as needed.
Add the dream catcher of your choosing to the top of the middle frame, so that it overlapps the sign a little.
Now add a flower of your choice, duplicating it twice and moving in the arrangement you like to the bottom right hand corner of the framed layer.
Next open the feather and beads you like to either side of the frame. Adjust and resize as needed.
Add the tube of choice to the center of the tag, adjust as needed.
Also add the word art or text of choice. Add your copyrights and tagger markings
Save and your done!
Thank you for trying my tutorial!

No comments:
Post a Comment