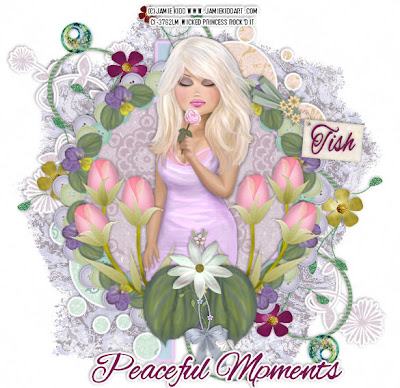
This tutorial was written on January 5, 2010 Shani aka Wicked Princess. The concept of the tag is mine and mine alone. Any resemblance to any other tag/tut is pure coincidence. This was written for those with working knowledge of PSP.
Supplies Needed:
++Paint Shop Pro ( I used 10 but any version should work)
++Scrap kit called Spring by Tish by Skrappin Magic http://www.scrappetizing.com/store/index.php?main_page=index&manufacturers_id=60&zenid=e1c359302cb62b067360cf64ee7a8a44
++Template 101 by Designs by Ali can be found http://designsbyali.blogspot.com/search/label/TEMPLATES
++Tube of choice. I used the artwork of Jamie Kidd you can purchase this artists work from www.cilm.com and you MUST have a valid license in order to use their work.
++Plug ins:
-Eye Candy 4000 Gradient Glow
++Font and Mask of choice
**NOTES:
-Add Drop shadow of choice as you go
-You can merger layers as you want to make things easier for yourself.
Open the template in PSP, using your shortcut keys on your keyboard (SHIFT+D) duplicate the template as a new image. Close the original.
Open several papers of choice, resizing as needed. For example, when I look at the blue bar where it tells me what I’ve opened (say like paper 2) it tells me what percentage I’m viewing it at. For me it’s usually 16%, so I resize to 16% bringing it to 100%. ( I hope that made sense!) Once you’ve done this, minimize for later use.
Next go to the bottom template layer and go to selections, select all, then float, selections defloat. Add a gradient glow of choice. Don’t forget to go to selections, none then delete the template layer. Repeat this process for the rest of the template.
Add a new raster layer and move it to the bottom of the layers palette. Flood fill with your choice of paper. Add the mask you like and merge visible.
Open the string with flower sand beads on it. Resize then copy and paste as a new layer. Move below the circle template layer, and to the lower right hand corner. Duplicate it and go to image, mirror then image, flip.
Then open the flower button frame. Resize it then copy and paste as a new layer. Move it over the circle frame layer.
Now open your tube of choice, resize it then copy and paste as a new layer. Center it into the center of the frame.
Next open the rose buds on the stems, resize them then copy and paste as a new layer to the left of the frame. Angle and adjust as needed. Duplicate it then go to image, mirror. Add the leaf at the bottom center, and duplicate it. Move the other one beside it.
Open the string with a bow on the end, resize it then copy and paste as a new layer into the center of the leaf. Add the large flower after resizing to the top center of the leaves, over the string with flowers.
Add the tag you like to the upper right hand corner of the tag.
Finally add your text, license info, copyrights and license info.
Save and your done!
Thank you for trying my tutorial

No comments:
Post a Comment