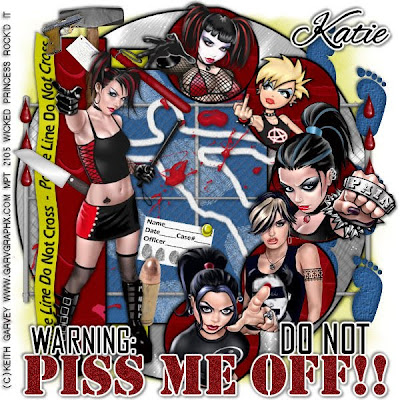
This tutorial was written on January 28, 2010 Shani aka Wicked Princess. The concept of the tag is
mine and mine alone. Any resemblance to any other tag/tut is pure coincidence. This was written for
those with working knowledge of PSP.
Supplies Needed:
++Paint Shop Pro ( I used 10 but any version should work)
++Scrap kit by Crazed's Creations called Crime Scene can be purchased from HERE
++Template 165 by Designs by ALi can be found HERE
++6 tubes of choice or the ones I used. I used the Artwork of Keith Garvey and you can purchase it from HERE You must have a valid license in order to use it.
++Plug ins:
-Eye Candy Gradient Glow
++Font and Mask of choice.
**NOTES:
-Add Drop shadow of choice as you go
-You can merger layers as you want to make things easier for yourself.
Open the template in PSP, using your shortcut keys on your keyboard (SHIFT+D) duplicate the template
as a new image. Close the original.
Open several papers of choice, resizing as needed. For example, when I look at the blue bar where it tells me what I’ve opened (say like paper 2) it tells me what percentage I’m viewing it at. For me it’s usually 16%, so I resize to 16% bringing it to 100%. ( I hope that made sense!) Once you’ve done this, minimize for later use.
Next go to the bottom template layer and go to selections, select all, then float, selections defloat. Don’t forget to go to selections, none then delete the template layer. Add a gradient glow of your choice. Repeat this process for the rest of the template.
Add a new raster layer and flood fill with your choice of paper. Add your choice of mask and merge group. Move this layer below your template layers.
Now open the chain link fence. Resize if needed then copy and paste as a new layer and move it just above the large rectangle layer.
next open the set of foot prints you like, and copy and paste as a new layer. Move it to the right of the tag, just above the chain link fence layer.
Then open the chalk outline that you like, resize as needed then copy and paste as a new layer. Adjust as you like and make sure this is above the fence layer.
Open the blood spatter you like, resize then copy and paste as a new layer above the chalk outline. Adjust and move as you need to.
Next open the fingerprint card of your choosing, resize then copy and paste as a new layer. Arrange it at an angle somewhere in the middle of the canvas. Add a push pin to it to make it looked like it is pinned to the fencing.
Then open the sledge hammer and gun. resize them then copy and paste in the upper left hand corner where the long rectangle is. Arrange how you like them.
Now open the blood drips, resize then copy and paste on each side of the fence poles.
open the police tape, resize and rotate to the left. Copy and paste as a new layer and move to the left of the skinny rectangle on the left.
Next open the baton, resize it then copy and paste as a new layer. Move it to the upper left hand side of the tag where you like it.
Now open the knife you like, resize it then copy and paste as a new layer. Move it to the middle of the rectangle on the left. Adjust as needed.
Then open your tube choices. Crop the first one then copy and paste as a new layer. Move it to the circle template layer that you want it to go itn. Duplicate it then on the circle layer go to selections, select all. Then selections, float then defloat. now go to selections, invert and on the bottom tube layer, hit the delete key. Go to selections none. Now on the top tube layer, erase the parts you don't want outside the circle. Repeat this for the other circles and tube layers.
Open the last tube of choice, copy and paste as a new layer to the left of the tag. Resize and adjust as needed.
Add a bullet to the bottom of the tag, near the tubes feet. Move behind this layer.
Add yoru text, copyrights, license info and tagger markings!
Save and your done!
Thank you for trying my tutorial!

No comments:
Post a Comment