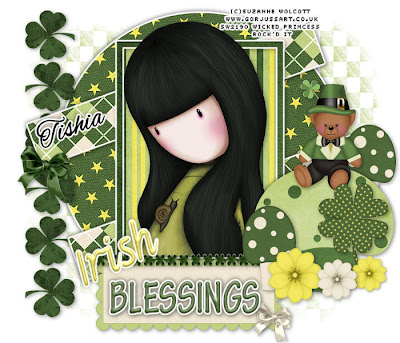
This tutorial was written on February 21, 2010 Shani aka Wicked Princess. The concept of the tag is mine and mine alone. Any resemblance to any other tag/tut is pure coincidence. This was written for those with working knowledge of PSP.
Supplies Needed:
++Paint Shop Pro ( I used 10 but any version should work)
++Scrap kit Just My Luck by Designs by Tishia can be purchased from HERE
++Template 101 by Ali can be found HERE
++Tube of choice or the one I used. I used the artwork Suzanne Wolcott. You must have a valid license in order to use her work. You can purchase her work from HERE
++Font and mask of choice
++Plug ins:
-Eye Candy 4000 Gradient Glow
**NOTES:
-Add Drop shadow of choice as you go
-You can merger layers as you want to make things easier for yourself.
Open the template in PSP, using your shortcut keys on your keyboard (SHIFT+D) duplicate the template as a new image. Close the original.
Open several papers of choice, resizing as needed. For example, when I look at the blue bar where it tells me what I’ve opened (say like paper 2) it tells me what percentage I’m viewing it at. For me it’s usually 16%, so I resize to 16% bringing it to 100%. ( I hope that made sense!) Once you’ve done this, minimize for later use.
Next go to the bottom template layer and go to selections, select all, then float, selections defloat. Don’t forget to go to selections, none then delete the template layer. Add a gradient glow of your choosing. Repeat this process for the rest of the template.
Then open the clover border. Resize and free rotate to the left. Copy and paste as a new layer, moving it below the rectangles layers.
Now open the tag, resize then copy and paste as a new layer at the bottom of the frame layer, off to the left a bit. Add the criss cross stitching so it overlaps the tag and the frame slightly. Giving it that look like its been stitched on there.
Open the large toadstool, reseize it then copy and paste as a new layer. Move it to the left of the tag. Add two of the smaller ones, one in front and one behind it.
Then open the bear, resize then copy and paste as a new layer to the top of the large toadstool. Make it look like he is sitting on top of it.
Pick one of the shamrocks you like, resize it then copy and paste as a new layer to the left of the large toadstool.
Now open two flowers you like, resize then copy and paste as new layers towards the bottom of the toad stools.
Add a bow to one of the ends of rectangles. Then another to the bottom tag.
Add your texts, copyrights, tagger markings and license numbers. Save and your done!
Thanks for trying my tutorial.

No comments:
Post a Comment