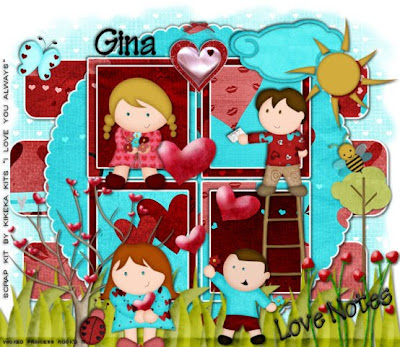
This tutorial was written on February 26, 2010 Shani aka Wicked Princess. The concept of the tag is mine and mine alone. Any resemblance to any other tag/tut is pure coincidence. This was written for those with working knowledge of PSP.
Supplies Needed:
++Paint Shop Pro ( I used 10 but any version should work)
++Scrap kit Gina of Kikeka kits called I love you always can be found HERE
++Template 12 by Scraps of Enchantment can be found HERE
++Tube of choice or the one I used. I used the clip out kiddo’s that come with the kit. If you don’t use any outside tubes, please credit back to the designers blog.
++Font and Mask of choice
**NOTES:
-Add Drop shadow of choice as you go
-You can merger layers as you want to make things easier for yourself.
Open the template in PSP, using your shortcut keys on your keyboard (SHIFT+D) duplicate the template as a new image. Close the original.
Open several papers of choice, resizing as needed. For example, when I look at the blue bar where it tells me what I’ve opened (say like paper 2) it tells me what percentage I’m viewing it at. For me it’s usually 16%, so I resize to 16% bringing it to 100%. ( I hope that made sense!) Once you’ve done this, minimize for later use.
Next go to the bottom template layer and go to selections, select all, then float, selections defloat. Don’t forget to go to selections, none then delete the template layer. Repeat this process for the rest of the template.
Add a new raster layer and flood fill with your choice of paper. Add your choice of mask and merge group. Move this layer below your template layers.
Open the ladder, resize it then copy and paste as a new layer. Move it to the left squares. Adjust it so it looks like the top of the ladder looks like its “resting” on the top square.
Then open the cloud you like and sun. Resize it then copy and paste as a new layer to the upper right of the tag, overlapping them.
Now open the tree, the stick tree. Resize then copy and paste as a new layer to the left of the template. Adjust as needed.
Next open the grass. Resize it then copy and paste as a new layer. Make sure this is the top layer and move it to the bottom of the canvas. Adjust as needed.
Open the strawberry flower bunch. Resize then copy and paste as a new layer moving it to the right of the tag.
Now open the heart tree, resize it then copy and paste as a new layer to the left of the tag towards the bottom.
Then open the little girl you like, resize then copy and paste as a new layer. Move her to the right of the heart tree. Add a little boy to the right of her after resizing.
Next open the heart cluster, resize then copy and paste as a new layer into the center of the template.
Open the other little girl, resize then copy and paste so that it sits in the upper left hand square. Add the other boy one to the opposite side of it.
Then open the butterfly, bee and lady bug. Copy and paste them after resizing where you like it
Now open the heart dangle charm, resize it then copy and paste as a new layer to the upper center of the template.
Finally add your text, copyrights and tagger markings.
Save and your done! Thanks for trying my tutorial.

No comments:
Post a Comment