**PLEASE NOTE, WHEN YOU CLICKED ON THE WARNING BEFORE LOGGING TO MY BLOG, YOU ACCEPT THAT THERE IS SOME ADULT CONTENT ON THIS BLOG. THE FOLLOWING TAG DOES HAVE STRONG LANGUAGE AND SOME CLEAVAGE. IF YOU ARE EASILY OFFENDED PLEASE CLOSE OUT NOW.**
SCROLL DOWN FOR TAG AND TUT

This tutorial was written on February 20, 2010 Shani aka Wicked Princess. The concept of the tag is mine and mine alone. Any resemblance to any other tag/tut is pure coincidence. This was written for those with working knowledge of PSP.
Supplies Needed:
++Paint Shop Pro ( I used 10 but any version should work)
++Scrap kit called Wicked Princess-The kit by me which can be purchased from HERE
++Template 329 by Missy by can be found HERE
++ 3 tubes of choice or the ones I used. I used the work of Elias Chatzoudis. You must have a valid license in order to use his work and you can purchase it from HERE
++Plug ins:
-Eye Candy 4000 Gradient Glow
-Penta jeans
-Penta dot and cross
++Font of choice
**NOTES:
-Add Drop shadow of choice as you go
-You can merger layers as you want to make things easier for yourself.
Open the template in PSP, using your shortcut keys on your keyboard (SHIFT+D) duplicate the template as a new image. Close the original.
Open several papers of choice, resizing as needed. For example, when I look at the blue bar where it tells me what I’ve opened (say like paper 2) it tells me what percentage I’m viewing it at. For me it’s usually 16%, so I resize to 16% bringing it to 100%. ( I hope that made sense!) Once you’ve done this, minimize for later use.
Next go to the bottom template layer and go to selections, select all, then float, selections defloat. Don’t forget to go to selections, none then delete the template layer. Add the gradient glow of your choosing. Repeat this process for the rest of the template. NOTE add your gradient glow to the two outside circles.
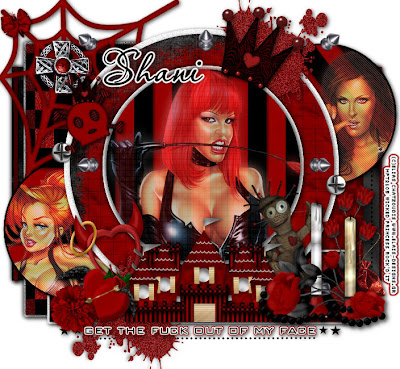
Then open the spider web, resize it then copy and paste as a new layer. Move it below all the circle layers in the upper left hand corner of the tag.
Open two of your tubes, crop and resize. Copy and paste the first one as a new layer, moving it over to the left hand circle layer at the bottom. Duplicate the tube, go to adjust, blur, guassin blur at the setting of 3.00. While still active on this layer change your blend mode (above your layers palette) to overlay. Now merge down. Merging down just merges it down one layer. Nowyou’re your plug in, Penta>Jeans on the setting you like. Change the opacity to 75.Adjust the tube with in the circle layer the way you like it. Then go to the circle layer and go to selections, select all, selections, float then selections, defloat. Go to selections, invert. Go back to the tube layer, and hit the delete key. Then go to selections, none.
Repeat this for the other tube and other circle layer.
Now open the glitter splats. Resize then copy and paste as a new layer towards the top right of the tag. Move it below the top circle glitter layer. Duplicate it and go to image, mirror then image, flip.
Then open your last tube, resize and crop as needed. Copy and paste the first one as a new layer, moving it over to the center circle layer. Duplicate the tube, go to adjust, blur, guassin blur at the setting of 3.00. While still active on this layer change your blend mode (above your layers palette) to overlay. Now merge down. Merging down just merges it down one layer. Now you’re your plug in, Penta>dots and cross on the setting you like. Change the opacity to 75. Adjust the tube with in the circle layer the way you like it. Then go to the circle layer and go to selections, select all, selections, float then selections, defloat. Go to selections, invert.
Now open the steel spikes, resize then copy and paste as a new layer. Adjust it as needed.
Next open the castle , resize it then copy and paste as a new layer. Move it to the bottom center of the tag. Adjust as needed. Add the voodoo doll after resizing to the upper right of it.
Open the candeles with roses, resize then copy and paste as a new layer, moving it to the right of the castle. Add the bauganvilla flower below this layer to the right of it. Along with the sachet bag.
Then open the devil horns frame, resize then copy and paste to the left of the castle. Move it below the castle layer.
Add the winged hearts just low that but above the castle. Angle it the way you like. Add the blood flower to the left of that.
Open the silver cross, resize then copy and paste as a new layer over the web layer. Adjust as needed. Add the butterfly to the upper left corner.
Open the skull with the crown, resize it then copy and paste as a new layer. Angle it and move to over by the web.
Then open the crown, resize then copy and paste as a new layer. Move it and angle it so it sits sideways on the circle.
Add two screws on the edges of the circle layers.
Finally add your text, copyrights and tagger markings. Save and your done!
Thanks for trying my tutorial.

No comments:
Post a Comment