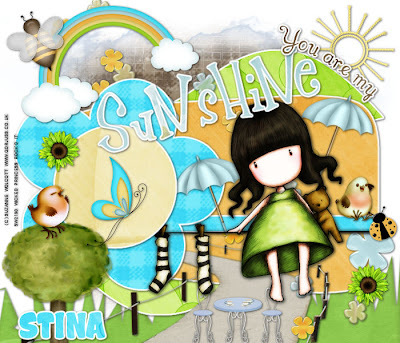
This tutorial was written on April 15, 2010 Shani aka Wicked Princess. The concept of the tag is mine and mine alone. Any resemblance to any other tag/tut is pure coincidence. This was written for those with working knowledge of PSP.
Supplies Needed:
++Paint Shop Pro ( I used 10 but any version should work)
++Scrap kit by Designs by Stina called Showers and Flowers can be purchased HERE
++Template You are my sunshine by Loving Miranda Creations can be found HERE
++Tube of choice or the one I used. I used the artwork of Suzanne Wolcott. You can purchase her work from HERE
++Plug ins:
-Eye Candy 4000 Gradient Glow
++Font and mask of choice
**NOTES:
-Add Drop shadow of choice as you go
-You can merger layers as you want to make things easier for yourself.
Open the template in PSP, using your shortcut keys on your keyboard (SHIFT+D) duplicate the template as a new image. Close the original.
Open several papers of choice, resizing as needed. For example, when I look at the blue bar where it tells me what I’ve opened (say like paper 2) it tells me what percentage I’m viewing it at. For me it’s usually 16%, so I resize to 16% bringing it to 100%. ( I hope that made sense!) Once you’ve done this, minimize for later use.
Next go to the bottom template layer and go to selections, select all, then float, selections defloat. Don’t forget to go to selections, none then delete the template layer. Repeat this process for the rest of the template. Add a gradient glow of your choosing also.
Go to the background layer at the bottom of the layers palette, and flood fill the background layer with your choice of paper.
Open the grass, resize it then copy and paste as a new layer. Move it to the bottom of the layer palette, and just above the mask layer.
Next open the pathway, resize it then copy and paste as a new layer. Move this below the large flower layer. Adjust it so it looks like it’s coming out of the flower.
Now open the flower spray, resize then copy and paste as a new layer above the path way layer. Move to the center where you like them.
Then open the table and chairs resize then copy and paste as a new layer. Move down towards the bottom of the pathway.
Open your tube of choice, resize it then copy and paste it as a new layer so it looks like its sitting on the small rectangle layer. Adjust as needed. I moved mine below the flower center layer so it’s tucked behind it a bit. Add a lady bug to the end of the right side.
Now open the umbrellas, resize then copy and paste two on the sides of the tube layer. Add a bird of your choosing to the right of the tube.
Next open the sunshine resize it then copy and paste as a new layer to the upper right of the tag below the templates layer.
Open the tree of your choosing, open it then copy and paste as a new layer to the bottom left of the tag. Add a bird to the top of it.
Then open the rainbow, resize it then copy and paste as a new layer to the upper left of the tag.
Now open a bee and butterfly of your choosing, copy and paste them to where you like. Add the sunflower of your choosing to opposite sides of the tag.
Finally add your text, copyrights, license number and tagger markings. Save and your done! Thanks for trying my tutorial.

No comments:
Post a Comment