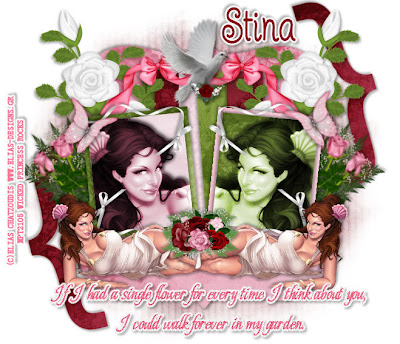
This tutorial was written on April 15, 2010 Shani aka Wicked Princess. The concept of the tag is mine and mine alone. Any resemblance to any other tag/tut is pure coincidence. This was written for those with working knowledge of PSP.
Supplies Needed:
++Paint Shop Pro ( I used 10 but any version should work)
++Scrap kit by Designs by Stina called Rose Gardencan be purchased HERE
++Template 9 by Rachel at Scraps of Enchantment. You can find it HERE
++Tube of choice or the one I used. I used the artwork of Elias Chatzoudis and you can purchase his work from HERE
++Font and mask of choice
**NOTES:
-Add Drop shadow of choice as you go
-You can merger layers as you want to make things easier for yourself.
Open the template in PSP, using your shortcut keys on your keyboard (SHIFT+D) duplicate the template as a new image. Close the original.
Open several papers of choice, resizing as needed. For example, when I look at the blue bar where it tells me what I’ve opened (say like paper 2) it tells me what percentage I’m viewing it at. For me it’s usually 16%, so I resize to 16% bringing it to 100%. ( I hope that made sense!) Once you’ve done this, minimize for later use.
Next go to the bottom template layer and go to selections, select all, then float, selections defloat. Don’t forget to go to selections, none then delete the template layer. Repeat this process for the rest of the template.
Go to the background layer at the bottom of the layers palette, and flood fill the background layer with your choice of paper.
Now open the rose cluster you like, resize then copy and paste as a new layer to the right side. Move it all the way down on your palettes layer just above the skinny rectangle layers. Duplicate it and go to image, mirror.
Then open the bow you like. Resize it then copy and paste as a new layer to the right. Place it above the skinny rectangle layers. Adjust as you like it then duplicate it and go to image mirror. Move it over slightly so it looks like they are joined. Add the dove, to the center of where they meet.
Open the rose bouquet you like. Resize it then copy and paste as a new layer. Move it below the square layers, move it the left and at an angle. Duplicate it and go to image, mirror. Adjust as needed.
Next open your tube of choice. Now I used one that had a close up in the pack. Copy and paste your tube, resize it then move it to the top square layer. Adjust as you need to. On the square layer, go to selections float, selections, defloat then selections invert. On the tube layer, hit the delete key. Go to selections none. Repeat this for the opposite square. Merge down one layer. Duplicate the tubes, go to adjust, blur, guassin blur at 3. On your layers palette, on the blend mode change it to Luminance. You should now see it with a cool effect.
Then open the curly ribbon you like. Resize it then copy and paste as a new layer. Move it to the upper right of the square where your tube is. Duplicate it and go to image mirror. Duplicate it again and go to image, flip. Do the same thing on the other side. Adjust them as you need to. It will look like it’s hugging the square. Add a butterfly to the opposite corners at the top.
Now open the tube again, on this one, I used the tube that was laying down. Resize then copy and paste as a new layer. Move to the bottom of the canvas. Duplicate it and go to image, mirror. Add a rose cluster to the center where they join.
Finally add your text, copyrights and tagger markings. Save and your done!
Thanks for trying my tut!

No comments:
Post a Comment