Sunday, December 4, 2011

Faery Magick PTU


This tutorial was written on December 4, 2011, Shani aka Wicked Princess. The concept of the tag is mine and mine alone. Any resemblance to any other tag/tut is pure coincidence. This was written for those with working knowledge of Paint Shop Pro.
Supplies Needed:


++Paint Shop Pro ( I used 10 but any version should work)


++ Tube of choice or the one I used, which is Shanomneya/Purple Mist by Denise Garbis aka SwtMeloDe which is available for purchase from The Art of Giving you can find out more about this cause and how to purchase the tube HERE *Note for the month of December you buy a tube you get a kit for free!

++Scrap kit of choice, I used Garden Magick by Kate aka 2 Irish Bitches Designs and it’s an exclusive to the Art of Giving. you can find out more about this cause and how to purchase the kit HERE *Note for the month of December you buy a tube you get a kit for free!

Visit Kate's main blog HERE


++Fonts of your choice. I can’t remember what I used! LOL

**NOTE ADD DROP SHADOWS OF YOUR CHOOSING AS YOU LIKE! AND SAVE AS YOU GO!

Open a canvas of 800x800 and make sure it has a transparent background. Remember we can resize this later.
Next open the large wooden frame you like. I used frame 3 and resized it when I pasted it to the new canvas. So copy and paste the frame into your new canvas. Resize as you like it.

Now open the paper of your choosing. I used paper 1 because it gave me a “scene”. Copy and paste as a new layer and move it below the frame. Adjust it and resize as you like it so it shows the scene you like. Click on the frame layer and activate your magic wand tool. Click inside the frame and go to selections, modify, expand by 10. Back to the paper layer go to selections, invert then edit, clear. The selections, none. Now you have a nice new scene!
Then open the purple mushroom cluster. Resize it then copy and paste as a new layer below the frame layer. Place it somewhere in the bottom center of the frame. Adjust it as you like.

Now open your tube of choice. I used the second close up of the fairy, and copy and paste as a new layer. Move it to where you like, I move it to the right of the frame. Once you are happy with the placement, duplicate it then move one below the frame layer. Go back to the frame layer, and activate your magic wand tool. Click inside the frame and go to selections, modify, expand by ten. Then back to the bottom tube layer, go to selections, invert. Hit the delete key or go to edit, clear. Go to selections none. Back to the top tube layer, activate your eraser brush and remove the parts of the tube you don’t’ want seen outside the frame. To make it look like it’s “popping” out!
Open up the ivy branches, which is leaves 1. Resize then copy and paste as a new layer just above the frame layer. Yes still below the top tube layer. Move to the upper right of the frame. You may need to resize it again some. Adjust as you like. Duplicate it and go to image, mirror then image flip.

Then open the snail stand and resize it then copy and paste as a new layer. Move it to the upper left of the frame. You may need to adjust and resize it some.

Next open up the pond, resize it then copy and paste as a new layer to the bottom of the snail stand in the lower left corner of the frame.

Add the book to overlap the pond.

Now add a new raster layer and move it to the bottom of the layers so it’s below even the scene paper. Flood fill with your choice of color or paper and add your mask of choice!

Add your text, copyrights, tagger markings. Thank you for trying my tutorial!

Thursday, October 27, 2011

The Music Moves Me PTU


This tutorial was written on October 17, 2011, Shani aka Wicked Princess. The concept of the tag is mine and mine alone. Any resemblance to any other tag/tut is pure coincidence. This was written for those with working knowledge of Paint Shop Pro.
Supplies Needed:


++Paint Shop Pro ( I used 10 but any version should work)


++ 4 tubes of choice. I used the artwork of Lix You can purchase herwork currently at PSP Tubes Emporium

++Scrap kit of choice, I used the cute kit Music Moves Me Tasha of Tasha’s Playground


++Fonts of your choice. I can’t remember what I used! LOL

**NOTE ADD DROP SHADOWS OF YOUR CHOOSING AS YOU LIKE! AND SAVE AS YOU GO!

Open a canvas of 800x800 and make sure it has a transparent background. Remember we can resize this later.


Start out by opening the triple rectangle frame. copy and paste as a new layer. Using your magic wand tool click inside the first frame and go to selections, modify, expand to 6. Add a new raster layer and flood fill with the paper of your choosing. Go to selections none, and move this layer to the bottom. Do this for the other two frames. I used the same paper for both sides and a different one for the center.

Next you are going to use your rectangle tool. In the materials palette change it to the paper you want. Now using your rectangle tool, activate a new layer below the rectangle frame and in the left hand frame draw out a small square. About half way down from the top to the middle. convert it to a raster layer and then duplicate it and move it to the right frame to the bottom right. The reason for this is we're going to give a new effect to your tubes!

Open your first tube, copy and paste as a new layer into the left frame. Move below the frame layer and then crop as needed. on your frame layer click inside the frame with the magic wand tool, go to selections float, selections defloat then click on the tube layer and go to selections, invert then hit the delete key. Go to selections, none.

Repeat this process for the right side rectangle. Now on the left one, change the blend mode to luminance legacy. See how it gives a cool effect to the tube? now do the same thing for the one on the right.

Using the next tube you like, follow the process for the last tubes, but in the center one. I chose to duplicate mine and mirror so they were looking at each other. You can do what you like!

Now use your rectangle tool and draw out a thin rectangle in the color white. Convert it to a raster layer and move it over the center of the frames. Change the blend mode to luminance legacy. Add the text you like! I used an inner bevel on mine and a slight drop shadow.


Next open your glitter platter and music notes. Resize as needed then copy and paste as new layers and move them to the bottom of the materials palette. Move them towards the top of the frames though. Duplicate then for each go to image, mirror, then image flip.

Open the stars wave, resize then copy and paste as a new layer. Go to edit, free rotate and rotate 90 degrees. Move to the right side of the frame and then duplicate it and move to the left hand side.

Then open up your guitar of choice, resize then copy and paste as a new layer. Rotate it so that it looks like it's upside down and angled towards the left Move it to the left of the center rectangle frame. Duplicate it and go to image, mirror. Now open the keyboards, resize then copy and paste as a new layer. Move it to on the side of the center frame. Adjust it so they overlap and look like they are coming out of the frame.

Next open the ticket, resize then copy and paste as a new layer to the left of the center frame. Duplicate it and angle them.

Add a flower to the bottom left hand corner of the rectangle frame and the disco ball on top of it.

Add your last tube where you like it. I moved it to h right of the center frame. add the word art you like.

Don't forget your copyrights, license number and tagger markings!

Save and your done.


Saturday, October 15, 2011

Do you believe in Magic? PTU


This tutorial was written on October 15, 2011, Shani aka Wicked Princess. The concept of the tag is mine and mine alone. Any resemblance to any other tag/tut is pure coincidence. This was written for those with working knowledge of Paint Shop Pro.
Supplies Needed:


++Paint Shop Pro ( I used 10 but any version should work)


++Your tube of choice. I used the artwork of Elias Chatzsoudis. You can purchase his work currently at PSP Tubes Emporium (note I purchased mine when he was at MPT)


++Scrap kit of choice, I used the cute kit 2 cute 2 Spook by Tasha of Tasha’s Playground


++ Mask of your choosing


++Fonts of your choice. I can’t remember what I used! LOL


++Plug in: Penta.com-Jeans


++Muera Meister Copies

**NOTE ADD DROP SHADOWS OF YOUR CHOOSING AS YOU LIKE! AND SAVE AS YOU GO!

Open a canvas of 800x800 and make sure it has a transparent background. Remember we can resize this later.

Open the paper you like. Copy and paste it as a new layer onto your canvas. Add your mask of choice by going to layers>load/save mask and then load mask from disk and pick the mask you want to use. Remember to merge the group by right clicking on the layer palette, the top mask layer and click on merge group.

Now open the frame of your choice. Resize then copy and paste as a new layer into the center of the canvas. Using your magic wand tool, click inside the frame. Go to selections>modify>expand by 3 and click ok. Add a new raster layer and then flood fill your choice of paper. Go to selections>none and then move this layer below the frame layer.

Next open spider web you like. I used the one with the skinnier webs. Resize if needed then copy and paste as a new layer below the circle frame layer.
Now open your tube of choice, and resize it if you need to. Move it to the right of your frame. Duplicate then move it below the frame layer and go to image>mirror. On this one use your plug in pent.com jeans on the setting you like. Now click on the circle frame to make it active. Use your magic wand tool and click inside the circle frame. Go to selections, modify, and expand by four. Click ok and then make your left tube layer active. Go to selections invert and then hit the delete key on your keyboard. Go to selections, none. Now on the layers palette change the blend mode for this tube layer to luminance legacy. You will see the difference there!
Open the eyeball element. Resize then copy and paste as a new layer. Use your meura meister copies on the encircle setting. Set it to how many you want to show in the circle, and then click ok. Resize the circle then move it to the upper left part of the circle. Move to just above the mask layer. Duplicate it then go to image, mirror. Merge down one layer then duplicate it once, and go to image, flip. Merge down one more layer.
Then open the mesh circle then copy and paste as a new layer. Move it down to below the eyeball layers. Move it towards the top though. Duplicate it and go to image, flip. Merge down one layer. Duplicate and go to image, free rotate and click 90. Then click ok. Merge down one layer.
Now open the bats you like, resize then copy and paste as a new layer. Move it to the upper left of the tag. Make sure this is at the top.
Add the heart bow you like and the grim reaper dude. I made him look like he’s kind of “popping out of it. What I did was erase bits and parts of his body.

Finally add your text, copyrights, and tagger markings. Save and you’re done! Thank you for trying my tutorial.

Friday, June 3, 2011

I'm just a Superstar-Forum Set FTU NO SCRAPS! NO PLUG INS!


This tutorial was written on June 3, 2011, Shani aka Wicked Princess. The concept of the tag is mine and mine alone. Any resemblance to any other tag/tut is pure coincidence. This was written for those with working knowledge of Paint Shop Pro.
Supplies Needed:

++Paint Shop Pro ( I used 10 but any version should work)

++Two tubes of choice or the ones I used. I used the work of Zlata_M and you can purchase her work from PicsForDesign Specifically I used “dancing” this comes in many layers. So I just changed the color hat and dress layers.

++Texture of your choice. I used one from Toxic Desirez which you can find on her
Blog


++The Checkerboard shape that I have included and you can download it here

++Fonts of your choice. I used vrinda which should be a default font for PSP. The other one I used for my name is Weltron and I can’t remember where I found it lol

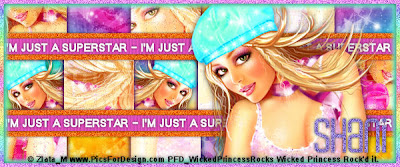
No plug ins needed!!! This is a no scraps, no plug in tutorial for a banner and avatar! First the banner…I will try to keep it simple for you.

**NOTE ADD DROP SHADOWS OF YOUR CHOOSING AS YOU LIKE! AND SAVE AS YOU GO!

Open a new canvas 600x250 with a transparent background. Open your texture of choice, for this one I used texture 4. Minimize the texture. In your materials palette click on the foreground box. Change it to pattern then click on the drop down menu. Scroll down until you see your texture, and click on it. Set the scale to 50 and click ok. Now using your flood fill tool, flood the canvas. You now should see a brightly colored canvas!

Next you will want to open your checkerboard shape then copy and paste as a new layer in your canvas. You may need to adjust it a bit. Now the fun parts!

Open your first tube of choice. Resize it as you want it, I reduced mine about 40 percent I believe. Copy and paste it as a new layer above the checkerboard. Move it to the left edge to wear most of the black behind it is covered. Duplicate it then go to adjust, blur, gaussian blur and set it to 3.00. On that same layer, go to the layers mode and set it to overlay. Go to layers, merge down one layer. Duplicate it and go to image, mirror. Adjust it if you need to. Want more fun? Continue this process to cover the entire checkerboard! Move the tube up to show different parts, down, opposite, whatever you like. I just went with whatever I thought looked the best. The key though is to make sure that you do not see any black behind the tubes. Now close off the other layers EXCEPT your tubes. Go to layers, merge visible. Duplicate this layer, and on the bottom layer we’re going to add a bit of texture! Go to Effects, texture effects, mosaic antique. I kept my settings at 50 for number of columns and rows, then tile diffusion at 70%, grout width 5 and then grout diffusion at 50. You can always mess with the settings to make it as you want it! Click ok. On the top tube layer change the opacity to around 60 to 70%. This gives it a pretty cool “rough” look right? Merge this layer down one just like you merged before.

Go back down to the checkerboard, and go to selections, select all, selections float, selections defloat. What that does in case you didn’t know is makes sure that the edges aren’t rough when you fill or add something. Now go to the tube layer (yes while the checkerboard has the dancing ants) go to selections, invert. On your tubes layer, hit the delete key. Ta da! Look at that! Lol Go to selections none.

On the checkerboard layer again, the selections, select all, float, defloat again. Go to selections modify, expand by 3. Add a new layer and move it below the tubes layer. Flood fill it with your choice of color. I used a dark purple to match the texture and tube. Go to selections, none. On that layer go to adjust, blur, guassian blur again and at the same setting. See how it gives you a bit of a glow just like if you had used a gradient glow? Pretty cool huh?! You can now delete the original checkerboard layer.

Now open your other tube. Copy and paste as a new layer, resize it down. As you can see I just used the face portion of the girl. Move your tube to the open square on the center left. Use your magic wand tool and go to the checkerboard tube layer and click inside the square and go to selection, modify, expand by I think I did 10. Basically once you hit ok you want to see the dancing ants get bigger so that they are beyond your current square. Go back to the tube layer, go to selections, invert. Hit the delete key then selections none. Repeat this for the next open space over. Merge down one layer and then move this below the blurred checkerboard, the one we made into our “glow”.

We’re going to do our rectangles now. Using your preset shape tool, activate the rectangle tool. In the layers palette, choose the foreground and background colors to ones that will compliment your tube. Draw out a medium sized rectangle. I guess you could say the thickness of a common ribbon. I over drew mine just a little, to make sure I had it long enough. Don’t worry about placement; we’ll move it in a minute after another few steps. Convert this to a raster layer. To do this you would right click on it in the layers palette, and in the menu click on convert to raster layer. With this layer still activated go to selections, float, selections defloat then selections contract by 10. Add a new raster layer and flood fill this one with a another color that compliments the tube. Go to selections none. On the bottom rectangle, go to adjust, add noise. Play with the settings to what you like. On the top rectangle layer go to textures, texture effects, blinds and I used the settings Width 5, opacity 15, then the color to black, horizontal unchecked and light from left top checked. Click ok. Pretty cool effects huh? I added a drop shadow to the top rectangle to just give it a bit of depth. Merge down one layer. Now we’re going to move it! I moved it so the top edges of it was lined up with the edges of the middle squares. Look at mine to see what I mean. Duplicate it and go to image, flip. Adjust it a little bit if you need to. Activate your text tool, change the foreground and background colors to what you like, I chose white. You can type in whatever text you like, I used “I’m just a superstar” in all caps. I repeated it a few times to make sure I had enough room. Now move this to center it in the bottom rectangles. I added a drop shadow too. Adjust it to where you like it. Duplicate it and move it to the upper one too. It’s a pain in the bum, but take the time to really try to center it, it took me a few tries to get it to match.

Almost done! Add your tube, I moved mine to the left a bit, it’s just where I liked it. Add yours where ever you like it and have fun with it! Once you’ve got it where you like it, SAVE! But save it in layers so you can go back and change it anytime you want. Now that you’ve save and not scared you’ve done something you can’t change lol, merge visible. OMG scary huh? Now we’re going to add borders! Go to selections, select all then selections, float, selections defloat. Now go to selections, modify, select borders. Set it at 10, with anti-alias checked and inside checked. Click ok. Activate your flood fill tool, change the foreground and background to a color you like. I chose a lighter one. Add a new raster layer and then flood fill with that color. Go to selections none. Now go to adjust, blur, guassian blur again set at 3.00. Now back to your merged layer. Repeat the process again, but this time set to 5. Flood fill again with whatever color, I used a gradient. I added noise to it too.

Add your copyrights and license number and save as jpeg! Pretty swift huh?
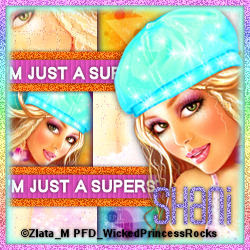
Now on to the avatar…easy peasy I promise!

Open up your PSPimage of the banner we just did. Now open a new canvas of 250x250, yes I make my avatar’s larger than most. Back to your PSPimage banner, close off the tube layer and the rectangles and merge visible. Go to edit copy then over to your new canvas and do edit, paste. Move it around to where you kind of like it, I messed around with it for a few minutes until it looked good. Back to the banner, close off everything else then open up the rectangles and words, merge those down then copy. Back to the avatar, paste as a new layer and move it and adjust like you did before. Add your tube and place it where you want. Repeat the steps before for the border and add your copyright and license number! Save as a pspimage first then as a jpeg. Add your name and your done!

Pretty cool huh?

Tuesday, May 17, 2011

Today's Attitude PTU


This tutorial was written on May 17, 2011 Shani aka Wicked Princess. The concept of the tag is mine and mine alone. Any resemblance to any other tag/tut is pure coincidence. This was written for those with working knowledge of http://www.blogger.com/img/blank.gifPSP.http://www.blogger.com/img/blank.gif

Supplies Needed:

++Paint Shop Pro ( I used 10 but any version should work)

++Scrap kit Toxic Candy by Rieka Rafita and you can find it here
http://www.blogger.com/img/blank.gif
++Template 95 by Creative by Nature HERE

++Tube of choice or the one I used the artwork of Lady Mishka and you can now find her work at Scraps and the City HERE


++Plug ins:
-penta.com-color dot


**NOTES:
-Add Drop shadow of choice as you go
-You can merger layers as you want to make things easier for yourself.

Open the template in PSP, using your shortcut keys on your keyboard (SHIFT+D) duplicate the template as a new image. Close the original.

Open several papers of choice, resizing as needed. For example, when I look at the blue bar where it tells me what I’ve opened (say like paper 2) it tells me what percentage I’m viewing it at. For me it’s usually 16%, so I resize to 16% bringing it to 100%. ( I hope that made sense!) Once you’ve done this, minimize for later use.

Next go to the bottom template layer and go to selections, select all, then float, selections defloat. Don’t forget to go to selections, none then delete the template layer. Repeat this process for the rest of the template.

Add a new raster layer and flood fill with your choice of paper. Add your mask of choice. Merge the group. Move to the bottom of the palette.

Open the glitter splatter of your choosing. Copy and paste as a new layer just above the mask layer. Move it to the upper right. Duplicate it and go to image, flip. Merge down one layer. Duplicate it again and go to image, mirror. Adjust as needed.

Next open the curly ribbon of your choice, resize then copy and paste as a new layer to the left of the canvas. Again, just above the glitter layer. Duplicate it and go to image, mirror.

On the right small rectangle, the faded one, change the opacity if you want to. I did and made it 100 percent. Open your tube and then copy and paste as a new layer. Adjust and move over the rectangle layer. Duplicate it then with the bottom layer active, go to adjust, blur, guassian blur, set it to 3.00. Then on the layers visibility, change it to overlay. Merge down one layer. Go to your plug in penta.com, color dots. Set it at your settings you like. Now go back to the rectangle layer and go to selections, float, selections, defloat , then selections invert. On the tube layer, hit delete. Then go to selections none. Change the visibility to 85.

Now copy and paste your tube again as a new layer. Duplicate it and with the bottom layer active go to adjust then guassian blur, set to 3.00. On the top layer set the layer to overlay. On the top set it where you like. Duplicate it and move one below the big rectangle layer. Using your magic wand tool, click inside the frame. Go to selections, invert and hit the delete key on the bottom tube layer. Go to selections none. Next go to the top layer, and remove the parts of the tube you don’t want seen outside the tube.

Open the flame and skull border. Resize it then copy and paste as a new layer. Move it to below the word art. Adjust as needed. Add the skull you like to the upper left of the canvas. Adjust as you like.

Next open the barbedwire heart…resize then copy and paste as a new layer. Move it to the bottom right of the canvas. Adjust as needed. Add the skull butterfly to the center left of the tag. Duplicate it and go to image, mirror. Add the lips to the left of the tube.

Finally add the copyrights, license information and your tagger markings. Thank you for trying my tutorial!

Saturday, February 5, 2011

Make Him HOt PTU ***SAC***


This tutorial was written on February 5, 2011 Shani aka Wicked Princess. The concept of the tag is mine and mine alone. Any resemblance to any other tag/tut is pure coincidence. This was written for those with working knowledge of PSP.
Supplies Needed:

++Paint Shop Pro ( I used 10 but any version should work)

++Scrap kit Dark Cravings 2 by Dianna of Digicat’s (and dogs) HERE

++ 5 tube of choice. I used the artwork of Elias Chatzoudis you can purchase his work from HERE

++Template 382 by Missy can be found HERE

++Font of choice

**NOTES:

-Add Drop shadow of choice as you go

-You can merger layers as you want to make things easier for yourself.

Open several papers of choice, resizing as needed. For example, when I look at the blue bar where it tells me what I’ve opened (say like paper 2) it tells me what percentage I’m viewing it at. For me it’s usually 16%, so I resize to 16% bringing it to 100%. ( I hope that made sense!) Once you’ve done this, minimize for later use.

++Font of choice

**NOTES:

-Add Drop shadow of choice as you go
-You can merger layers as you want to make things easier for yourself.
Open several papers of choice, resizing as needed. For example, when I look at the blue bar where it tells me what I’ve opened (say like paper 2) it tells me what percentage I’m viewing it at. For me it’s usually 16%, so I resize to 16% bringing it to 100%. ( I hope that made sense!) Once you’ve done this, minimize for later use.

Next go to the bottom template layer and go to selections, select all, then float, selections defloat. Don’t forget to go to selections; none then delete the template layer. Repeat this process for the rest of the template. Note I removed the dot layers…

Add a new raster layer and move it to the bottom. Open the metal chain fencing. Resize if you like, copy and paste as a new layer. Move it to the upper left hand corner of the canvas. Duplicate it and go to image, mirror then image, flip.

Next open the candelabra you like. Resize it then copy and paste as a new layer. Move it down below the word art layer. Move it to the left and adjust as you like. Duplicate it and go to image, mirror.

Open the first three tubes you want to use. Copy and paste your first tube, positioning it where you like in the first frame, but below the frame. Using your magic wand tool, click inside the frame on the left. Go to selections, modify, contract by 4. Go to selections, invert. On the tube layer, hit the delete key. Go to selections, none. Do this for the other three frames as well.

Now open the barbed wire, resize then copy and paste as a new layer. Move it above the frame layer, at the top of it. Duplicate it and then move one to the bottom frames. Add a rose to either side of the middle frame.

Then open the wand (they’re in an X) copy and paste as a new layer. Move to the right side of the frame, at the end of the barbed wire. Duplicate it then move to the in between of the frames. Add the silver mask to the center of each of those. Add a set of fuzzy cuffs to the top left side of the wands. Duplicate it and go to image, mirror.

Next open your one tube of choice. Resize then copy and paste as a new layer. Move to the bottom left side of the tag.

Open the other tube. Copy and paste as a new layer and move to the right side of the tag. Add the ball and chain to the bottom of the foot. Erase the parts where it would look like it was around the foot.

Now open the whip you like, resize then copy and paste as a new layer. Move to the left side of the tag on the bottom. Duplicate it and go to image, mirror. Add the regular handcuffs you like to the bottom left and right of those. Along with the heart of your choosing to the center.

Then open the ball cage, resize then copy and paste as a new layer. Move it to the top of it. Add a bow to the top the chain.

Finally add your text, copyrights and license number. Save and you’re done! Thank you for trying my tutorial.