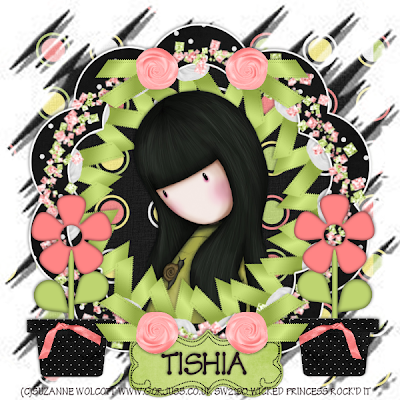
Gorjuss Garden-PTU
This tutorial was written on May 26, 2009 by Shani aka Wicked Princess. The concept of the tag is mine and mine alone. Any resemblance to any other tag/tut is pure coincidence. This was written for those with working knowledge of PSP.
Supplies Needed:
++Paint Shop Pro ( I used 10 but any version should work)
++Scrap kit by Tishia called Little Stinker can be purchased from HERE
++Tube of choice. I used the artwork of Suzanne Wolcott. You must have a license in order to use her work. You can find her work HERE
++Mask and font of choice
++Plug ins:
-Eye Candy 4000 Gradient Glow
-Muera Meister Copies
**NOTES:
-Add Drop shadow of choice as you go
-You can merger layers as you want to make things easier for yourself.
Open several papers of choice, resizing as needed. For example, when I look at the blue bar where it tells me what I’ve opened (say like paper 2) it tells me what percentage I’m viewing it at. For me it’s usually 16%, so I resize to 16% bringing it to 100%. ( I hope that made sense!) Remember to check what percentage its at first! Once you’ve done this, minimize for later use.
Start with a 600x600 blank canvas. Remember you can always resize and crop later. Flood fill this with your choice of paper. Add your mask and remember to merge group.
Open your frame of choice, resizing as needed and copy and paste as a new layer onto the new canvas. Use the eye candy 4000 gradient glow plug in to add a fat gradient glow to the frame.
Next use your magic wand tool and click inside the frame. Go to selections, modify and expand by 10. Add a new raster layer and flood fill with you choice of paper. Go to selections, none.
Open your choice of rose, resize and adjust as you need to. Copy and paste as a new layer. Use your plug in Muera Meister Copies and use the encircle setting. I used 65 for both the shift x and y settings. Click ok and move this layer below your frame layer.
Open two glitter frames of choice, resizing and copy and paste as new layers on top of the original frame layer. Move and adjust as needed.
Next open the flower pot, resizing as needed. Copy and paste as a new layer on the left side of the frame. Duplicate this layer and go to image, mirror. Adjust as needed. Add a small bow of choice to the pot.
Add the roses of your choice to the top of the frame and also the bottom. Add a placard tag.
Open your tube and adjust as needed. Copy and paste as a new layer. Duplicate it, and move the one layer below the encircled rose layer. On the top tube layer, use your eraser brush and erase the parts of the tube you don’t’ want to be seen outside the frame.
Add your artist info, license info, tagger marking and text of choice.
Save and your done!
Thank you for trying my tutorial.

No comments:
Post a Comment