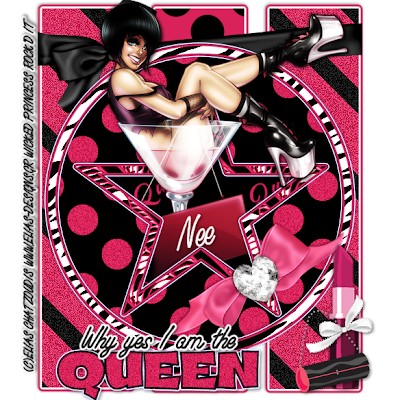
I’m the Queen –FTU
This tutorial was written on May 30, 2009 by Shani aka Wicked Princess. The concept of the tag is mine and mine alone. Any resemblance to any other tag/tut is pure coincidence. This was written for those with working knowledge of PSP.
Supplies Needed:
++Paint Shop Pro ( I used 10 but any version should work)
++Scrap kit by Nee at Envied and Admired called “Royalty Kit” your can find it HERE
++Template # 2 by Nee at Envied and Admired can be found HERE
++Tube of choice. I used the artwork of Elias Chatzoudis. You can purchase his work HERE
++Plug Ins:
-Eye Candy 4000 Gradient Glow
-Xero Radiance
Let’s get going!
**NOTES:
-Add Drop shadow of choice as you go
-You can merger layers as you want to make things easier for yourself.
Open the template in PSP, using your shortcut keys on your keyboard (SHIFT+D) duplicate the template as a new image. Close the original.
Open several papers of choice, resizing as needed. For example, when I look at the blue bar where it tells me what I’ve opened (say like paper 2) it tells me what percentage I’m viewing it at. For me it’s usually 16%, so I resize to 16% bringing it to 100%. ( I hope that made sense!) Once you’ve done this, minimize for later use.
Next go to the bottom template layer and go to selections, select all, then float, selections defloat. Don’t forget to go to selections, none then delete the template layer. Add a gradient glow on the fat setting with the color black. Repeat this process for the rest of the template.**Also add gradient glow to the word art also. Note I changed the color of the gradient glow to coordinate better to each layer.
Open ribbon 5 and resize as needed. Copy and paste as a new layer and move to the bottom, just one layer above the rectangles. Move and adjust so it looks like its just hugging the rectangles.
Open your tube of your choice and use the plug in Xero, Radiance. I used a random setting, choose one you like. Copy and paste the tube as a new layer into your working canvas. Duplicate it and move one below the star frame layer. Go back to the top tube layer and activate your eraser brush. Erase the portion you want to be hidden behind the star frame. On the second tube layer, erase the parts you want to be also hidden inside of the frame.
Next open ribbon 4 and resize as needed. Copy and paste as a new layer and place on the lower right hand side of the star point. Angle it slightly as you like it. Add the heart bling, resizing as needed. Place in the middle of the ribbon.
Open the lipstick and purse, resizing as needed. Place to the left of the tag, towards the bottom. Add a small ribbon of choice.
Add word art and text of your choice
Add artist info, license info, tagger markings and save!
Thank you for trying my tutorial.

No comments:
Post a Comment