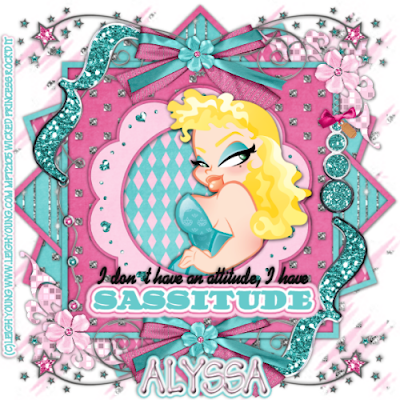
Sparkly Sassitude-FTU
This tutorial was written on May 14, 2009 by Shani aka Wicked Princess. The concept of the tag is mine and mine alone. Any resemblance to any other tag/tut is pure coincidence. This was written for those with working knowledge of PSP.
Supplies Needed:
++Glitter My Fancy Kit by Missy (this is FTU) can be found HERE
++ Template #9 by Alyssa and you can find it HERE
++Tube of choice. I used the artwork of Leigh Young. You can find her work HERE You must have a proper license in order to use her artwork or any artist from that site.
++Mask and Font of Choice
Let’s get started!
NOTES: Add drop shadow of choice as you go through. Also you can merge layers as you need to.
Open the template and delete the background and info layers. Resize it by 84% with all layers checked.
Open several papers of your choice and minimize them for later use.
Add a new raster layer and move it to the bottom of the layers palette. Flood fill with the paper of your choice. Load the mask of your choice, and remember to merge group.
Next click on the bottom template layer and go to selections, all then selections float and then selections defloat. Add a new raster layer and flood fill with your choice of paper. Go to selections, select none. Delete the template layer. Repeat this process for all of the template layers.
Open glitterdoodle 3 and resize as needed. Copy and paste as new layer, to the left side of the top frame. Duplicate and go to image, mirror. Close off all other layers except for these two. Merge the two layers by right clicking on the open layers and click merge visible. Duplicate this layer and go to image flip. Merge again. Open all layers again.
Next Open the doodle, resize by 50% and rotate to the left. Copy and paste as a new layer to the left of the top frame.
Choose a bracket from the elements, resizing as needed. Copy and paste as new layer, and angle it, placing it the upper left hand corner of the top frame. Duplicate this layer and go to image, mirror. Then go to image, flip.
Open a key chain of choice from the elements and resize as necessary. Copy and paste on the right hand side towards the top of the frame.
Then open flower of choice, resizing and copy and paste it to the top of the keychain where the loop is. Duplicate this flower layer and place in the opposite corner on the bottom left hand side of the frame.
Next open the frame of choice, resizing then copy and paste as new layer and place it in the center of the top square frame. Using your magic wand too, click on the inside of the frame and go to selections, modify, expand. Expand by 5. Add a new raster layer and flood fill with your choice of paper. Selections, none. Move the new paper layer below the frame.
Open the bow and flower of choice. Resize, and copy then paste as new layers and place in the center connection of the wire doodle from before. Add the flower of choice on top of the bow.
Take your tube of choice, resize and copy and paste as new layer. You can place where ever you like or you can do as I did. What I did was duplicate the tube layer once I had it where I wanted it, then moved the duplicated layer below the circle frame layer. Going back to the top tube layer I used my eraser brush and deleted the parts of the tube I wanted hidden behind the frame. Also I cleaned up the bottom tube layer so that any parts having out of the frame were gone.
Add your text of choice and your copyright info, license info and tagger stuff.
Remember to save!
Thanks for trying my tutorial.

No comments:
Post a Comment