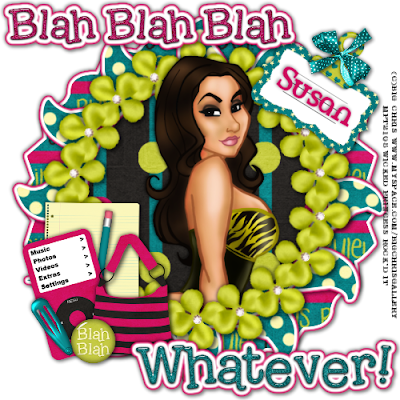
BLAH BLAH BLAH-FTU
This tutorial was written on June 13, 2009 by Shani aka Wicked Princess. The concept of the tag is mine and mine alone. Any resemblance to any other tag/tut is pure coincidence. This was written for those with working knowledge of PSP.
Supplies Needed:
++Paint Shop Pro ( I used 10 but any version should work)
++Scrap kit by Yvette called A bit of attitude can be found HERE
++Template 11 by HippieDaze can be found HERE
++Tube of choice. I used the artwork of Big Chris. You can purchase his work HERE you must have a valid license in order to use his work.
++Plug Ins:
-Muera Meister Copies
-Eye Candy 4000 Gradient Glow
Let’s Get started!
**NOTES:
-Add Drop shadow of choice as you go
-You can merger layers as you want to make things easier for yourself.
Open the template in PSP, using your shortcut keys on your keyboard (SHIFT+D) duplicate the template as a new image. Close the original.
Open several papers of choice, resizing as needed. For example, when I look at the blue bar where it tells me what I’ve opened (say like paper 2) it tells me what percentage I’m viewing it at. For me it’s usually 16%, so I resize to 16% bringing it to 100%. ( I hope that made sense!) Once you’ve done this, minimize for later use.
Next go to the bottom template layer and go to selections, select all, then float, selections defloat. Don’t forget to go to selections, none then delete the template layer. Add a gradient glow on the fat setting with two colors that coordinate with the kit. Repeat this process for the rest of the template.
Pick the flower you like, resize then copy and paste as a new layer. Use your plug in muera meister copies with the shift x and y set to 70 and whatever number for the flowers that you think looks best. Hit ok. Move this layer to just above the circle frame layer.
Add your tube of choice, you can place where ever you like. I placed the tube in the center of the frame, below the frame layers. Then I duplicated it and moved one to the top of the layer palette. Using the eraser brush, I erased the parts I wanted hidden behind the frame. This was done on the top tube layer btw. On the bottom tube layer I erased the parts that were hanging out the bottom of the frame. This way she looks like she is popping out of the frame.
Take several of the elements of your choice and cluster them to the left of the tag. Make sure you resize as you want them.
Next take a binder clip, bow and tag and place at the upper right hand corner as you like it.
You can either use the text of your choice or use the word art supplied in the kit.
Add your copyright info, license info and tagger markings.
Remember to save and your done! Thank you for trying out my tutorial.

No comments:
Post a Comment