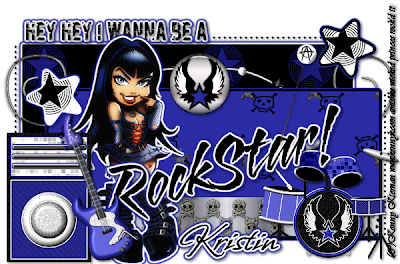
Sweet RockStar-PTU
This tutorial was written on June 17, 2009 by Shani aka Wicked Princess. The concept of the tag is mine and mine alone. Any resemblance to any other tag/tut is pure coincidence. This was written for those with working knowledge of PSP.
Supplies Needed:
++Paint Shop Pro ( I used 10 but any version should work)
++Scrap kit by me can be purchased from HERE
++Template 52 by Kristin at Wicked Scrapz can be found HERE
++Tube of choice. I used the artwork of Kenny Kiernan which can be purchased from HERE
++Plug ins:
-Eye Candy 4000 Gradient glow
-Xero Radiance
Let's get started!
**NOTES:
-Add Drop shadow of choice as you go
-You can merger layers as you want to make things easier for yourself.
Open the template in PSP, using your shortcut keys on your keyboard (SHIFT+D) duplicate the template as a new image. Close the original.
Open several papers of choice, resizing as needed. For example, when I look at the blue bar where it tells me what I’ve opened (say like paper 2) it tells me what percentage I’m viewing it at. For me it’s usually 16%, so I resize to 16% bringing it to 100%. ( I hope that made sense!) Once you’ve done this, minimize for later use.
Next go to the bottom template layer and go to selections, select all, then float, selections defloat. Don’t forget to go to selections, none then delete the template layer. Add a gradient glow on the fat setting the colors of your choice. Repeat this process for the rest of the template.
Go to the dot overlay layers, and delete both of those. We won’t be using them this time! Also colorize the dotted line on the side to your choice of color from the kit.
Open the metal and bead doodle of your choice. Resize, then copy and paste as a new layer, moving it below the lower rectangle layer. Adjust and place where you like then duplicate it. Go to image, mirror. Add a button of your choice to the center of it, where the doodles meet.
Add the tape of your choice, resizing so it fits just inside the lower rectangle. Place towards the bottom of the rectangle.
Open the speaker and guitar of your choice, resize and paste as new layers to the left of the rectangles. Angle the guitar slightly to the left.
Next open the drum set, resize and paste as a new layer to the right of the tag. You will need to move and adjust as you like. I moved it below the word art. Add a pin of your choosing to the top rectangle.
Insert your tube of choice and use the plug in, Xero Radiance at a random setting you like. Move behind the wordart and guitar. Add a gradient glow of your choice.
Add the copyright info, tagger markings and license info.
Remember to save!
Thanks for trying my tutorial!

No comments:
Post a Comment