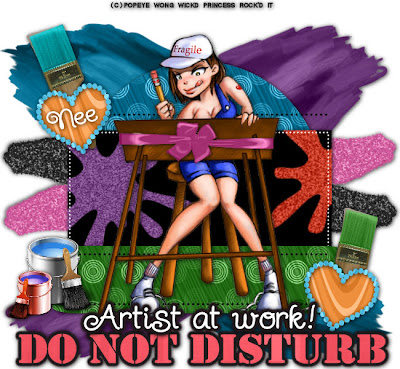
Do Not Disturb: Artist At Work PTU
This tutorial was written on July 20, 2009 by Shani aka Wicked Princess. The concept of the tag is mine and mine alone. Any resemblance to any other tag/tut is pure coincidence. This was written for those with working knowledge of PSP.
Supplies Needed:
++Paint Shop Pro ( I used 10 but any version should work)
++Scrap kit by Nee @ Envied and Admired Scraps called Starving Artist Collab Kit 2008 can be purchased HERE OR HERE OR HERE
++Template 33 by Lacarolita can be found HERE
++Tube of choice, or the one I used. I used the artwork of Popeye Wong. He is a FREE TO USE artist, however please make sure you put his copyright on the tag! The tube I used is called “a fragile talent” and can be found HERE
++Font of choice
**NOTES:
-Add Drop shadow of choice as you go
-You can merger layers as you want to make things easier for yourself.
Open the template in PSP, using your shortcut keys on your keyboard (SHIFT+D) duplicate the template as a new image. Close the original.
Open several papers of choice, resizing as needed. For example, when I look at the blue bar where it tells me what I’ve opened (say like paper 2) it tells me what percentage I’m viewing it at. For me it’s usually 16%, so I resize to 16% bringing it to 100%. ( I hope that made sense!) Once you’ve done this, minimize for later use.
Next go to the bottom template layer and go to selections, select all, then float, selections defloat. Don’t forget to go to selections, none then delete the template layer. Repeat this process for the rest of the template.
Open the two large brush strokes (non glitter ones) resize them then copy and paste one as a new layer. Angle it slightly and move to the upper right hand corner. Add the second one, but opposite of this one, in the upper left hand corner. Close off a layers but these. Merge visible on these. Duplicate it then go to image, mirror, then image flip. Merge these together. You should now have four color splotches in one layer.
While all the layers are closed off, open two of the glitter paint strokes you like. Copy and paste one after resizing, where it will look like its coming out of the center of the other ones we just merged. Look at my finished tag for an example. Add the second glitter paint stroke angling slightly. Close off the last big paint layer and merge visible. Duplicate it then go to image, mirror then image flip. Merge these together. Then open the other paint splotch layer and merge these together.
Open up all layers again.
Open two paint brushes of your choosing, I chose opposite colors. Resize then copy and paste each as a new layer Move each behind one of the hearts layers, angle as you like. Add two paint cans with brushes of choice to the left hand part of the tag.
Open your tube of choice, and copy and paste into the center of the tag. If you use the one I did, then add a bow to the drawing board.
Add your text of choice, tagger markings and copyrights!
Save and your done!
Thank you for trying out my tutorial!

No comments:
Post a Comment