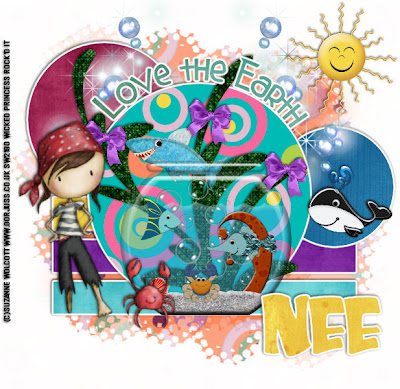
Love the earth-PTU
This tutorial was written on July 24, 2009 by Shani aka Wicked Princess. The concept of the tag is mine and mine alone. Any resemblance to any other tag/tut is pure coincidence. This was written for those with working knowledge of PSP.
Supplies Needed:
++Paint Shop Pro ( I used 10 but any version should work)
++Scrap kit called Under the Sea by Nee @ Envied and Admired Scraps can be purchased HERE OR HERE OR HERE
++Template 70 by Blissfully Beth can be found HERE *Note you’ll have to scroll down a bit and you’ll see it on the left hand side.
++Tube of choice or the one I used. I used the artwork of Suzanne Wolcott. You can purchase her work
HERE
++Plug ins:
-Eye Candy 4000 Gradient Glow
++Font and mask of choice
Let’s get Started!
**NOTES:
-Add Drop shadow of choice as you go
-You can merger layers as you want to make things easier for yourself.
Open the template in PSP, using your shortcut keys on your keyboard (SHIFT+D) duplicate the template as a new image. Close the original.
Open several papers of choice, resizing as needed. For example, when I look at the blue bar where it tells me what I’ve opened (say like paper 2) it tells me what percentage I’m viewing it at. For me it’s usually 16%, so I resize to 16% bringing it to 100%. ( I hope that made sense!) Once you’ve done this, minimize for later use.
Next go to the bottom template layer and go to selections, select all, then float, selections defloat. Don’t forget to go to selections, none then delete the template layer. Repeat this process for the rest of the template.
Add a new raster layer and flood fill with your choice of paper. Add your mask and merge the group. Move this layer to the bottom of your layer palette.
Now we’re going to make the fishbowl scene. Open the fish bowl, the gravel and the water. Copy and paste the water and the gravel onto the fishbowl. Make sure these are below the fishbowl layer.
Add the coral and some fish that you like. Adjust and move as you like. Resize it then minimize to add later.
Next open the bubbles of choice. Resize if needed then copy and paste as a new layer, move it below the large circle layer. Duplicate it then go to image, mirror.
Open the seaweed element, resize then copy and paste as a new layer and move into the center of the circle layer.
Add the fish bowl by going to copy merged and paste it as a new layer. Center it into the circle layer. Add the shark and have to popping out of the fish bowl a bit. Resize and adjust as needed. Add the killer whale to the other side of it on the circle layer.
Next add the sun up in the upper right hand corner. Then add bows to the seaweed.
Open your tube of choice, resize then copy and paste as a new layer to the left of the tag.
Finally add your text, copyrights, license info and tagger markings
Save and your done!
Thank you for trying my tutorial.

No comments:
Post a Comment