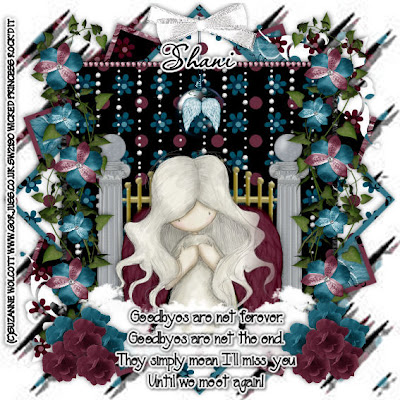
Goodbye –PTU
This tutorial was written on July 21, 2009 by Shani aka Wicked Princess. The concept of the tag is mine and mine alone. Any resemblance to any other tag/tut is pure coincidence. This was written for those with working knowledge of PSP.
Supplies Needed:
++Paint Shop Pro ( I used 10 but any version should work)
++Scrap kit by me called Remembering La La can be purchased from HERE OR HERE
++Template by Alyssa can be found HERE
++Tube of choice or the one I used. I used the artwork of Suzanne Wolcott. You can purchase her work from HERE
++Mask and font of choice.
Let’s get started!
**NOTES:
-Add Drop shadow of choice as you go
-You can merger layers as you want to make things easier for yourself.
Open the template in PSP, using your shortcut keys on your keyboard (SHIFT+D) duplicate the template as a new image. Close the original.
Open several papers of choice, resizing as needed. For example, when I look at the blue bar where it tells me what I’ve opened (say like paper 2) it tells me what percentage I’m viewing it at. For me it’s usually 16%, so I resize to 16% bringing it to 100%. ( I hope that made sense!) Once you’ve done this, minimize for later use.
Next go to the bottom template layer and go to selections, select all, then float, selections defloat. Don’t forget to go to selections, none then delete the template layer. Repeat this for the remainder of the template.
Add a new raster layer, and send to the bottom Flood fill with your choice of paper and add your mask and remember to merge group.
Next open the glitter rain of choice. Resize then copy and paste as a new layer below the frame layer. Adjust as needed.
Open the gates of heaven element, resize as needed. Copy and paste below your top frame layer. Try to center it as best as you can.
Add a beading strip of choice to the top of the frame.
Open your tube of choice, and resize it as needed. Copy and paste it as a new layer, centering it in front of the gates of heaven. Add a set of angel wings from the elements behind the tube.
Next open the greenery of choice. Copy and paste it to the left hand side of the frame. Duplicate it and move it up a bit so now you have a set of greenery all the way up the side. Duplicate the greenery again twice, and go to image, mirror and do the same thing on the other side.
Open your cloud element, copy and paste as a new layer. Move it to the bottom of the frame, towards the left. Duplicate it and go to image mirror. You want to make sure this is ABOVE the frame layer and tube layer.
Next open two roses of your choosing. Resize then copy and paste as a new layer. Duplicate it twice. Move each of them to the bottom left hand corner, arranging in a pile. Duplicate them some more and do the same on the opposite side. With the second colored rose, do the same thing. Look at my tag for an example.
Open two of the flowers you like from the elements. Open the one, resize then copy and paste in three spots along the greenery on the one side. Duplicate them and do it on the other side as well. Add the second flower, a bit smaller and repeat the process again.
Next open the ornament of your choice. Resize then copy and paste as a new layer. Move to the top of the frame and adjust where you like it. Add a bow of choice to the top of it.
Add your text, copyrights, license number and tagger markings.
Save and your done!
Thank you for trying my tutorial!

No comments:
Post a Comment