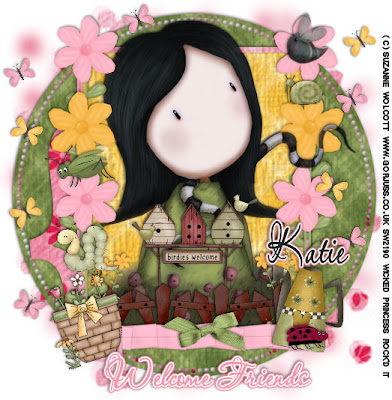
Welcome Friends-PTU
This tutorial was written on July 16, 2009 by Shani aka Wicked Princess. The concept of the tag is mine and mine alone. Any resemblance to any other tag/tut is pure coincidence. This was written for those with working knowledge of PSP.
Supplies Needed:
++Paint Shop Pro ( I used 10 but any version should work)
++Scrap kit by Katie at Crazed Creations called Garden Pals can be purchased HERE
++Template 57 by Ali at Designs by Ali can be found HERE
++Tube of choice or the one I used. I used the artwork of Suzanne Wolcott. You can purchase her work HERE
++Font and Mask of choice
**NOTES:
-Add Drop shadow of choice as you go
-You can merger layers as you want to make things easier for yourself.
Open the template in PSP, using your shortcut keys on your keyboard (SHIFT+D) duplicate the template as a new image. Close the original.
Open several papers of choice, resizing as needed. For example, when I look at the blue bar where it tells me what I’ve opened (say like paper 2) it tells me what percentage I’m viewing it at. For me it’s usually 16%, so I resize to 16% bringing it to 100%. ( I hope that made sense!) Once you’ve done this, minimize for later use.
Next go to the bottom template layer and go to selections, select all, then float, selections defloat. Don’t forget to go to selections, none then delete the template layer. Repeat this process for the rest of the template.
Add a new raster layer and flood fill with your choice of paper. Add your mask layer and merge the group. **Note I chose to duplicate the layer, mirror then flip. I also added a guassin blur, this is optional.
Open the fence clip art. Resize then copy and paste as a new layer. Move it below the frame layer.
Next open the folded ribbon of choice, and resize. Copy and paste as a new layer at the bottom of the frame. Add a bow you like to the center of it after resizing.
Open two flowers with stems you like, resize them. Copy and paste the first one and place to the left side of the frame towards the bottom of it. Duplicate it and go to image, Mirror. Add the next flower, but a layer below that one, and duplicate it. Go to image mirror. Repeat it once more for the next set.
Add your basket and water can clip art, angled slightly to the corners of the frames.
Open several of the bug pals and resize them. Place them where you like on the tag. I put them mostly on the flowers since bugs like flowers!
Next open your tube of choice. Resize as needed, copy and paste as a new layer. Move this below the frame layer. Duplicate it and move this one to the top of the layers palette. With this one activated, use your eraser brush and erase the parts you want gone and to look like they are sitting in front of the tube, or the tube is “Popping” out of the frame.
Open two butterflies of choice, resize then copy and paste each as a new layer. Duplicate several times and move them around as you like around the tag.
Add your text, license info, copyrights and tagger markings
Save and your done! Thank you for trying my tutorial!

No comments:
Post a Comment