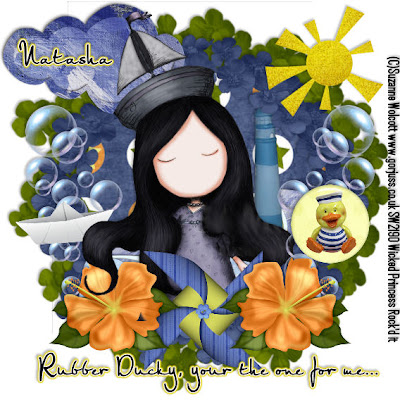
Rubber Ducky PTU
This tutorial was written on August 18, 2009 by Shani aka Wicked Princess. The concept of the tag is mine and mine alone. Any resemblance to any other tag/tut is pure coincidence. This was written for those with working knowledge of PSP.
Supplies Needed:
++Paint Shop Pro ( I used 10 but any version should work)
++Scrap kit called Row, Row, Out to Sea by Sticky Kisses Designs can be purchased HERE
++Tube of choice or the one I used. I used the artwork of Suzanne Wolcott which can be found HERE
++Font of choice
Let’s get Started!
**NOTES:
-Add Drop shadow of choice as you go
-You can merger layers as you want to make things easier for yourself.
Open several papers of choice, resizing as needed. For example, when I look at the blue bar where it tells me what I’ve opened (say like paper 2) it tells me what percentage I’m viewing it at. For me it’s usually 16%, so I resize to 16% bringing it to 100%. ( I hope that made sense!) Once you’ve done this, minimize for later use.
Open a new canvas of 600x600 you can always resize and crop later.
Next open the first flower frame you want to use. Note this one will be on the bottom layer. Resize it then copy and paste into your canvas. Open a second one, resize it to be smaller then copy and paste as a new layer. Adjust and move where you like it.
Next draw out a circle using your preset shapes. Make it a bit smaller than the bottom frame. Convert it to a raster layer and move to the bottom of the layer s palette.
Open the waves, resize then copy and paste as a new layer, move it below the frame layer. Add the lighthouse just above this layer to the right.
Add the bubbles after resizing to either side of the top frame layer. Then on one side, the rubber duckie button and on the other side the paper hat.
Open the Flower of your choice, resize it then copy and paste as a new layer on the bottom left hand side of the frame. Duplicate it and go to image, mirror. Add the pinwheel after resizing to the center between the flowers. Move this layer below the flowers layer.
Next open the cloud and sun, resizing them. Copy and paste them at opposite sides of the canvas towards the top.
Add your text, copyrights, license number and tagger markings
Save and your done! Thank you for trying my tutorial.

No comments:
Post a Comment