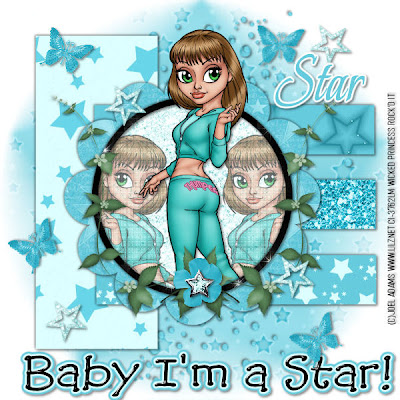
This tutorial was written on September 26, 2009 by Shani aka Wicked Princess. The concept of the tag is mine and mine alone. Any resemblance to any other tag/tut is pure coincidence. This was written for those with working knowledge of PSP.
Supplies Needed:
++Paint Shop Pro ( I used 10 but any version should work)
++Scrap kit by Stargazer Musings called Starlight Starbright can be purchased HERE OR HERE
++Template 13 can be found HERE
++Tube of choice or the one I used. I used the artwork of Joel Adams which can be purchased HERE
++Plug in:
-Penta, dot and cross
++font and mask of choice
**NOTES:
-Add Drop shadow of choice as you go
-You can merger layers as you want to make things easier for yourself.
Open the template in PSP, using your shortcut keys on your keyboard (SHIFT+D) duplicate the template as a new image. Close the original.
Open several papers of choice, resizing as needed. For example, when I look at the blue bar where it tells me what I’ve opened (say like paper 2) it tells me what percentage I’m viewing it at. For me it’s usually 16%, so I resize to 16% bringing it to 100%. ( I hope that made sense!) Once you’ve done this, minimize for later use.
Next go to the bottom template layer and go to selections, select all, then float, selections defloat. Don’t forget to go to selections, none then delete the template layer. Repeat this for the remainder of the template.
Add a new raster layer, and send to the bottom Flood fill with your choice of paper and add your mask and remember to merge group.
Open the bubbles element and resize as needed. Copy and paste as a new layer moving it below the templates layer. Also move it to the upper right hand part of the canvas. Duplicate it and go to image, mirror.
Now open your tube of choice, crop as needed. Copy and paste as a new layer and move it below the circle frame layer. Move the tube to the left, as far as you like it. Add your plug in Penta Dot and Cross on the default setting. Change the opacity on the layers palette to 60. Duplicate it and go to image, mirror. Adjust as needed. Using your magic wand tool click inside the frame, go to selections, modify, expand and expand by 5. On the tube layers, hit the delete key. Then go to selections, none.
Copy and paste the tube once more, centering it in the circle frame. I chose to make her look like she was “popping” out of the frame. To do this, duplicate the tube, and move the bottom layer below the circle frame. On the top layer, erase the parts you don’t want seen outside the frame. Go to the bottom layer and erase the parts you don’t want seen.
Then open the ivy element. Resize it then copy and paste as a new layer. Move it to the right hand side of the circle frame, adjusting as you like. Duplicate it then go to image, mirror. Add a flower and star to the center of the ivy where it meets.
Open the stars and butterflies of your choice. Resize then and then copy and paste through out the tag as you like.
Finally add your text, copyrights, license info and tagger markings!
Save and your done!
Thank you for trying my tutorial!

No comments:
Post a Comment