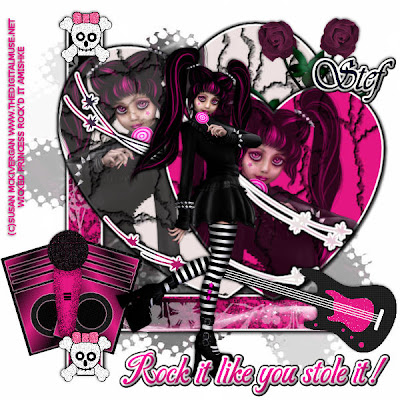
Rock it like you stole it PTU
This tutorial was written on September 14, 2009by Shani aka Wicked Princess. The concept of the tag is mine and mine alone. Any resemblance to any other tag/tut is pure coincidence. This was written for those with working knowledge of PSP.
Supplies Needed:
++Paint Shop Pro ( I used 10 but any version should work)
++Scrap kit called Girls Can Rock Too by Stef can be purchased HERE
++Template 19 by Horeseplays Pasture can be found HERE
++Tube of choice or the one I used. I used the artwork of Susan Mckivergan which can be purchased HERE
++Plug ins:
-Eye Candy 4000 Gradient Glow
++Font and mask of choice
**NOTES:
-Add Drop shadow of choice as you go
-You can merger layers as you want to make things easier for yourself.
Open the template in PSP, using your shortcut keys on your keyboard (SHIFT+D) duplicate the template as a new image. Close the original.
Open several papers of choice, resizing as needed. For example, when I look at the blue bar where it tells me what I’ve opened (say like paper 2) it tells me what percentage I’m viewing it at. For me it’s usually 16%, so I resize to 16% bringing it to 100%. ( I hope that made sense!) Once you’ve done this, minimize for later use.
Next go to the bottom template layer and go to selections, select all, then float, selections defloat. Don’t forget to go to selections, none then delete the template layer. Add a gradient glow of your choosing. Repeat this process for the rest of the template
Add a new raster layer and send it to the bottom. Flood fill with your choice of paper. Add your mask and merge group.
Open the swirl of your choice, resize then copy and paste as a new layer towards the bottom, on the bottom rectangle.
Next open the rose of choice, resize it. Copy and paste as a new layer below the hearts layer, to the right. Duplicate it and go to image, mirror. Adjust it as needed.
Then open your tube of choice. Note that I used the same tube but used the close up as well as the regular tube. Copy and paste your tube as a new layer and move it above the large heart layer. Make sure its below the wire. On the heart layer go to selections, select all, selections, invert. Go back to your tube layer and hit the delete key. Go to selections, none. Change the opacity so that its slightly see through. Repeat this process for the other heart.
Now open the skull and crossbones sticker. Resize it then copy and paste as a new layer at the top of the left and side rectangle. Duplicate it and move the other one to the bottom of the rectangle.
Open the speakers, resize the copy and paste as a new layer to the left of the tag. Angle it slightly to the left. Duplicate it and angle to the right. Add a microphone to the center.
Then open a guitar you like, resize it then copy and paste as a new layer to the bottom of the right hand side.
Add your tube of choice to the center of the tag.
Then add your text, copyrights, license number and tagger markings.
Save and your done! Thanks for trying my tutorial!

No comments:
Post a Comment