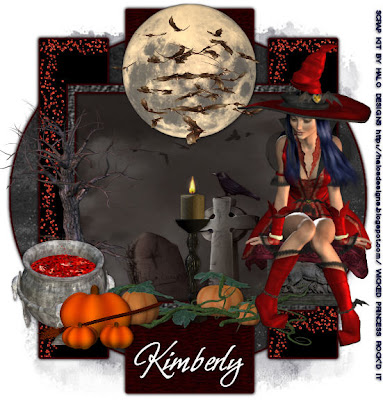
This tutorial was written on August 28, 2009 by Shani aka Wicked Princess. The concept of the tag is mine and mine alone. Any resemblance to any other tag/tut is pure coincidence. This was written for those with working knowledge of PSP.
Supplies Needed:
++Paint Shop Pro ( I used 10 but any version should work)
++Scrap kit by Halo Designs called Halloween can be purchased HERE
++Template 79 by Ali can be found HERE
++Tube of choice or the one I used. I used the tube from the kit. If you choose to use this tube and the kit with no extra’s, please credit the designer for the kit with their url.
++Font and mask of choice
Let’s get started!
**NOTES:
-Add Drop shadow of choice as you go
-You can merger layers as you want to make things easier for yourself.
Open the template in PSP, using your shortcut keys on your keyboard (SHIFT+D) duplicate the template as a new image. Close the original.
Open several papers of choice, resizing as needed. For example, when I look at the blue bar where it tells me what I’ve opened (say like paper 2) it tells me what percentage I’m viewing it at. For me it’s usually 16%, so I resize to 16% bringing it to 100%. ( I hope that made sense!) Once you’ve done this, minimize for later use.
Next go to the bottom template layer and go to selections, select all, then float, selections defloat. Add a gradient glow of choice. Don’t forget to go to selections, none then delete the template layer. Repeat this process for the rest of the template.
Add a new raster layer and flood fill with your choice of paper. Add your mask and merge group.
Open the tree element, resize then copy and paste as a new layer to the left hand side of the frame.
Then open the cauldron resizing and copy and paste as a new layer below the tree. Have it so it overlaps it a bit. Then add both sets of pumpkin bunches to the right of it.
Add the candle to the center of the tag, resize it and move below the pumpkin layers.
Add a moon of choice to the top center.
Open the stone table you like, resize then copy and paste as a new layer. Add the tube of choice, pasting where you like it. I moved it to look like it was sitting on top of the table.
Add your copyrights and any needed license numbers.
Save and your done.
Thank you for trying my tutorial.

No comments:
Post a Comment