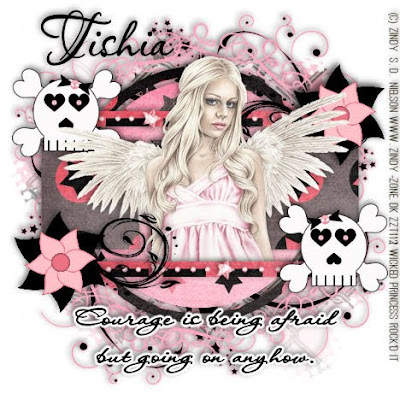
Courage Is…
This tutorial was written on October 10, 2009 by Shani aka Wicked Princess. The concept of the tag is mine and mine alone. Any resemblance to any other tag/tut is pure coincidence. This was written for those with working knowledge of PSP.
Supplies Needed:
++Paint Shop Pro ( I used 10 but any version should work)
++Scrap kit by Tishia called Alysia can be purchased HERE
++Template “fancy” by Vicky can be found HERE *Note you have to scroll down quite a bit to find it.
++Tube of choice or the one I used. I used the work of Zindy Nielson and you can find her artwork HERE You must have valid license in order to use her work.
++Font and Mask of choice
**NOTES:
-Add Drop shadow of choice as you go
-You can merger layers as you want to make things easier for yourself.
Open the template in PSP, using your shortcut keys on your keyboard (SHIFT+D) duplicate the template as a new image. Close the original.
Open several papers of choice, resizing as needed. For example, when I look at the blue bar where it tells me what I’ve opened (say like paper 2) it tells me what percentage I’m viewing it at. For me it’s usually 16%, so I resize to 16% bringing it to 100%. ( I hope that made sense!) Once you’ve done this, minimize for later use.
Next go to the bottom template layer and go to selections, select all, then float, selections defloat. Don’t forget to go to selections, none then delete the template layer. Repeat this process for the rest of the template.
Add a new raster layer and send it to the bottom. Flood fill with your choice of paper. Add your mask and merge group.
Open the chain link fencing, resize as needed and copy then paste as a new layer. Add the same mask as you used before, merge the group.
Next open your tube of choice, resize if needed then copy and paste as a new layer. Move it to the center of the tag. Adjust as needed.
Open your star string bling. Resize it and rotate it by going to image, free rotate and check left and 90 degrees. Then copy and paste it as a new layer, moving it above the bottom rectangle layer. Duplicate it and go to image, flip. You should now have one on each small rectangles.
Now open the skull and cross bones of choice. Add one to opposite corners after resizing.
Then open the flower of choice, resize it and copy then paste as a new layer. Add it to opposite corners.
Add the text you like, copyright info, tagger markings and license info.
Save, and your done! Thanks for trying my tutorial.

No comments:
Post a Comment