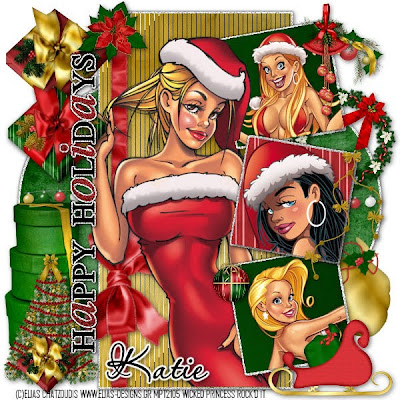
This tutorial was written on November 24, 2009hani aka Wicked Princess. The concept of the tag is mine and mine alone. Any resemblance to any other tag/tut is pure coincidence. This was written for those with working knowledge of PSP.
Supplies Needed:
++Paint Shop Pro ( I used 10 but any version should work)
++Scrap Kit by Crazed Creations called Home for the Holidays can be purchased HERE
++Template 5 by Tracy at Freebie Friends can be found HERE
++4 tubes of choice or the ones I used. I used the artwork of Elias Chatzoudis and you can purchase his work HERE
++Plug ins needed:
-Tramages, tow the line
Let’s get started!
**NOTES:
-Add Drop shadow of choice as you go
-You can merger layers as you want to make things easier for yourself.
Open the template in PSP, using your shortcut keys on your keyboard (SHIFT+D) duplicate the template as a new image. Close the original.
Open several papers of choice, resizing as needed. For example, when I look at the blue bar where it tells me what I’ve opened (say like paper 2) it tells me what percentage I’m viewing it at. For me it’s usually 16%, so I resize to 16% bringing it to 100%. ( I hope that made sense!) Once you’ve done this, minimize for later use.
Next go to the bottom template layer and go to selections, select all, then float, selections defloat. Don’t forget to go to selections, none then delete the template layer. Repeat this process for the rest of the template. **NOTE leave the glitter layers alone.
Go to the large rectangle layer and use your plug Tramages, Tow The Line on the default settings.
Next open the wrap ribbon with bow of your choosing. Rotate it to the right by 90 degrees. Copy and paste as a new layer, moving it to the left of the tag. Make sure this is below the word art layers.
Open the ornaments string, resizing as needed. Copy and paste as a new layer, adjusting as needed. Move this down to just above the oval layer.
Now open up the santa’s gift bag of choice, resize it then copy and paste as a new layer. Move it and angle it slightly to the right and move below the bottom square layers.
Then open up your four tubes of choice. Start with the one that will go in the large rectangle layer. Move this below the square layers. Then crop each one of your others so that they will fit in the squares. Copy and paste as new layers into each of the squares.
Open the wreath, resize it then copy and paste as a new layer. Angle it to the right and move below the top square layer on the right side. Add the swag cluster just above this.
Next open the large stack of round boxes. Resize then copy and paste as a new layer to the left of the tag, moving it below the word art. Add the Christmas tree in front of it along with a square present to the bottom of the tree. Add two more presents to the top of the stack.
Open the poinsetta, add it after resizing to the top of the wrap ribbon bow. Add an ornament to the bottom and top squares in the corner. Also add the santa’s sleigh to the bottom right hand corner.
Add your text, copyrights, licensing info . Save and your done! Thank you for trying my tutorial

No comments:
Post a Comment