Thursday, January 28, 2010

Warning PTU


This tutorial was written on January 28, 2010 Shani aka Wicked Princess. The concept of the tag is
mine and mine alone. Any resemblance to any other tag/tut is pure coincidence. This was written for
those with working knowledge of PSP.

Supplies Needed:

++Paint Shop Pro ( I used 10 but any version should work)

++Scrap kit by Crazed's Creations called Crime Scene can be purchased from HERE

++Template 165 by Designs by ALi can be found HERE

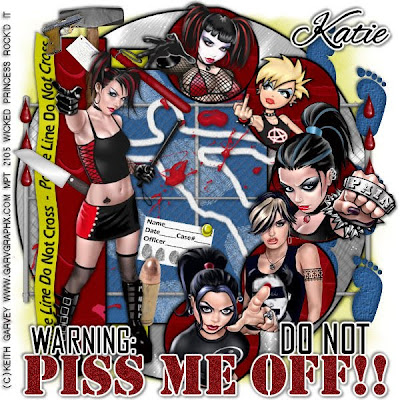
++6 tubes of choice or the ones I used. I used the Artwork of Keith Garvey and you can purchase it from HERE You must have a valid license in order to use it.

++Plug ins:
-Eye Candy Gradient Glow

++Font and Mask of choice.


**NOTES:
-Add Drop shadow of choice as you go
-You can merger layers as you want to make things easier for yourself.

Open the template in PSP, using your shortcut keys on your keyboard (SHIFT+D) duplicate the template
as a new image. Close the original.

Open several papers of choice, resizing as needed. For example, when I look at the blue bar where it tells me what I’ve opened (say like paper 2) it tells me what percentage I’m viewing it at. For me it’s usually 16%, so I resize to 16% bringing it to 100%. ( I hope that made sense!) Once you’ve done this, minimize for later use.

Next go to the bottom template layer and go to selections, select all, then float, selections defloat. Don’t forget to go to selections, none then delete the template layer. Add a gradient glow of your choice. Repeat this process for the rest of the template.

Add a new raster layer and flood fill with your choice of paper. Add your choice of mask and merge group. Move this layer below your template layers.

Now open the chain link fence. Resize if needed then copy and paste as a new layer and move it just above the large rectangle layer.

next open the set of foot prints you like, and copy and paste as a new layer. Move it to the right of the tag, just above the chain link fence layer.

Then open the chalk outline that you like, resize as needed then copy and paste as a new layer. Adjust as you like and make sure this is above the fence layer.

Open the blood spatter you like, resize then copy and paste as a new layer above the chalk outline. Adjust and move as you need to.

Next open the fingerprint card of your choosing, resize then copy and paste as a new layer. Arrange it at an angle somewhere in the middle of the canvas. Add a push pin to it to make it looked like it is pinned to the fencing.

Then open the sledge hammer and gun. resize them then copy and paste in the upper left hand corner where the long rectangle is. Arrange how you like them.

Now open the blood drips, resize then copy and paste on each side of the fence poles.

open the police tape, resize and rotate to the left. Copy and paste as a new layer and move to the left of the skinny rectangle on the left.

Next open the baton, resize it then copy and paste as a new layer. Move it to the upper left hand side of the tag where you like it.

Now open the knife you like, resize it then copy and paste as a new layer. Move it to the middle of the rectangle on the left. Adjust as needed.

Then open your tube choices. Crop the first one then copy and paste as a new layer. Move it to the circle template layer that you want it to go itn. Duplicate it then on the circle layer go to selections, select all. Then selections, float then defloat. now go to selections, invert and on the bottom tube layer, hit the delete key. Go to selections none. Now on the top tube layer, erase the parts you don't want outside the circle. Repeat this for the other circles and tube layers.

Open the last tube of choice, copy and paste as a new layer to the left of the tag. Resize and adjust as needed.

Add a bullet to the bottom of the tag, near the tubes feet. Move behind this layer.

Add yoru text, copyrights, license info and tagger markings!

Save and your done!

Thank you for trying my tutorial!


Monday, January 25, 2010

Sexify My Love (SAC) PTU


This tutorial was written on January 25, 2010 Shani aka Wicked Princess. The concept of the tag is mine and mine alone. Any resemblance to any other tag/tut is pure coincidence. This was written for those with working knowledge of PSP.

Supplies Needed:

++Paint Shop Pro ( I used 10 but any version should work)

++Scrap kit by Crazed Creations called Always and Forever can be purchased HERE

++Template 177 by Designs by ALi can be found HERE

++Tube of choice or the one I used. I used the Artwork of Marco Gualione and you can purchase it from MPT You must have a valid license in order to use it.


**NOTES:
-Add Drop shadow of choice as you go
-You can merger layers as you want to make things easier for yourself.

Open the template in PSP, using your shortcut keys on your keyboard (SHIFT+D) duplicate the template as a new image. Close the original.

Open several papers of choice, resizing as needed. For example, when I look at the blue bar where it tells me what I’ve opened (say like paper 2) it tells me what percentage I’m viewing it at. For me it’s usually 16%, so I resize to 16% bringing it to 100%. ( I hope that made sense!) Once you’ve done this, minimize for later use.

Next go to the bottom template layer and go to selections, select all, then float, selections defloat. Don’t forget to go to selections, none then delete the template layer. Repeat this process for the rest of the template.

Add a new raster layer and move it tothe bottom of the layer pallette. Flood fill with your choice of paper and add the mask you like. Remember to merge the group.

Open the wrap ribbon you like, resize it then copy and paste as a new layer. Move it to below all the layers, but just above the large rectangle layer on the bottom. Resize and asdjust as you need to.

Then open the watch, resize then copy and paste as a new layer. MOve it below the ribbon layer and at an angle. Erase the top part of the watch where the band is.

Now open your tube of choice, resize it then copy and paste as a new layer. Move it below the hearts layer as well as the skinny rectangle layers on teh bottom Adjust as needed.

Next open the heart dangle that you like, resize it then copy and paste as a new layer. Move it to the upper left of the corner of the rectangle. Add a bow of choice to the top of it.


Open the champagne glasses, resize, then copy and paste as a new layer. Arrange where you like it, duplcicate it and angle one. Add the bottle to the side.

Then open the candle, sachet bag and present. copy and paste them to the left of the glasses.

Now open the chocolate box, pillow and bear. Resize them and copy and paste as a new layer to the right.

Place two of the roses you like to the right of those.

Add your text,copyrights, license info and tagger markings.

Save and you done! Thanks for trying my tutorial.


Thursday, January 21, 2010

Chocolate PTU (SAC)


This tutorial was written on January 21, 2010 Shani aka Wicked Princess. The concept of the tag is
mine and mine alone. Any resemblance to any other tag/tut is pure coincidence. This was written for
those with working knowledge of PSP.

Supplies Needed:

++Paint Shop Pro ( I used 10 but any version should work)

++Scrap kit by Polka Dot Scraps called Valentine Chocolate can be purchased from
Scrappin' Bratz

++Template 153 by Designs by ALi can be found HERE

++Tube of choice or the one I used. I used the Artwork of Marco Gualione and you can purchase it from MPT You must have a valid license in order to use it.


**NOTES:
-Add Drop shadow of choice as you go
-You can merger layers as you want to make things easier for yourself.

Open the template in PSP, using your shortcut keys on your keyboard (SHIFT+D) duplicate the template
as a new image. Close the original.

Open several papers of choice, resizing as needed. For example, when I look at the blue bar where it tells me
what I’ve opened (say like paper 2) it tells me what percentage I’m viewing it at. For me it’s usually 16%, so I
resize to 16% bringing it to 100%. ( I hope that made sense!) Once you’ve done this, minimize for later use.

Next go to the bottom template layer and go to selections, select all, then float, selections defloat. Don’t forget
to go to selections, none then delete the template layer. Repeat this process for the rest of the template.

I used a close up that was a bonus when I purchased the tube. You can do this or make your tube larger to make
the close up. Crop as needed then copy and paste as a new layer. Move it below your circle frame layer. Using your magic
wand tool, click inside the frame and then go to selections, modify and expand by 4. Go to selections, invert. Then go to the
tube layer and hit the delete key. Go to selections none.

Next open the glass heart frame, resize it then copy and paste as a new layer and move it around the cirlcle frame layer.

Then open the heart trail, resize it then copy and paste as a new layer. Move it blelow the circle frame background. Move it to the
top rectangle layer and duplicate it. Go to image, flip and move it back up over the other one. Arrange it as you like.

Now open up the glass bead, resize as needed and copy and paste it at the edge of any part of the frame. Duplicate it several
times and move it around the frame as you like it.

Next open the cherry and do the same steps above with the difference of moving the cherry below the bead layer so the stem
is under the bead. Note that I angled the cherry to kind of go with the frame. Also add the bow you like between the cherries and
bead where you like it.

Open the leaf element, re size then copy and paste as a new layer, moving it below the cherry and bead layers. Duplicate it several
times and mvoe around the frame as you like.

Then open several chocolates you like and arrange them in the bottom right hand side of the tag. Add your tube on top of it.

Add your copyrights, licens number, tagger markings and any text you like.

Save and your done! Thank you for trying my tutorial.


Sunday, January 17, 2010

PC Crash :(

Hey just to let you all know, my pc crashed and wiped out my external hard drive as well. I had my kits backed up in the stores of course, and freebies online. However I lost everything else including tubes etc. We're in the process of recovering but it is going to take several days and then we have to re organize. I will be around and will be working on stuff, however I'm not sure how anything is going to go at this point.

Please be patient with me as I go through this process!

Thursday, January 14, 2010

Very Berry Lovely PTU


This tutorial was written on January14, 2010 Shani aka Wicked Princess. The concept of the tag is mine and mine alone. Any resemblance to any other tag/tut is pure coincidence. This was written for those with working knowledge of PSP.
Supplies Needed:

++Paint Shop Pro ( I used 10 but any version should work)

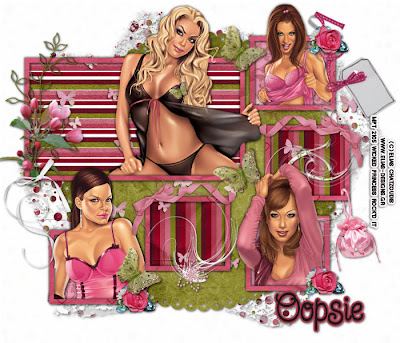
++Scrap kit Very Berry Lovely by Oopsie can be purchased from her store. Find it HERE

++Template 15 by Ali can be found HERE

++ 4 tubes of choice. I used the artwork of Elias Chatzoudis, you must have a valid license in order to use his work. You can purchase his work at MPT

++Font and Mask of choice


**NOTES:
-Add Drop shadow of choice as you go
-You can merger layers as you want to make things easier for yourself.

Open the template in PSP, using your shortcut keys on your keyboard (SHIFT+D) duplicate the template as a new image. Close the original.

Open several papers of choice, resizing as needed. For example, when I look at the blue bar where it tells me what I’ve opened (say like paper 2) it tells me what percentage I’m viewing it at. For me it’s usually 16%, so I resize to 16% bringing it to 100%. ( I hope that made sense!) Once you’ve done this, minimize for later use.

Next go to the bottom template layer and go to selections, select all, then float, selections defloat. Don’t forget to go to selections, none then delete the template layer. Repeat this process for the rest of the template.


Add a new raster layer and move it to the bottom of the layers palette. Flood fill with your choice of paper. Add the mask you like and merge visible.

Open the butterfly trail, resize it then copy and paste as a new layer. Move it to the right, and move to just above the background layers for the frames. Duplicate it and go to image, mirror. Move them where you like them.

Then open your tubes of choice. Resize, crop and copy and paste as new layers. I made them look like they were “popping” out of the frame. To do this move your tube to the frame you want it to be in, duplicate it and move below the frame layer. Erase the parts on the top layer you don’t want seen outside the frame. On the bottom layer, erase the parts hanging outside the frame on the bottom and sides.

Next open the sachet bag. Resize it then copy and paste as a new layer. Move it to the right of the frame, hanging to the right a bit.

Then open the swirlie you like, resize it then copy and paste as a new layer. Move into one of the empty frames. Open the other one, and move into the other open frame.

Open the wire leaf brance. Resize it then copy and paste as a new layer. Move it to the left of the large rectangle frame. Add your choice of flower bouquet on top of it. Add the ribbon to the bottom of the branches.

Now open the rose, resize then copy and paste into the corners of three different frames.

Add the butterfly of choice randomly through out the tag as you like.

Next add the tag to the upper right hand corner of the canvas.

Make your adjustments, add your text and any copyrights and license info you need to add.

Save and your done!

Thursday, January 7, 2010

Your Place Or Mine? (PTU)


This tutorial was written on January 7, 2010 Shani aka Wicked Princess. The concept of the tag is mine and mine alone. Any resemblance to any other tag/tut is pure coincidence. This was written for those with working knowledge of PSP.
Supplies Needed:

++Paint Shop Pro ( I used 10 but any version should work)

++Scrap kit by Stargazer Musings called My loving heart can be purchased from

++ Template valentine 7 by Ali can be found HERE

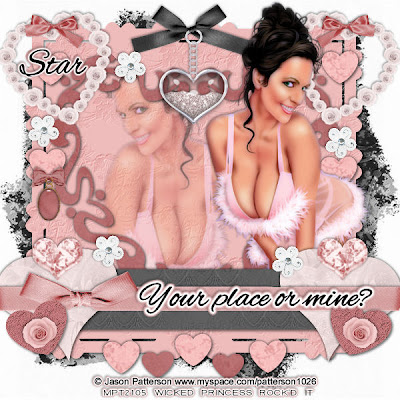
++Tube of choice or the one I used. I used the artwork of Jason Patterson and you can purchase his work from MPT You must have a valid license in order to use this artists work.

++Plug ins:
-Xero Porcelain

++Font and mask of choice

**NOTES:
-Add Drop shadow of choice as you go
-You can merger layers as you want to make things easier for yourself.

Open the template in PSP, using your shortcut keys on your keyboard (SHIFT+D) duplicate the template as a new image. Close the original.

Open several papers of choice, resizing as needed. For example, when I look at the blue bar where it tells me what I’ve opened (say like paper 2) it tells me what percentage I’m viewing it at. For me it’s usually 16%, so I resize to 16% bringing it to 100%. ( I hope that made sense!) Once you’ve done this, minimize for later use.

Next go to the bottom template layer and go to selections, select all, then float, selections defloat. Don’t forget to go to selections, none then delete the template layer. Repeat this process for the rest of the template.


Add a new raster layer and move it to the bottom of the layers palette. Flood fill with your choice of paper. Add the mask you like and merge visible.

Open your tube of choice and add your plug in Xero Porcelin on the setting you like. Copy and paste as a new layer, moving it to the left of the tag. I mirrored it so its facing the opposite direction. Move below the frame layer and to the left. Using your magic wand tool click inside the frame and go to selections, modify, expand by 5. Go to selections, invert and on the tube layer hit the delete key. Go to selections, none. Change the opacity to 50.

Then open the rose heart frame. Resize then copy and paste as a new layer. Move to the upper left hand corner so it surrounds the small heart. Angle it as you like then duplicate it. Go to image, mirror.

Next open the heart bling with bow, resize it then copy and paste as a new layer into the center of the canvas towards the top of the square.

Now open your tube, resize it then copy and paste as a new layer to the right of the tag. Move it below the big heart and rectangle layers.

Open the wrap ribbon and bow you like and resize it. Copy and paste as a new layer. Move it to just above the big heart layers. Center it as you like.

Then open a single rose, resize it then copy and paste as a new layer into the center of the two center hearts on the bottom.

Next open the bow with opal you like. Resize then copy and paste as a new layer. Move towards the bottom on the left.

Now open the bow you like, resize then copy and paste as a new layer. Move to the upper left hand corner where the rose frame is. Move where you like. Duplicate it then go to image, mirror.

Open the bling heart you like, resize it then copy and paste towards the top of the large heart. Duplicate it and move it to the other heart.

Then open the small flower you like, resize then copy and paste as a new layer. Duplicate several times and move over the whole canvas as you like.

Finally add your text, copyrights, license info and tagger markings. Save and your done! Thank you for trying my tutorial.

Winter Grace (PTU)


This tutorial was written on January 7, 2010 Shani aka Wicked Princess. The concept of the tag is mine and mine alone. Any resemblance to any other tag/tut is pure coincidence. This was written for those with working knowledge of PSP.
Supplies Needed:

++Paint Shop Pro ( I used 10 but any version should work)


++Scrap kit by Oopsie Daisy Can be purchased from the stores she sells in. Check out her blog HERE to find out where to buy!

++ template 57 by Designs by Ali can be found HERE

++Tube of choice. I used the tube that came with the kit.

++Plug ins:
-Eye Candy 4000 Gradient glow
-Xero Porcelain
-Xero Soft Mood

++Font and mask of choice

**NOTES:
-Add Drop shadow of choice as you go
-You can merger layers as you want to make things easier for yourself.

Open the template in PSP, using your shortcut keys on your keyboard (SHIFT+D) duplicate the template as a new image. Close the original.

Open several papers of choice, resizing as needed. For example, when I look at the blue bar where it tells me what I’ve opened (say like paper 2) it tells me what percentage I’m viewing it at. For me it’s usually 16%, so I resize to 16% bringing it to 100%. ( I hope that made sense!) Once you’ve done this, minimize for later use.

Next go to the bottom template layer and go to selections, select all, then float, selections defloat. Don’t forget to go to selections, none then delete the template layer. Repeat this process for the rest of the template.


Add a new raster layer and move it to the bottom of the layers palette. Flood fill with your choice of paper. Add the mask you like and merge visible.

Open the paper ivy cut out. Resize then copy and paste as a new layer. All the way down below the template layer. Move also to the top left hand corner. Duplicate it and go to image, mirror then image, flip.

Next open your tube of choice. Resize then copy and paste as a new layer. Move it below the frame layer. Add your plug in Xero, Soft mood on the setting you like. Then use the plug in Xero, Porcelain on the setting you like. Using your magic wand tool, click inside your frame. Go to selections, modify, expand it by 4. Go to selections, invert. On your tube layer, hit the delete key and go to selections, none.

Now open the light “ray” resize it then copy and paste as a new layer. Go to image, flip. Move it to the bottom right hand corner of the frame. Adjust and resize as needed.

Open your tube again, resize it then copy and paste as a new layer to the right of the frame. Add a thin gradient glow of your choice to the tube.

Then open the star bling, resize then copy and paste as a new layer at the left hand side of the top of the frame. Duplicate it several times and move across the top of the frame.

Next open the green tree. Resize it then copy and paste as a new layer. Move it to the top center of the frame. Add the holly berries to the bottom center of the tree.

Add the satin bow to the bottom portion of the frame.

Open the flower trail, resize then copy and paste as a new layer to the left. Move it below the bracket layer. Duplicate it and go to image, mirror.

Now add your text, copyrights license info and tagger markings. Save and your done!

Tuesday, January 5, 2010

Peaceful Moments PTU


This tutorial was written on January 5, 2010 Shani aka Wicked Princess. The concept of the tag is mine and mine alone. Any resemblance to any other tag/tut is pure coincidence. This was written for those with working knowledge of PSP.
Supplies Needed:

++Paint Shop Pro ( I used 10 but any version should work)

++Scrap kit called Spring by Tish by Skrappin Magic http://www.scrappetizing.com/store/index.php?main_page=index&manufacturers_id=60&zenid=e1c359302cb62b067360cf64ee7a8a44

++Template 101 by Designs by Ali can be found http://designsbyali.blogspot.com/search/label/TEMPLATES

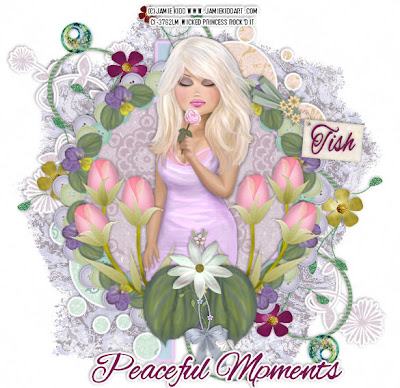
++Tube of choice. I used the artwork of Jamie Kidd you can purchase this artists work from www.cilm.com and you MUST have a valid license in order to use their work.

++Plug ins:
-Eye Candy 4000 Gradient Glow

++Font and Mask of choice


**NOTES:
-Add Drop shadow of choice as you go
-You can merger layers as you want to make things easier for yourself.

Open the template in PSP, using your shortcut keys on your keyboard (SHIFT+D) duplicate the template as a new image. Close the original.

Open several papers of choice, resizing as needed. For example, when I look at the blue bar where it tells me what I’ve opened (say like paper 2) it tells me what percentage I’m viewing it at. For me it’s usually 16%, so I resize to 16% bringing it to 100%. ( I hope that made sense!) Once you’ve done this, minimize for later use.

Next go to the bottom template layer and go to selections, select all, then float, selections defloat. Add a gradient glow of choice. Don’t forget to go to selections, none then delete the template layer. Repeat this process for the rest of the template.


Add a new raster layer and move it to the bottom of the layers palette. Flood fill with your choice of paper. Add the mask you like and merge visible.

Open the string with flower sand beads on it. Resize then copy and paste as a new layer. Move below the circle template layer, and to the lower right hand corner. Duplicate it and go to image, mirror then image, flip.

Then open the flower button frame. Resize it then copy and paste as a new layer. Move it over the circle frame layer.

Now open your tube of choice, resize it then copy and paste as a new layer. Center it into the center of the frame.

Next open the rose buds on the stems, resize them then copy and paste as a new layer to the left of the frame. Angle and adjust as needed. Duplicate it then go to image, mirror. Add the leaf at the bottom center, and duplicate it. Move the other one beside it.

Open the string with a bow on the end, resize it then copy and paste as a new layer into the center of the leaf. Add the large flower after resizing to the top center of the leaves, over the string with flowers.

Add the tag you like to the upper right hand corner of the tag.

Finally add your text, license info, copyrights and license info.

Save and your done!

Thank you for trying my tutorial