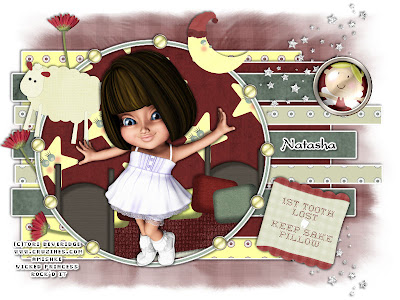
This tutorial was written on February 20, 2010 Shani aka Wicked Princess. The concept of the tag is mine and mine alone. Any resemblance to any other tag/tut is pure coincidence. This was written for those with working knowledge of PSP.
Supplies Needed:
++Paint Shop Pro ( I used 10 but any version should work)
++Scrap kit by Natasha of Sticky Kisses Designs can be found on her blog HERE
++Template 153 by Ali can be found HERE
++Tube of choice or the one I used. I used the work of Tori Beveridge and you can purchase it from HERE
++Plug ins:
-Eye Candy 4000 Gradient Glow
++Font and Mask of choice
**NOTES:
-Add Drop shadow of choice as you go
-You can merger layers as you want to make things easier for yourself.
Open the template in PSP, using your shortcut keys on your keyboard (SHIFT+D) duplicate the template as a new image. Close the original.
Open several papers of choice, resizing as needed. For example, when I look at the blue bar where it tells me what I’ve opened (say like paper 2) it tells me what percentage I’m viewing it at. For me it’s usually 16%, so I resize to 16% bringing it to 100%. ( I hope that made sense!) Once you’ve done this, minimize for later use.
Next go to the bottom template layer and go to selections, select all, then float, selections defloat. Don’t forget to go to selections, none then delete the template layer. Add a gradient glow of your choice. Repeat this process for the rest of the template.
Add a new raster layer and flood fill with your choice of paper. Add your choice of mask and merge group. Move this layer below your template layers.
Open up the star cluster, resize it then copy and paste as a new layer. Move it below the circle background layer and at the upper right of the canvas. Duplicate it and go to image, flip.
Then open up the flower, resize then copy and paste as a new layer. Move to the upper left of the canvas, below the circle background layer. Duplicate it and move a little bit further down of the other one. Duplicate it one more time and do the same thing.
Now open up the bed, resize it then copy and paste as a new layer. Move below the circle frame layer. Erase the parts of the bed you don’t want seen outside the frame.
Now open up the sheep, resize it then copy and paste as a new layer. Move it to the upper left of the frame layer. Add a moon to the opposite side.
Open the button of your choosing, resize then copy and paste as a new layer. Duplicate it several times and move around the circle layer as you like.
Then open the button with the tooth fairy on it. Resize it then move it to the upper right of the template, where the rectangles are.
Next open your tube of choice, resize it then copy and paste as a new layer. Move it to the center of the circle layer. Adjust as needed.
Add the tooth fairy pillow and move it to the bottom right of the canvas, angle as you like.
Finally add your text, copyright, tagger markings and license info. Save and your done!

No comments:
Post a Comment