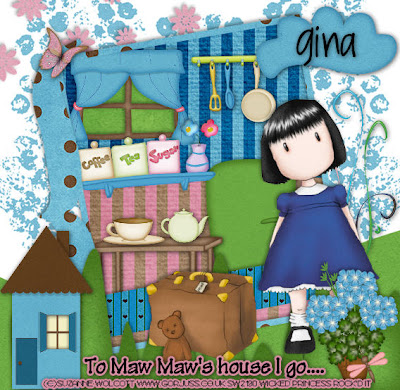
This tutorial was written on March 27, 2010 Shani aka Wicked Princess. The concept of the tag is mine and mine alone. Any resemblance to any other tag/tut is pure coincidence. This was written for those with working knowledge of PSP.
Supplies Needed:
++Paint Shop Pro ( I used 10 but any version should work)
++Scrap kit by called MawMaw’s House by Kikeka kits. You can purchase the kit HERE
++Valentine Template 2 by Designs by Ali can be found HERE
++Tube of choice or the one I used. I used the work of Suzanne Wolcott and you can purchase her work HERE
++Font of choice
**NOTES:
-Add Drop shadow of choice as you go
-You can merger layers as you want to make things easier for yourself.
Open the template in PSP, using your shortcut keys on your keyboard (SHIFT+D) duplicate the template as a new image. Close the original.
Open several papers of choice, resizing as needed. For example, when I look at the blue bar where it tells me what I’ve opened (say like paper 2) it tells me what percentage I’m viewing it at. For me it’s usually 16%, so I resize to 16% bringing it to 100%. ( I hope that made sense!) Once you’ve done this, minimize for later use.
Next go to the bottom template layer and go to selections, select all, then float, selections defloat. Don’t forget to go to selections, none then delete the template layer. Repeat this process for the rest of the template. I removed the word art layer and the heart layer.
First open the bubbled back ground. Resize then copy and paste as a new layer. Move it to the bottom of the template layers. Duplicate it and go to image, mirror. Adjust as needed.
Now open your landscape (hill) element. Resize it then copy and paste as a new layer. Make sure it’s just above the bubble background.
Open the doodle (it looks like long weeds) resize it then copy and paste as a new layer to the right of the template.
Then open the flower spray, resize then copy and paste as a new layer. Move it to the right so it looks like it’s spraying from the top down to the opposite corner.
Now using your pre set shapes on the rectangle shape, draw out a rectangle just above your rectangle background template layer. If you can’t quite get it the same size as the rectangle, that’s ok. Erase the parts that are hanging outside the frame.
Next open your pots and utensil hanging thing. Resize then copy and paste as a new layer to the upper right of the template background.
Then add the refrigerator to the bottom right of the template. Make sure its below the skinny rectangle layer on the bottom.
Open the window, resize it then copy and paste as a new layer to the upper left of the template. Erase the part that shows outside the frame. Draw out another rectangle with the paper of your choice using your preset shapes tool and move it below the window.
Now open the shelf, resize it then copy and paste below the window so it looks like its just at the top of that second back ground layer you made. It kind of looks like a divide in the wallpaper right?
Then open the table, resize then copy and paste as a new layer. Move it below the shelf. Add the teapot and the cup, so that its sitting on the table.
Next open the grass, resize it then copy and paste as a new layer at the bottom of the canvas.
Open the house, resize then copy and paste as a new layer to the left of canvas.
Now open the tube of choice and paste it where you like it.
Then open the flower pot of your choice, resize it then copy and paste as a new layer to the bottom right of the tag. Add the dragon fly to the bottom center of the pot.
Next open the cloud you like, resize then copy and paste as a new layer to the upper right of the tag. Add a butterfly to the opposite side.
Finally add your text, copyrights, license info and tagger markings
Save and your done! Thank you for trying my tutorial.

No comments:
Post a Comment