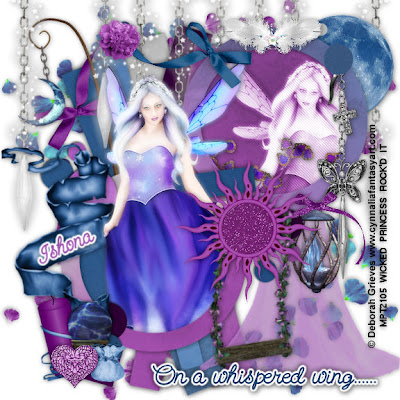
This tutorial was written on June 20th 2010 Shani aka Wicked Princess. The concept of the tag is mine and mine alone. Any resemblance to any other tag/tut is pure coincidence. This was written for those with working knowledge of PSP.
Supplies Needed:
++Paint Shop Pro ( I used 10 but any version should work)
++Scrap kit by called Myth’s and Magic by Athena Designs can be found HERE
++Template 187 by Designs by Ali can be found HERE
++Tube of choice or the one I used. I used the artwork of Deborah Grieves and her work can be purchased from HERE
++Font
++Plug Ins:
-penta jeans
**NOTES:
-Add Drop shadow of choice as you go
-You can merger layers as you want to make things easier for yourself.
Open the template in PSP, using your shortcut keys on your keyboard (SHIFT+D) duplicate the template as a new image. Close the original.
Open several papers of choice, resizing as needed. For example, when I look at the blue bar where it tells me what I’ve opened (say like paper 2) it tells me what percentage I’m viewing it at. For me it’s usually 16%, so I resize to 16% bringing it to 100%. ( I hope that made sense!) Once you’ve done this, minimize for later use.
Next go to the bottom template layer and go to selections, select all, then float, selections defloat. Don’t forget to go to selections, none then delete the template layer. Repeat this process for the rest of the template. NOTE: I deleted the star layers.
Open the flower petal scatter you like first. Resize it then copy and paste as a new layer. Move it to the bottom of the layers palette, below all the template layers. Now move it to the upper left, position where you want it. Duplicate it and go o image, mirror. Then to image, flip. Merge down one layer. Do the same in the opposite corner with the other one.
Now open the bow that has the long side on one side, resize then copy and paste as a new layer to the upper part of the tag, towards the center. Open the other, and resize it the same. This time turn it around with your pick tool so that the tail ends meet. Put the flower of choice right in the middle of where they meet.
Next open the moon chain resize then copy and paste as a new layer. Move it below the background layer to the circle on the left. Arrange it and adjust it as you like.
Open the curtain/drapery you like, resize then copy and paste as a new layer. Move to below the top circle background layer. Also move it to there so it looks like it’s falling beneath it.
Next open the chain with crystals on them. Resize then copy and paste as a new layer. Move to the upper left of the tag. Duplicate it and go to image, mirror.
Now open the moon you like, resize tehn copy and paste as a new layer. Make sure this is also below the circle background layer and move it to the right of the circle frame.
Open your tube of choice. Resize then copy and paste as a new layer. Crop it where you will only need part of it. The upper half. Move it to below the circle frame layer on the right. Adjust where you like it. Duplicate it then go to adjust, blur, guassian blur set to 3. Then set the blend mode to overlay. Merge down one layer. Add your plug in, penta, jeans on the setting you like. Now change the blend mode to luminance. Erase the parts you don’t want seen outside of the circle frame.
Open the jeweled flower petals, crop then resize. Copy and paste as a new layer over the tube layer. Move where you like. Erase the parts you don’t want seen outside of the circle.
Then open the jeweled cage. Resize then copy and paste as a new layer. Move it to the bottom of the circle frame on the right.
At this point I have merged all the small circles together.
Now open the silver chain with the butterfly and cross on it. Copy and paste it to the right, just below the merged circles layer.
Next open the scroll banner you like, resize then copy and paste as a new layer to the left of the tag.
Open your tube again, resize it then copy and paste as a new layer. You want to position it over the second circle frame on the left. Duplicate it and go to adjust, blur, guassian blur set to 3. Change the blend mode to overlay and merge down one layer. Duplicate it again and move it to below the circle frame. On the top tube layers, erase the parts you don’t want showing outside of the frame. Go back to the other tube and erase the parts that shouldn’t show outside either.
Then open the candle, crystal ball, heart and bag of your choosing. Resize them then copy and paste as a new layer to the left of the tag, by the banner scroll. Group them as you like.
Open the swing, resize then copy and paste as a new layer and move it to the bottom of the upper circle frame. Add the sun of your choosing over that.
Next open the feather wings, resize then copy and paste as a new layer to the center of the upper circle frame.
Finally add your text, copyrights, license info and tagger markings. Save and your done!
Thanks for trying my tutorial.

No comments:
Post a Comment