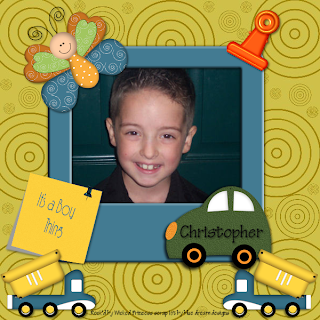
This tutorial was written on March 23,2009 and all concepts of the tutorial and tag are mine. Any similarities are coincidental.
This is a beginners tutorial for basic scrap tagging.
Supplies needed:
Paint Shop Pro (any version will work I used PSP 10)
Picture of choice ( I used one of my son Christopher)
Kit of choice or the one I used, a freebie called It’s A Boy Thing from Blue Dream Designs and can be found here:
http://bluedreamdesigns.blogspot.com/search/label/Freebie?updated-max=2008-10-02T15%3A25%3A00%2B01%3A00&max-results=20
Font of choice
Let’s get started!
Once you have downloaded the kit and have it saved to your computer, open the papers folder and pick a paper of your choice. This is the main background for your scrap tag.
Next open the folder marked marked frames and choose your frame you would like to use. Click open.
With the frame open in PSP go to Edit then Copy. Then Click on your paper, and go to edit, Paste as new layer. Adjust as needed.
Open the picture of your choice, resize as needed. Either using your pointer tool or going to, Image then resize and resize to the percentage needed.
Edit then copy, paste as new layer onto your working canvas. Make sure you look at your layer palette on the right side and click on the picture layer. Click on the layer, and move it to below the frame layer.
Next open the various elements you would like to use from the kit and place them where you would like to on the working canvas. Remember to resize them as needed.
You may also add drop shadow as you want. You can get to the drop shadow by going to Effects then drop shadow. The settings I used are: Offset: Vertical 2 Horizontal 2 Attributes: Opacity 50 Blur 5.00 and the color black.
Add text as you want.
Thank you for using my tutorial!

No comments:
Post a Comment