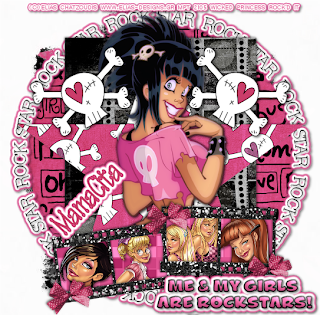
This tutorial was written on March 21, 2009 by Shani aka Wicked Princess. All concepts for tags are mine. Any similarites to any other tutorial or tag are coincidental.
On to the tutorial!~
Supplies needed:
Template 65 By Yvette, can be found at her site:
http://essenceofcreativity.wordpress.com/category/new-templates/
Girlz Rock by Yvette can be found at her blog her: http://misfitsscrapz.blogspot.com/
Mask of choice
5 tubes of choice. I used the work of Elias Chatzoudis, you must have a license to use his work. You can find him at www.mypsptubes.com
Eyecandy 4000>Gradient Glow plug in
Font of choice
Let’s get started:
Open a blank canvas 600x600
Choose a paper of choice, flood fill. Using mask of choice
Copy and paste template as new layers.
Click on the circle layer, using your magic wand tool click inside the circle to activate it.
Go to selections, float, then selections de float.
Add new raster layer
Using paper of choice from kit, flood fill on the new raster layer. Repeat this for the other template layers. Remember to delete the template layers as you go.
Activate the word art layer. Add drop shadow of choice and then add a gradient glow of your choice. Move this layer above your circle layer.
Add tube of choice to the center of the star, adjusting as needed.
Pick a frame from the kit and add it to the bottom of the tube, adjusting placement where you like it.
Using your magic wand tool, click in the first square in the frame. Hold down the shift key and click the magic wand in each square.
Add new layer, moving it down below the frame layer. Flood fill with a paper of choosing or pick up a matching color.
Selections> none
Using the plug in Xero>Fritallary, click the random button until you find out which setting you like.
Open the four remaining tubes you chose, adjusting in size if needed.
Paste first tube as new layer under the frame layer. Adjust size to fit the face pretty much in the square.
Activate the frame layer, use your magic wand tool clicking inside of the square. Then go to Selections>modify> expand by 4 then Selections>invert
Make your tube layer active and hit delete on your keyboard. Go to selections none.
Repeat this each time for your tubes in each frame.
Add your copyright info for the artist, license number if needed, your watermark/tag info.
Add chosen text and your done!
Remember to save as a .png if you want it to have a transparent background. Otherwise save it as a .jpg in order to get it with the white background.
Thank you for trying out my tutorial!

Beautiful tutorial Shani! Good luck with your new blog.
ReplyDeletexoxo
Val