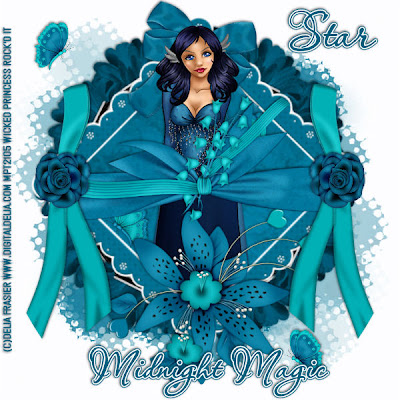
This tutorial was written on July 18, 2009 by Shani aka Wicked Princess. The concept of the tag is mine and mine alone. Any resemblance to any other tag/tut is pure coincidence. This was written for those with working knowledge of PSP.
Supplies Needed:
++Paint Shop Pro ( I used 10 but any version should work)
++Scrap kit by Stargazer Musings called My love, My life can be purchased HERE
++Tube of choice or the one I used. I used the artwork of Delia Frasier. You can purchase her work HERE
++Plug ins:
~Eye Candy 4000-Gradient Glow
~Muera Meister Copies
++Font and Mask of choice
**NOTES:
-Add Drop shadow of choice as you go
-You can merger layers as you want to make things easier for yourself.
Open several papers of choice, resizing as needed. For example, when I look at the blue bar where it tells me what I’ve opened (say like paper 2) it tells me what percentage I’m viewing it at. For me it’s usually 16%, so I resize to 16% bringing it to 100%. ( I hope that made sense!) Once you’ve done this, minimize for later use.
Open a new canvas of 600x600, remember you can always resize later if you like. Flood fill with your choice of paper. Add your mask and merge group.
Next open your choice of frame. Copy and paste it as a new layer. Add a gradient glow, I used white on the fat setting. Turn the frame so its corners are up and down, looks like a diamond now. Use your magic wand tool and click inside the frame. Go to selections, modify expand by 6. Add a new raster layer and flood fill with your choice of paper. Go to selections, none.
Open the flower clip of your choice. Copy and paste as a new layer. Turn it so the binder clip loop is facing the bottom. Center it in your canvas, and use your plug in muera meister copies. I set the x and y shift to 60. Make the number of clips your choice, whatever you like best. Move this layer to below the frame layer.
Now open a big bow you like, copy and paste it after resizing at the top corner of the frame. Adjust where you like it.
Next add your tube of choice. You can do as I chose to do and make her “pop” out of the frame. Duplicate the tube and move one below the frame layer. Go to the top tube layer and erase the parts of her you want hidden behind the frame. For instance I erased down towards the bottom where her feet would be. Go to the second tube layer and erase the parts that shouldn’t be there, below the frame.
Open a large flower of your choice, and copy and paste as a new layer at the bottom corner of the frame. Resize and adjust if needed.
Open the wrap frame of your choice, I chose one with flowers coming out of the knot. Copy and paste as a new layer. Move it over the center of the tube, so that the edges are touching the corners of the frame.
Add a tie bow to the right corner, resizing if needed. Duplicate it and go to image, mirror. Add a rose of choice to each side also.
Next add several butterflies through out the tag as you like them.
Add your text, copyrights, license info, and tagger markings.
Save and your done!
Thank you for trying my tutorial.

No comments:
Post a Comment