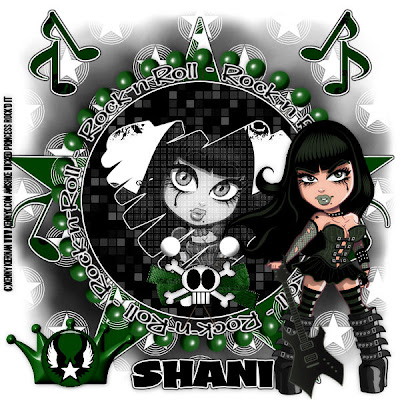
Rock-n-Roll-FTU
This tutorial was written on July 11, 2009 by Shani aka Wicked Princess. The concept of the tag is mine and mine alone. Any resemblance to any other tag/tut is pure coincidence. This was written for those with working knowledge of PSP.
Supplies Needed:
++Paint Shop Pro ( I used 10 but any version should work)
++Scrap kit by my called Rock Envy (FTU) can be found HERE
++Template 10 by me can be found HERE
++2 tubes of choice, or the ones I used. I used the artwork of Kenny Kiernan. You can purchase his work from HERE
++Plug ins:
-Eye Candy 4000 Gradient Glow
-Xero Greyscaler
-Xero Radiance
-Penta-dot and cross
-Muera Meister Copies
**NOTES:
-Add Drop shadow of choice as you go
-You can merger layers as you want to make things easier for yourself.
Open several papers of choice, resizing as needed. For example, when I look at the blue bar where it tells me what I’ve opened (say like paper 2) it tells me what percentage I’m viewing it at. For me it’s usually 16%, so I resize to 16% bringing it to 100%. ( I hope that made sense!) Once you’ve done this, minimize for later use
Next go to the bottom template layer and go to selections, select all, then float, selections defloat. Don’t forget to go to selections, none then delete the template layer. Add a gradient glow on the fat setting the colors of your choice. Repeat this process for the rest of the template.
Add a new raster layer, flood fill with your choice of paper. Load the mask of your choosing, remember to merge group. Move this layer to the bottom.
Open the pin element of your choice. Copy and paste into the center of the canvas. Go to your plug in muera Meister copies and set to encircle. I used 50 for the shift x and y. Once satisfied, click ok. Move this layer below the word art layer.
Next open your first tube, and go to your plug in, Xero greyscaler. Use the default setting as I did. Then got to the plug in penta-dot and cross. Again use the default setting. Copy and paste your tube into the center of the heart layer.
Activate the heart layer and go to selections, select all then selections, float then defloat. Then selections, invert. On your tube layer, hit delete. You should now just have the tube just inside the heart layer.
Next open your second tube. Use the plug in Xero Radiance and use the random setting of your choice. Copy and paste as a new layer and move where you like it. I moved it to the right of the canvas.
Open the bow, pin and skull of your liking. First copy and paste the bow, and move to the bottom part of the heart. Next add the pin, angle it to the right and duplicate it. Go to image, mirror and adjust as needed. Add the skull to sit in the center of those.
Add a crown and button of your choice. I overlapped them and put them in the left hand corner of the canvas.
Add your text, license number, copyright info and tagger markings.
Save and your done!
Thank you for trying my tutorial.

No comments:
Post a Comment