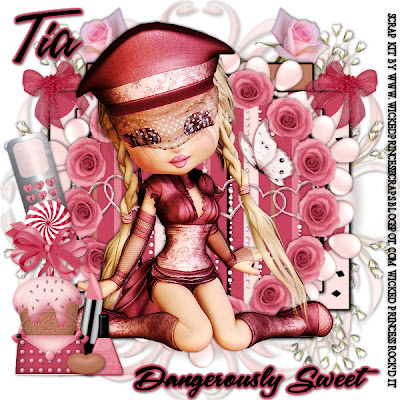
Dangerously Sweet PTU
This tutorial was written on August 22, 2009 by Shani aka Wicked Princess. The concept of the tag is mine and mine alone. Any resemblance to any other tag/tut is pure coincidence. This was written for those with working knowledge of PSP.
Supplies Needed:
++Paint Shop Pro ( I used 10 but any version should work)
++Scrap kit by me called Dangerously Sweet can be purchased HERE OR HERE
++Template 51 by Yvette can be found HERE*Scroll all the way to the bottom for the labels to find the link.
++Tube of choice or the one I used. I used the tube provided. If you do use this tube and the scrap kit please credit me by using my URL for my blog! Thank you!
++Plug ins:
-Eye Candy 4000 Gradient glow
-Muera Meister copies
++Font and Mask of choice
Let’s get Started!
**NOTES:
-Add Drop shadow of choice as you go
-You can merger layers as you want to make things easier for yourself.
Open the template in PSP, using your shortcut keys on your keyboard (SHIFT+D) duplicate the template as a new image. Close the original. Because this template is taking up the whole space we need to add more. Go to image, canvas size and make it 600x600.
Open several papers of choice, resizing as needed. For example, when I look at the blue bar where it tells me what I’ve opened (say like paper 2) it tells me what percentage I’m viewing it at. For me it’s usually 16%, so I resize to 16% bringing it to 100%. ( I hope that made sense!) Once you’ve done this, minimize for later use.
Next go to the bottom template layer and go to selections, select all, then float, selections defloat. Add your gradient glow of choice. Don’t forget to go to selections, none then delete the template layer. Repeat this process for the rest of the template.
Add a new raster layer and flood fill with your choice of paper. Add your mask and merge the group. Move this layer to the bottom of your layer palette.
Open the babies breath. Copy and paste as a new layer and move to the upper left of the tag as well as below the template. Duplicate it and go to image, mirror. Then duplicate it again go to image, flip. One more time and go to image, mirror. You should now have one on each side at the top and bottom.
Next open the long stem rose, copy and paste as a new layer and move it to below the template layer. Move it to the top of the tag, duplicate it then go to image, mirror.
Open the pearl flower of your choice, copy and paste as a new layer. Use your plug in Muera Meister copies on the encircle option and set the shift x and y to 60. Move this layer below the circle template layer.
Then add the glitter rain of your choice, copy and paste as a new layer, moving it up towards the top of the circle template layer. On the circle layer, go to selections, float then defloat then invert. On the glitter rain layer, hit your delete key. Go to selections, none. Duplicate it and go to image flip.
Open the heart chain, copy and paste it as a new layer on the circle template layer. Erase the parts you don’t want seen outside the circle layer.
Then open the rose of your choice. Resize it then copy and paste as a new layer. Use your plug in Muera Meister copies on the encircle option and set the shift x and y to 60. Move this layer below the circle template layer.
Add a bow of choice to the two corners on the top rectangle. Angle it slightly.
Then add your tube of choice and center it. Resize and adjust as needed.
Next open the cupcake, lollipop, cell phone, purse, polish, lipstick and jelly bean of choice and copy and paste them after resizing. Place to the left of the tag in the arrangement you choose.
Finally add your text, any copyrights and tagger markings.
Save and your done!
Thank you for trying my tutorial.

No comments:
Post a Comment